
How To
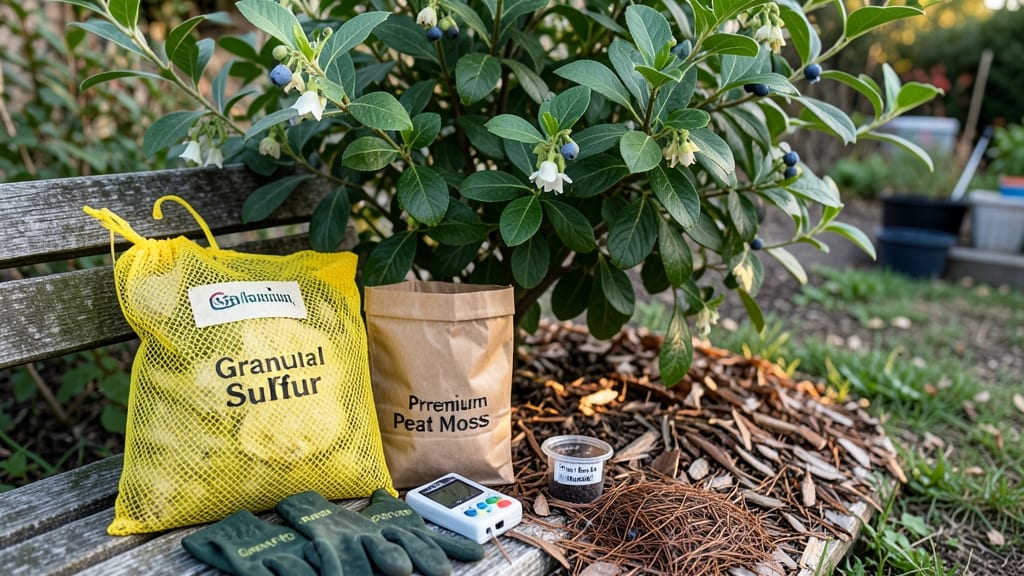
How to make acid soil for blueberries requires a touch of chemistry and a dash of patience—because these berries are picky, like a diva who demands the perfect stage. The right pH unlocks their full potential—deep purple fruit, lush foliage, and plants that thrive instead of struggle. My first blueberry patch failed until I learned this simple trick: combining organic boosters with a little patience. Start with pine needles (free from forest floors) and lemon peels (saved from kitchen counters)—both naturally lower pH over time. For faster results, add elemental sulfur or aluminum sulfate, but test soil first. Most blueberry beds need pH 4.5-5.5, and you'll know you're on track when leaves stay vibrant green, not yellow or brown. By late fall, your soil will be primed for planting. The plants will reward you with harvests twice as big as before, and the process becomes easier each year. Just keep testing and adding amendments as needed—no more guesswork, just blueberry perfection. This method works for azaleas, rhododendrons, and other acid-lovers too. Let's get that soil ready for next season's bounty!
📚 In This Guide
- What you need
- Instructions
- Tips and common mistakes
- Wrapping up and next steps
What you need
- ● Lemon peels – 1–2 lbs (fresh or dried). Save peels from 4–6 lemons for best results!
- ● Pine needles – 5–10 lbs (fresh or dried). Spruce or fir needles work too!
- ● Compost or aged soil – 1–2 gallons (as a base for mixing). Ensure it’s organic and free of weeds.
- ● Water – 1–2 gallons (for soaking or brewing). Rainwater is ideal if available!
- ● Container or bucket – 5-gallon size (for steeping or composting). Plastic or metal works—just avoid reactive materials.
- ● Garden gloves – 1 pair (to protect your hands from pine needle prickles).
- ● pH test kit – Digital or liquid strips (to monitor acidity levels). Target pH: 4.5–5.5 for blueberries!
- ● Shredder or blender – To chop pine needles/peels into smaller pieces (speeds up decomposition!).
- ● Garden fork or trowel – For mixing into soil beds.
- ● Old burlap sacks or mesh bags – To contain pine needles while they decompose.
- ● Aluminum sulfate or sulfur powder – Emergency pH booster (if needed). Use sparingly—follow package instructions!
Step-by-step instructions for creating acidic soil with natural amendments
Here's how to transform your garden soil into the perfect acidic environment for acid-loving plants like blueberries.
🌱 Step 1: Gather and Prepare Your Acid-Forming Materials
Collect pine needles—they’re one of nature’s best acidifiers. Fill a 5-gallon bucket with fresh, dry needles (avoid moldy ones). You’ll need about 2-3 cups of needles per square foot of soil you’re treating. I like to gather them right after a rain when they’re clean and free of debris.
Next, chop the needles into ½-inch pieces using pruning shears or a sharp knife. Smaller pieces break down faster and release acidity more quickly. If you have access to sulfur powder, add ½ cup per square foot—this will give you an extra boost of acidity. Store your chopped needles in a dry place until ready to use.
🌿 Step 2: Incorporate Organic Matter for Long-Term Acidification
Spread a 2-inch layer of chopped pine needles evenly over the soil where you’re planting acid-loving plants. This layer will slowly decompose and lower the soil’s pH over time. For an immediate effect, mix the needles directly into the top 6 inches of soil using a garden fork or tiller.
If you’re working with a raised bed or container, blend the needles into the soil mix before planting. I often combine them with peat moss (if available) for extra acidity. Water the amended soil thoroughly after mixing—this helps the needles settle and start breaking down.
☀️ Step 3: Use Lemon Peel and Coffee Grounds for a Quick Acid Boost
Save your lemon peels and coffee grounds—they’re free acidifiers that work wonders. Dry the peels in a dehydrator or oven at 200°F for 10 minutes to kill any mold, then chop them into small pieces. Spread ½ cup of dried lemon peels and ½ cup of coffee grounds per square foot of soil.
Work these into the top 2 inches of soil or sprinkle them around established plants. Coffee grounds are especially effective because they contain tannins, which lower pH while also providing nitrogen. Water the area lightly after adding them to help activate the acidifying process.
💧 Step 4: Monitor and Maintain Soil Acidity Over Time
Test your soil’s pH 4-6 weeks after amending it using a soil pH test kit. Blueberries thrive in soil with a pH between 4.5 and 5.5. If the pH is still too high, repeat the process with fresh pine needles or add elemental sulfur (follow package instructions).
For ongoing maintenance, top-dress the soil with 1 inch of pine needles every 3-4 months. This keeps the acidity stable without overworking the soil. Avoid overdoing it—too much acidity can harm beneficial microbes and stunt plant growth. A little goes a long way!
✂️ Step 5: Plant and Care for Acid-Loving Plants
Once your soil is properly acidified, plant your blueberries, azaleas, or other acid-loving plants. Water them deeply after planting to help the roots establish in the amended soil. Mulch with pine bark or wood chips to maintain acidity and retain moisture.
Keep an eye on your plants for signs of stress, like yellowing leaves or stunted growth. If you notice these, test the soil again and adjust the acidity as needed. With consistent care, your soil will stay perfectly acidic for years, giving your plants the ideal growing conditions.
Tips & tricks for perfect acidic soil preparation
These practical strategies will help you create the ideal growing conditions for your acid-loving plants without any guesswork.
Timing for Maximum Effect: The 200°F drying temperature for lemon peels is critical—it kills mold spores while preserving their acidifying properties. I recommend using an oven timer for exactly 10 minutes to avoid over-drying, which can make the peels brittle and less effective when mixed into soil. For larger batches, consider drying peels in a dehydrator at the same temperature for consistent results.
Needle Chopping Technique: When chopping pine needles into ½-inch pieces, aim for uniform size—this ensures even decomposition rates throughout your soil. I use sharp pruning shears and work in batches to maintain consistency. For raised beds, you can pre-chop all your needles before mixing them into the soil blend, saving time during planting.
Layering Strategy: The 2-inch surface layer of pine needles mentioned in Step 2 creates a natural mulch that slowly releases acidity. For containers or small gardens, you can reduce this to 1-inch while still maintaining effectiveness. Remember to water thoroughly after applying—this helps the needles settle and begin breaking down immediately.
Maintenance Reminder: The 3-4 month maintenance schedule for top-dressing with pine needles is perfect for keeping soil acidity stable. I've found that marking your calendar every 4 months with a note about "acid soil maintenance" prevents forgetting this crucial step. If you notice yellowing leaves on your acid-loving plants, this is often the first sign you need to refresh your acidifying materials.
Pro Tips for Make Acid Soil
- These practical strategies will help you create the ideal growing conditions for your acid-loving plants without any guesswork.
- Timing for Maximum Effect: The 200°F drying temperature for lemon peels is critical—it kills mold spores while preserving their acidifying properties.
- Needle Chopping Technique: When chopping pine needles into ½-inch pieces, aim for uniform size—this ensures even decomposition rates throughout your soil.
Frequently asked questions
Got questions about turning your soil acidic? You’re not alone! Here are answers to the most common concerns—plus a few pro tips to make the process smoother.
How long does it take for lemon peels or pine needles to lower soil pH?
Patience is key! With regular additions (every 4–6 weeks), you’ll see noticeable changes in 3–6 months. Pine needles break down slower (6+ months), while lemon peels work faster (2–3 months). Test your soil every few months with a pH meter or kit to track progress.
Will this hurt my plants if I overdo it?
Soil that’s too acidic (below pH 5.0) can lock out nutrients like phosphorus and damage roots. Aim for pH 4.5–5.5 for blueberries or other acid-lovers. If your soil tests too low, mix in lime (calcium carbonate) or wood ash to neutralize it.
Can I use other household items instead of lemon peels?
Yes! Try these natural acidifiers:
- Coffee grounds (add ½ cup per plant, 2–3 times/year)
- Vinegar (dilute 1 cup white vinegar in 1 gallon water; use sparingly—it’s strong!)
- Alum (potassium aluminum sulfate) (follow package rates for precise pH drops)
- Peat moss (amends soil while lowering pH gradually)
Just avoid citrus rinds from treated fruit (like store-bought oranges) or synthetic fertilizers with high salt content.
When’s the best time to adjust soil pH?
Plan ahead! Start 6–8 weeks before planting (e.g., spring for summer crops). For established plants, amend soil in early spring or fall when microbes are active. Avoid mid-summer—heat can speed up decomposition and waste your efforts!
Why does my soil still feel “off” after adding acidifiers?
Possible culprits:
- Your soil has a high buffer capacity (clay or sandy soils resist pH changes—test first!).
- You’re not watering deeply enough to distribute amendments.
- Rain or irrigation is washing acids away (reapply as needed).
For stubborn cases, double-check your pH test and consider sulfur or elemental sulfur for long-term adjustments.
Pro Tip: Label your beds!
Keep a simple log of what you add (e.g., “5/15: 2 cups pine needles + 1 lemon peel”) and when. This helps you track what works and avoid overdoing it. A spray bottle with diluted vinegar also makes quick touch-ups easy!
Wrapping up and next steps
Transforming your soil into an acid-friendly haven for blueberries is easier than you think! By using simple, natural ingredients like lemon peels and pine needles, you’ve taken the first step toward a thriving garden.
Remember, patience and consistency are key—your blueberry bushes will thank you with juicy, sweet berries in no time!
Ready to see real results? Start small—test a patch of soil, monitor progress, and gradually expand. Happy gardening! 🌱✨