
Orchid Care
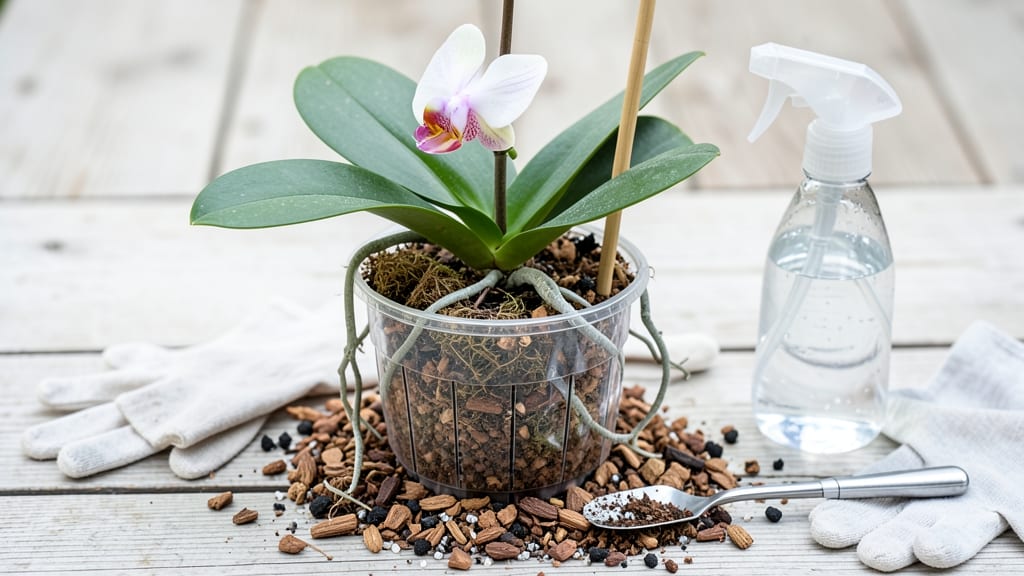
This orchid potting mix is the secret to blooms that last all winter. 🌸 I've learned through trial and error that store-bought mixes often hold too much moisture—roots need to breathe, not drown. The right blend keeps your orchids happy for years, not just one season.
You'll need four simple ingredients: fir bark (the backbone of the mix), sphagnum moss (for moisture retention), perlite (for aeration), and charcoal (to prevent rot). The key is sterilizing everything first—no one wants hidden pests or diseases in their mix.
We're talking a 3:1:1:1 ratio by volume, but adjust slightly based on your orchid type.
Once mixed, your custom blend will look like a fluffy nest for orchid roots. They'll grow strong, send out new pseudobulbs, and reward you with longer-lasting blooms than you'd get from pre-packaged mixes. The texture stays light even after years of use—just refresh with new charcoal every few months.
This mix works for Phalaenopsis, Cattleyas, and Dendrobiums alike. The biggest mistake? Using too much moss—it compact over time and suffocates roots. Start small, keep it airy, and your orchids will thank you with vibrant, healthy growth.
📚 In This Guide
- What you need
- Instructions
- Tips and common mistakes
- Wrapping up and next steps
What you need
- ● Sphagnum moss (peeled or chopped) – ½ to ⅔ of the mix (absorbs moisture while staying aerated)
- ● Bark (fir or pine, medium to coarse) – ⅓ of the mix (adds structure and drainage)
- ● Perlite or pumice – 10-15% (boosts airflow and prevents compaction)
- ● Charcoal (horticultural grade) – 5-10% (keeps mix fresh by reducing bacteria/fungi)
- ○ Gloved hands (optional but recommended—moss and bark can be scratchy!)
- ● Large mixing bowl or clean bucket (sterilized with boiling water or vinegar)
- ● Scissors or pruning shears (for trimming moss/bark to desired sizes)
- ● Measuring cup or scale (for precision—orchids are picky!
- ○ Spray bottle (optional) – For lightly misting components if they’re too dry
Step-by-Step instructions for crafting the perfect orchid potting mix
Here’s my go-to method for blending a breathable, moisture-retentive mix that keeps orchids happy and blooming.
🪴 Step 1: Gather Your Base Materials
Start with 1 part sphagnum peat moss—this holds moisture while allowing airflow. I measure by volume using a clean bucket, as peat compresses when wet. Next, add 1 part perlite for grit and aeration. Perlite’s lightweight texture prevents compaction, which is critical for orchid roots that need to breathe.
For drainage and structure, mix in ½ part charcoal (preferably horticultural-grade). Charcoal prevents bacterial buildup and keeps the mix fresh longer. If you’re using fir bark, chop it into ½-inch pieces—this chunky texture mimics the orchid’s natural epiphytic habitat. Weigh or measure these components separately before combining.
🌿 Step 2: Combine and Adjust for Texture
In a large container, gently fold the peat moss, perlite, and charcoal together. Avoid overmixing—just distribute them evenly. For fir bark, add it last and mix lightly to preserve its structural integrity. The goal is a blend that looks fluffy yet cohesive, not packed like garden soil.
Test the texture by squeezing a handful: it should hold its shape but crumble easily when released. If it feels too dense, add 10-20% more perlite. Too loose? Mix in a little extra peat moss. This balance ensures roots stay aerated but don’t dry out between waterings.
💧 Step 3: Sterilize and Store for Freshness
Spread the mix on a clean tray and bake it at 200°F for 30 minutes to kill any pathogens or pests lurking in the materials. Let it cool completely before use—warm mix can shock orchid roots. Store the sterilized blend in a sealed container, like a plastic bin with a lid, to keep it dry and ready for repotting.
I like to label each batch with the date and composition (e.g., "Peat/Perlite/Charcoal, 5/20/24"). This helps track aging—most homemade mixes last 6-12 months before breaking down. If you notice the mix losing its fluffiness over time, refresh it by adding a handful of fresh perlite.
✂️ Step 4: Use and Maintain Your Custom Mix
When repotting, fill the container ⅔ full with your mix, leaving room for the orchid’s root system. Gently spread the roots over the surface before adding more mix—orchids grow best when their roots aren’t buried too deeply. Water lightly after repotting to settle the mix around the roots without displacing them.
After planting, place the orchid in bright, indirect light (like a north or east-facing window) for the first week. Avoid fertilizing for 4-6 weeks to let the roots establish. Over time, monitor the mix’s moisture retention—if it dries out too quickly, add a bit more peat moss next batch; if it stays soggy, increase the perlite ratio.
Tips & tricks for perfect orchid potting mix
Here's what nobody tells you about crafting the ideal blend for orchids that'll keep them blooming beautifully.
Component Ratio Wisdom: That 1:1:½ ratio of peat moss to perlite to charcoal is your golden ticket. I've found that using a kitchen scale for the first few batches helps you get the proportions just right—especially when you're adjusting for fir bark. The key is keeping that balance: too much peat and your mix will stay soggy; too much perlite and it'll dry out too fast. Think of it like finding the perfect balance between a sponge and a sieve.
Texture Test Trick: In Step 2, when you're testing the texture by squeezing a handful, pay attention to how it feels when you release it. It should spring back just a little but still crumble easily—like a well-made meringue. If it sticks together like wet sand, you need more perlite. If it falls apart completely, add a bit more peat moss. This simple test saves you from guessing when it comes to orchid root health.
Sterilization Secret: That 200°F for 30 minutes isn't just about killing pests—it's also about resetting the mix's structure. I've learned the hard way that skipping this step can lead to mold issues down the line. Pro tip: Use an oven thermometer to verify your oven's accuracy, as home ovens can vary by 25°F or more. And always let it cool completely before using—warm mix can shock delicate orchid roots and set back their recovery time after repotting.
Storage Strategy: Labeling your batches with the date and composition is a game-changer. I've had batches last up to 18 months when stored properly in sealed containers, but I always refresh them after 12 months. The trick is keeping them in a cool, dry place away from direct sunlight. If you notice your mix developing a musty smell or losing its fluffiness, it's time to refresh it with some fresh perlite—don't let old mix compromise your orchids' health.
Pro Tips for Make An Orchid Potting Mix
- Here's what nobody tells you about crafting the ideal blend for orchids that'll keep them blooming beautifully.
- Component Ratio Wisdom: That 1:1:½ ratio of peat moss to perlite to charcoal is your golden ticket.
- Texture Test Trick: In Step 2, when you're testing the texture by squeezing a handful, pay attention to how it feels when you release it.
Frequently asked questions
Got questions about crafting the perfect orchid potting mix? You’re not alone! Here are answers to some of the most common concerns—so you can grow confidently and keep your orchids blooming beautifully.
Can I reuse old orchid potting mix?
It’s not recommended! Old mix breaks down, loses aeration, and can harbor pests or fungi. Refresh your blend every 1–2 years or repot when roots outgrow the pot. If you’re desperate, sterilize by baking at 200°F (93°C) for 30 minutes—but a fresh mix is always better.
What’s the best substitute if I don’t have bark?
If you’re missing bark, try these alternatives:
- Coconut coir (hydrates well, mimics bark texture)
- Lefse or rice paper (decomposes slowly, adds structure)
- Charcoal chunks (boosts drainage and prevents rot)
- Pine cones (natural, lightweight, and slow to break down)
How often should I repot my orchid?
Repot every 1–2 years or when:
- The mix breaks down into a dense, compacted mess.
- Roots are circling the pot or growing out of drainage holes.
- You notice pests (like scale or mealybugs) in the old mix.
Why does my orchid mix smell bad?
A funky odor usually means rot or bacterial buildup. Check for:
- Overwatering (let the mix dry between waterings).
- Poor drainage (ensure your pot has holes and the mix isn’t too dense).
- Old, decomposing materials (refresh your mix or add extra charcoal).
Do I need to sterilize my potting mix?
Yes! Sterilizing kills fungi, bacteria, and pests. For bark or coir, soak in a 10% hydrogen peroxide solution (3% strength) for 10 minutes, then rinse. Alternatively, bake components at 200°F (93°C) for 30 minutes. Fresh mix = happy orchids!
Wrapping up and next steps
Creating the perfect orchid potting mix doesn’t have to be complicated—just simple, lightweight, and well-balanced! By combining bark, sphagnum moss, perlite, and charcoal, you’ll give your orchids the ideal environment to thrive, encouraging lush roots and stunning blooms. 🌿✨
Now that you’ve mastered the mix, it’s time to pot your orchid and watch it flourish! Experiment with different ratios to find what works best for your plant, and don’t forget to repot every 1–2 years for fresh growth. Happy gardening—your orchids will thank you! 🌸