
How To
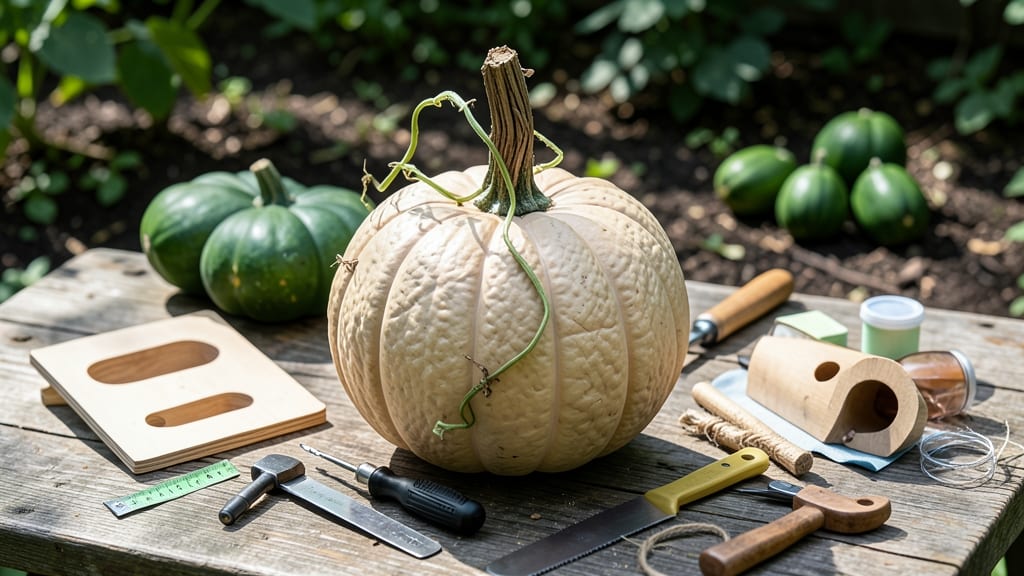
This rustic project on how to make bird houses out of the gourds turns humble gourds into charming nesting spots that blend seamlessly with your garden. 🌿 I’ve transformed cracked gourds into cozy homes for birds—no power tools required—using just a few simple tools and a little patience.
The result? A natural, biodegradable birdhouse that adds texture and life to any outdoor space.
The best part? Gourds provide insulation and weather resistance better than wood alone. You’ll need dry, mature gourds (like buffalo or acorn types), a drill or sharp knife, sandpaper, and non-toxic sealant.
Avoid gourds with mold or cracks—they won’t last. Once prepped, these birdhouses become instant conversation pieces while supporting local wildlife.
By summer, you’ll see birds inspecting their new homes, and your garden will buzz with activity. The natural aesthetic pairs perfectly with cottage-style decor, and the process is surprisingly satisfying. Plus, it’s a zero-waste project—repurposing what nature provides.
Works for hummingbirds, wrens, or chickadees—just adjust the entrance size. Hang them 5-10 feet high near shrubs for easy access. Ready to turn gourds into bird-friendly art? Let’s get crafting!
📚 In This Guide
- What you need
- Instructions
- Tips and common mistakes
- Wrapping up and next steps
What you need
- ● 1-2 gourds (e.g., Cucurbita pepo or Lagenaria siceraria—dried, hollow, and fully cured for at least 6 months). Aim for a diameter of 4-6 inches for small birds like chickadees or sparrows.
- ● Sandpaper (medium-grit, 80-120) to smooth rough edges and surfaces.
- ○ Non-toxic wood stain or paint (optional but recommended for weather resistance; choose bird-safe colors like natural tones, earthy greens, or blues).
- ● Acrylic sealant or outdoor varnish (waterproof and non-toxic, e.g., AFM Safecoat or Mod Podge Outdoor).
- ● Drill with small bits (1/4" to 3/8" diameter) for entry holes and drainage.
- ● Twine, jute rope, or natural fiber cord (for hanging; 3-6 feet long).
- ○ Small nails, screws, or dowels (optional, for reinforcing the gourd’s base if needed).
- ● Utility knife or craft knife (for carving or trimming excess gourd material).
- ● Paintbrushes (various sizes for staining/painting).
- ● Measuring tape or ruler (to ensure entry hole size is 1.5x the bird’s width, e.g., 1.25" for chickadees).
- ● Hot glue gun + glue sticks (for securing rope or decorative elements).
- ○ Decorative elements (optional): Wooden beads or charms for hanging accents.
- ● Natural twigs or dried flowers for rustic charm.
- ● Stencils or freehand designs (use bird-safe markers).
- ● 🌡️ Check gourds for pests: Tap them—if they sound hollow, they’re ready! If not, let them dry longer.
- ● ✨ Safety first: Wear gloves when handling gourds (they can be prickly!) and a mask if sanding.
- ● 🎯 Location matters: Place birdhouses 5-10 feet off the ground in a quiet, predator-free spot.
Step-by-Step instructions for crafting gourd bird houses
Transforming gourds into charming nesting spaces is simpler than you think—just follow these precise steps.
🪴 Step 1: Select and Prepare Your Gourds
Choose hard-shelled winter gourds like buffalo, acorn, or warty squash—these hold up best outdoors. Let them cure for 4-6 weeks in a dry, well-ventilated space until the stem shrinks and the rind hardens. Gently scrape off any remaining vine residue with a spoon; don’t scrub too hard or you’ll weaken the shell.
Once cured, test the gourd’s weight and thickness by tapping it—it should sound hollow with a solid thud. Mark the top third of the gourd with a pencil; this is where the entrance hole will go. Use a 3/4-inch drill bit (for small birds like chickadees) or 1-inch bit (for wrens or sparrows) to create the hole, drilling slowly to avoid cracking.
✂️ Step 2: Carve and Sand for Safety
Smooth the edges of the entrance hole with 120-grit sandpaper—rough edges can injure birds. Next, carve a small perch 1/2 inch below the hole by making a shallow groove with a utility knife. This gives birds a place to grip before entering. Avoid carving too deep; birds need a stable landing.
Flip the gourd and sand the bottom seam where the stem was attached. This prevents splinters when birds nest inside. For extra durability, apply a non-toxic wood sealant (like tung oil) to the entire exterior. Let it dry for 24 hours before adding any decorative touches.
🌿 Step 3: Add Nesting Materials and Mount
Stuff the gourd’s interior with dried leaves, straw, or wood shavings to create a soft nesting base. Press materials firmly against the sides so they don’t shift when birds use it. Leave a 1-inch gap at the entrance to allow easy access for parent birds.
Attach the gourd to a 4-foot wooden post using stainless steel screws (rust-proof) or hemp twine for a rustic look. Mount it 5-10 feet high on a south or east-facing side of a tree or pole—this shields it from prevailing winds while giving birds morning sun. Angle the entrance slightly upward to keep rain out.
💧 Step 4: Final Touches and Placement
Paint the exterior with milk-based paint (non-toxic) if desired, but leave the entrance hole unpainted. Birds prefer natural textures. Add a small wire mesh guard over the entrance hole to deter larger birds or predators like raccoons. Secure it with twist ties—birds will still enter easily while keeping intruders out.
Place the gourd house in early spring, before nesting season begins. Check it weekly for signs of use (feathers, twigs, or bird activity). If you notice mold or excessive moisture, move it to a drier location. With proper care, these gourd homes can last 5-10 years—longer than most commercial birdhouses!
Tips & tricks for perfect gourd bird houses
Creating functional and attractive birdhouses from gourds takes a few key insights that go beyond basic instructions.
Curing Is Non-Negotiable: The 4-6 week curing period is absolutely critical for durability. I've seen gourds crack prematurely when rushed—this happens because uncured gourds contain too much moisture. Place them in a spot with good airflow (like a screened porch) and turn them occasionally to ensure even drying. A properly cured gourd should feel light in your hands and make that satisfying hollow thud when tapped.
Drilling Technique Matters: When creating the entrance hole in Step 1, start with a pencil mark but don't drill through completely until you're ready. I've ruined three gourds by drilling too fast and cracking them—always use a slow speed and let the bit do the work. For extra stability, place a scrap wood piece underneath before drilling to prevent the gourd from rolling or cracking on the bottom.
Perch Placement Precision: The 1/2-inch perch below the entrance hole serves two vital purposes: it gives birds purchase before entering, and it prevents rain from pooling inside. When carving, make the groove shallow enough that it doesn't compromise the gourd's structural integrity. Test by running your finger along it—it should feel smooth but not too deep. This subtle detail makes all the difference in whether birds will actually use your house.
Sealant Application Strategy: The 24-hour drying time for tung oil or other non-toxic sealants is crucial for proper adhesion. I recommend applying the sealant in thin, even coats rather than one thick layer. This prevents drips and ensures complete coverage. Work in a well-ventilated area, and avoid touching the entrance hole area—birds prefer natural textures there. The sealed exterior will protect against weather while maintaining the gourd's natural beauty.
Pro Tips for Make Bird Houses Out Of Gourds
- Creating functional and attractive birdhouses from gourds takes a few key insights that go beyond basic instructions.
- Curing Is Non-Negotiable: The 4-6 week curing period is absolutely critical for durability.
- Drilling Technique Matters: When creating the entrance hole in Step 1, start with a pencil mark but don't drill through completely until you're ready.
Frequently asked questions
Got questions about turning gourds into cozy bird homes? You’re not alone! Here are answers to the most common queries to help you craft the perfect nesting spaces for feathered friends.
What’s the best type of gourd to use for birdhouses?
Opt for hard-shell gourds like acorn squash, buffalo gourds, or pumpkins—they’re durable and easy to carve. Avoid soft varieties like spaghetti squash, as they won’t hold up long-term. Look for gourds with thick walls (at least ½ inch) for sturdiness.
When is the best time to put up gourd birdhouses?
Hang them late winter to early spring (before nesting season) or fall (after birds have fledged). Avoid peak migration or breeding seasons (spring/summer) to prevent displacing resident birds. Pro tip: Add a small entrance hole (1.5–2 inches wide) to attract specific species—like chickadees or wrens—based on your region.
Do I need to treat the gourd to keep it safe for birds?
Yes! Untreated gourds can harbor mold or pests. Sand the interior smooth to remove rough edges, then let it dry in the sun for 2–3 days. For extra safety, lightly coat the outside with non-toxic, food-safe sealant (like milk paint or beeswax). Skip varnishes with fumes—birds are sensitive!
Will bees or wasps take over my gourd birdhouse?
Unfortunately, yes! To deter them, place the entrance hole high up (6+ feet off the ground) and use a metal mesh screen over the opening. Hang houses in shady, open areas away from dense foliage. If wasps already claim it, relocate the gourd and try again next season—patience pays off!
What if my gourd rots or cracks before birds use it?
Don’t worry—it’s common! Store unused gourds in a dry, ventilated spot (like a shed) until next year. If it cracks, patch it with a natural adhesive (like diluted wood glue) or replace it. Bonus: Rotted gourds can still be repurposed as natural bird feeders by stuffing them with seeds!
Can I paint or decorate my gourd birdhouse?
Birds prefer natural colors (browns, greens, or earth tones), but a light, non-toxic paint (like acrylic) can add charm. Avoid bright colors or glossy finishes—they can overheat the interior. Fun idea: Use stencils to create simple patterns or write the year to track usage!
Wrapping up and next steps
Creating bird houses from gourds is a rewarding way to blend creativity with nature! 🌿 With just a few simple tools and materials, you’ve unlocked a rustic, eco-friendly solution for local birds—plus, you’ve added a charming touch to your outdoor space.
Now that you’re equipped with the know-how, why not take the next step? Try experimenting with different gourd shapes or paints to personalize your designs, or even turn it into a fun DIY project with friends or kids. Every little effort helps our feathered friends thrive!