
Tools
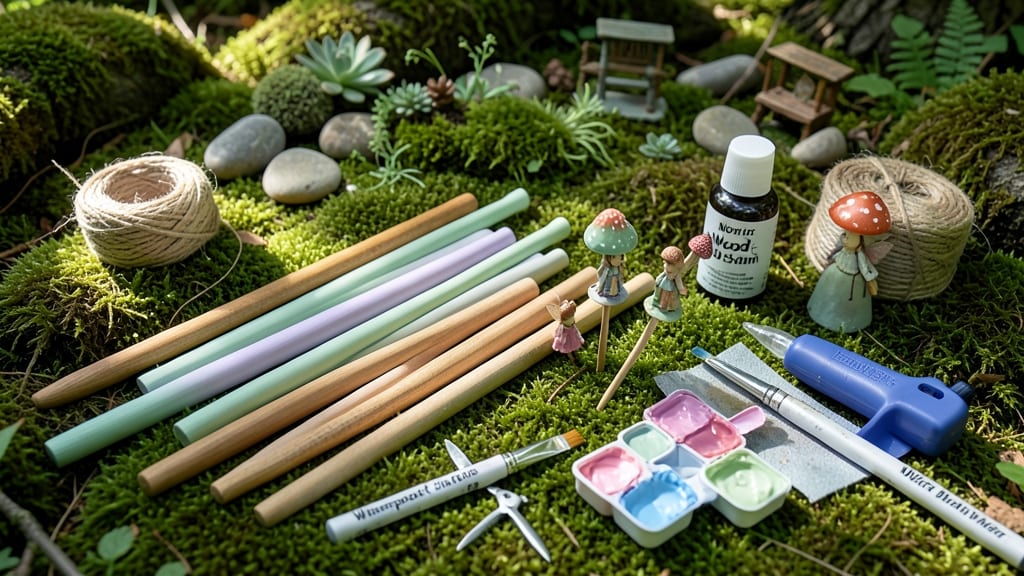
Fairy garden stakes transform a tiny world into something magical—without needing fancy tools or skills. 🌿 I’ve turned sticks from my backyard into whimsical markers that make my fairy garden feel like a real village, and you can too, even if you’ve never picked up a paintbrush before.
The secret is keeping it simple: gather twigs, bamboo, or even chopsticks from your kitchen drawer. A little paint, twine, or even pressed flowers can turn them into tiny signs or fences. No glue guns or power tools required—just basic supplies you might already have lying around.
Your fairy garden will feel complete with these stakes guiding paths, marking homes, or labeling tiny shops. The best part? They blend seamlessly into the scene, making it look like fairies built them themselves. Plus, kids love helping—turn it into a creative project for the whole family.
Start with just a few stakes to see how they elevate your garden. Once you try it, you’ll want to make more for every corner of your tiny world. Ready to bring your fairy garden to life?
📚 In This Guide
- What you need
- Instructions
- Tips and common mistakes
- Wrapping up and next steps
What you need
- ● Stake bases: 6–12 wooden dowels (¼" to ½" diameter, 6"–12" long) or
- ● 6–12 bamboo skewers (for lightweight stakes)
- ● 6–12 upcycled items (e.g., twigs, small branches, or even old spoons/sporks!)
- ● Decorative elements: Acrylic paint (assorted colors) or wood stains
- ● Small paintbrushes (size 0–2)
- ○ Glitter, sequins, or tiny charms (optional but magical!)
- ● Adhesives: Hot glue gun + glue sticks or strong craft glue
- ● Sandpaper (fine-grit, for smoothing edges)
- ● Pencil or marker (for sketching designs)
- ● Ruler or measuring tape (for consistency)
- ○ Optional but fun: Stencils (for intricate patterns)
- ● Clear sealant spray (to protect painted stakes)
- ● Twine or ribbon (for hanging stakes)
Step-by-Step instructions for crafting fairy garden stakes
Turn everyday items into whimsical garden supports with these simple steps—no fancy tools required.
🪴 Step 1: Gather Your Upcycled Materials
Fairy garden stakes don’t need to be store-bought. I like using toothpicks, skewers, or even thin branches from my yard—anything sturdy enough to hold a tiny flag or sign. For a rustic look, collect small sticks or twigs about 6-12 inches long. If you’re using wooden items, sand any rough edges lightly with fine-grit sandpaper to prevent splinters.
For a magical touch, gather tiny pieces of fabric, lace, or even old book pages to wrap around your stakes. A drop of white glue or Mod Podge helps secure these decorations without overpowering the natural look. Keep everything small—fairy stakes should be under 1 inch wide to stay proportional.
🎨 Step 2: Decorate with Whimsical Details
Start by coating your stake with a thin layer of glue. Press on tiny embellishments like glitter, beads, or even tiny paint dots to mimic fairy-sized details. I often use acrylic paint to add tiny dots or stripes—just a dab with a toothpick works perfectly. For a nature-inspired look, wrap thin strips of moss or dried flowers around the stake and secure with a dab of glue.
If you’re using fabric, cut tiny squares or strips and wrap them around the stake, leaving the top open for a flag or sign. A single drop of glue at the seam keeps it from unraveling. The key here is subtlety—fairy stakes should look like they belong in a miniature world, not like a craft project.
✂️ Step 3: Attach Flags or Signs (Optional)
For stakes that hold tiny signs, cut small pieces of cardstock or parchment paper into ½-inch squares. Write fairy names, warnings like "No Giants Allowed," or tiny messages with a fine-tip marker. Roll the paper tightly around a thin toothpick or matchstick, then slide it onto the top of your stake. Secure it with a dab of glue if needed.
If you’re making a flag, fold the paper into a tiny triangle or rectangle, then attach it to the top of the stake with a single piece of thread or fishing line. Tie it loosely so it flutters in the breeze. For extra charm, add a single bead or sequin as a tassel. Keep everything lightweight—fairy stakes should move gently, not sag under their own weight.
🌿 Step 4: Plant and Position in Your Fairy Garden
Fairy garden stakes work best when placed along pathways, near tiny benches, or around fairy houses. Push the stakes 1-2 inches deep into the soil, leaving the decorated part visible. If you’re using wooden stakes, you can pre-drill a small hole at the bottom to help them stand upright. For a natural look, bury the stake until only the top 2-3 inches are showing.
Arrange stakes in groups of 3 or 5 for a balanced look—just like how real garden markers are often clustered. If you’re marking specific spots, like a fairy’s favorite mushroom or a secret door, place the stake just beside the feature, not on top of it. Step back and admire your handiwork—your fairy garden is now complete with personalized stakes that add charm without clutter.
Tips & tricks for perfect fairy garden stakes
Here's what nobody tells you about making these enchanting garden markers—simple secrets that'll elevate your fairy garden from cute to magical.
Material Selection Matters: For the most natural look in Step 1, choose sticks that taper slightly—they'll feel more organic and blend better with your garden. If using toothpicks or skewers, look for ones with a slight natural curve rather than perfectly straight ones. This subtle imperfection makes them feel more whimsical and less like store-bought craft supplies. The 6-12 inch length range in instructions is perfect, but I often mix lengths slightly (8-10 inches) for visual interest when grouped together.
Glue Application Technique: When decorating in Step 2, apply your glue in a thin, even layer using a toothpick or small paintbrush. Too much glue will make your decorations look bulky and ruin the fairy-sized illusion. I like to work in small sections—coat the stake, add decorations immediately, then move to the next area. This prevents the glue from drying too quickly and making your embellishments hard to position. A drop of glue is all you need to secure each tiny piece.
Subtlety is Key: The magic of fairy stakes lies in their delicate appearance. In Step 2 and 3, resist the urge to go overboard with decorations. A single bead or two paint dots on each stake creates enough detail without overwhelming the tiny scale. I often limit myself to just 2-3 embellishments per stake maximum—this keeps them looking light and airy, just like something a fairy might use. Think "whisper of decoration" rather than "full-on craft project."
Positioning for Impact: When planting your stakes in Step 4, consider the "rule of thirds" from photography. Place stakes slightly off-center in their groupings to create visual interest. For example, if marking a fairy path, place one stake at the start, one at the midpoint, and one at the end—but position the middle stake slightly to one side rather than straight down the center. This creates a more natural, organic feel that makes your garden look intentionally designed rather than randomly placed.
Pro Tips for Make Fairy Garden Stakes
- Here's what nobody tells you about making these enchanting garden markers—simple secrets that'll elevate your fairy garden from cute to magical.
- Material Selection Matters: For the most natural look in Step 1, choose sticks that taper slightly—they'll feel more organic and blend better with your garden.
- Glue Application Technique: When decorating in Step 2, apply your glue in a thin, even layer using a toothpick or small paintbrush.
Frequently asked questions
Got questions about crafting your fairy garden stakes? You’re not alone! Here are answers to the most common queries to help you create stakes that are as sturdy as they are charming.
What materials can I use if I don’t have sticks or twigs?
No natural sticks? No problem! Upcycle any small, lightweight materials like:
- Toothpicks or skewers (for tiny stakes)
- Bamboo skewers or coffee stirrers
- Thin wire or pipe cleaners (bend into shapes!)
- Old chopsticks or popsicle sticks
- Even plastic straws or lollipop sticks (paint them for a rustic look)
How long do fairy garden stakes need to be?
Size matters! Aim for stakes that are 3–6 inches tall—short enough to blend into the scene but tall enough to support lightweight structures like tiny bridges, fences, or plant markers. For larger fairy houses, opt for 6–12 inches. Pro tip: Test-fit stakes in your garden bed before securing them to avoid awkward gaps.
Can I paint or decorate my stakes before planting?
Decorating adds whimsy to your fairy garden. Use acrylic paint or wood-burning tools for a rustic look, or wrap them with twine and tiny charms. Seal with Mod Podge or outdoor varnish if using natural materials to protect against moisture. Just let paint dry 24 hours before planting to avoid smudging.
Will fairy garden stakes survive rain or wind?
Most natural stakes (like twigs or bamboo) are lightweight and flexible, making them resilient to light rain. For windy areas, secure stakes with a drop of hot glue or pebbles at the base. Avoid heavy materials like metal—opt for bendable options like willow branches or wire. If stakes lean, gently reinsert them into the soil or tuck them under nearby rocks.
How do I remove stakes without damaging my garden?
No need to dig up your entire fairy garden! Gently wiggle the stake free or use a butter knife to loosen it from the soil. For stubborn stakes, soak the area with water for 10–15 minutes to soften the ground. Never pull upward—this can uproot plants. Store stakes in a dry place for reuse or compost them if they’re organic.
Wrapping up and next steps
Creating your own fairy garden stakes is easier—and more rewarding—than you think!
With just a few upcycled materials and a little creativity, you’ve got the perfect way to add whimsy to your tiny outdoor world. Don’t let "no crafting skills" hold you back—every stake is a chance to make something magical!
Ready to take it further? Try experimenting with different textures—like twine-wrapped stakes or painted designs—to match your fairy garden’s theme. Or, share your creations online for inspiration! 🌟