
Blooming
Irises refuse to bloom? The fix is simpler than you think. ✨ After years of struggling with stubborn iris clumps that produced leaves but no flowers, I discovered the exact pruning and feeding routine that transformed my garden into a spring riot of color.
Most gardeners overdo it with water and fertilizer, but irises thrive on neglect once established. The secret lies in three key moves: cutting back last year’s foliage at the right time, feeding with the right nutrients, and leaving the roots undisturbed.
My clumps now produce dozens of blooms per stalk instead of just a handful. You’ll see the difference within a single growing season—taller stalks, more buds, and flowers that last for weeks. The best part?
This method works for both bearded and Siberian irises, whether you’re growing in full sun or partial shade. Here’s how to get started without overcomplicating it—no fancy tools or expensive amendments required.
📚 In This Guide
- What you need
- Instructions
- Tips and common mistakes
- Wrapping up and next steps
What you need
- ● Healthy iris rhizomes – Look for firm, plump rhizomes (about the size of a potato) with no signs of rot or mold. Pro tip: If buying, choose bearded irises (the most common blooming type) or siberian irises for hardier options.
- ● Well-draining soil – Irises thrive in sandy, loamy, or rocky soil with a pH of 6.0–7.0. Amend heavy clay with coarse sand or perlite (1–2 parts per 3 parts soil).
- ○ Balanced fertilizer – A 10-10-10 or 20-20-20 NPK ratio (granular or slow-release) works well. Optional: Use bone meal (5-10-0) for phosphorus boosts before blooming season.
- ● Pruning shears or sharp scissors – Sterilize with rubbing alcohol to prevent disease spread.
- ● Garden gloves – Irises can have sharp rhizome edges and may carry iridovirus (a plant disease). Wear gloves to protect your hands.
- ● Garden fork or trowel – For digging up rhizomes (if dividing) or aerating soil.
- ● Hose with adjustable nozzle – Irises need deep watering (1–2 inches per week), but avoid soggy soil.
- ○ Mulch (optional) – Use gravel or pine straw (not organic mulch) to keep rhizomes exposed and prevent rot.
- ● Plant stakes or labels – Helpful if you’re experimenting with different iris varieties or new plantings.
- ○ Compost or worm castings – Optional boost: Mix 10% compost into soil for extra nutrients (avoid fresh manure—it can burn rhizomes!).
- ● Best planting/dividing time: Late summer to early fall (6–8 weeks before first frost). Why? Rhizomes need time to establish roots before winter.
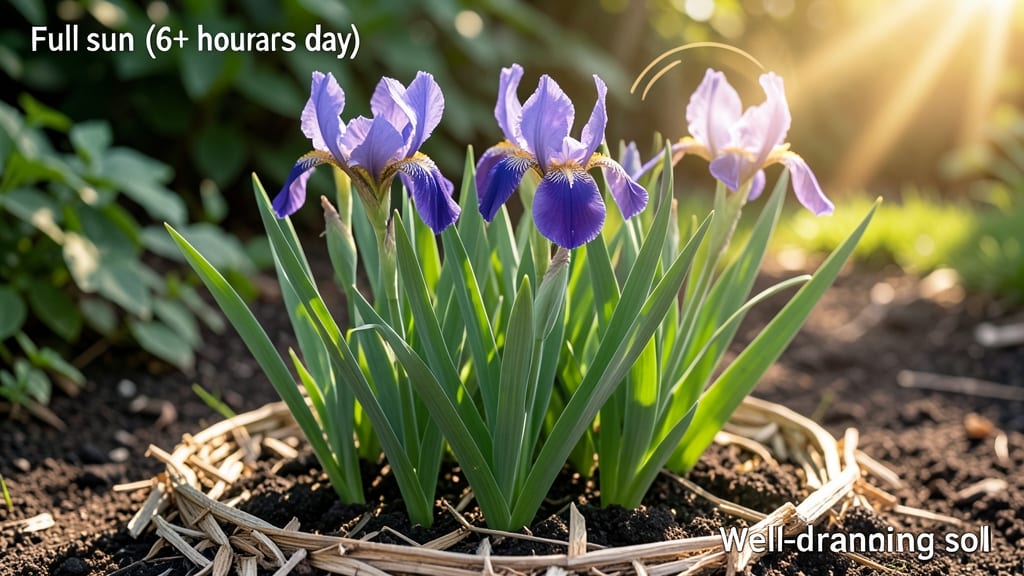
- ● Sunlight requirement: Full sun (6+ hours daily). Irises won’t bloom well in shade.
- ● Watering schedule: Keep soil moderately moist (not waterlogged) until roots establish. After that, drought-tolerant once blooming starts.
Step-by-Step instructions for pruning and feeding irises
Here's how I transform my irises into vibrant spring showstoppers every year.
✂️ Step 1: Prune Faded Blooms and Dead Foliage
After your irises finish blooming, cut back the flower stalks to the ground using clean, sharp pruners. This prevents energy from going into seed production and redirects it to next year's blooms. I like to wait until the stalks turn completely brown before cutting—this ensures all nutrients return to the rhizomes.
For the leaves, never cut them down in the fall. Instead, leave them until early spring when new growth begins. Old leaves protect the rhizomes from winter cold and help insulate the plant. You'll know it's time to trim leaves in late winter when you see fresh, bright green shoots emerging from the center.
🌱 Step 2: Divide Overcrowded Clumps
Every 3-4 years, irises need dividing to maintain vigor. The best time is after blooming when the foliage has turned brown. Gently dig up the entire clump and separate the rhizomes, making sure each section has at least one fan of leaves. Discard any rhizomes that are mushy or have black spots—these are diseased and won't recover.
I always replant the largest, healthiest rhizomes in the center of the new bed, with smaller ones around the edges. This creates a natural, full look while preventing overcrowding. Water lightly after replanting to help settle the soil around the rhizomes.
💧 Step 3: Apply Balanced Fertilizer in Early Spring
Irises thrive on a balanced fertilizer with equal parts nitrogen, phosphorus, and potassium. I use a 10-10-10 formula in early spring, just as the new leaves begin to emerge. Spread a ¼ cup of fertilizer around each clump, then water deeply to help it reach the roots. Avoid high-nitrogen fertilizers—they encourage leaf growth at the expense of blooms.
Real talk: Over-fertilizing is worse than under-fertilizing. If you see excessive leaf growth but no flowers, you've likely overdone it. Irises prefer lean soil, so a light feeding once a year is plenty. After the initial spring feeding, I add a ½ cup of compost around each plant in late summer to replenish nutrients naturally.
☀️ Step 4: Ensure Proper Sunlight and Drainage
Irises demand full sun—at least 6 hours daily—for strong blooms. If your irises are in partial shade, move them to a sunnier spot. I've seen irises in shady gardens produce only a few weak blooms, while those in full sun put on a spectacular show. The more sunlight, the more vibrant the flowers will be.
Equally important is well-draining soil. Irises rot easily in soggy conditions. If your soil doesn't drain well, amend it with sand or grit before planting. The rhizomes should sit partially exposed—never buried under soil. Aim to have about half of each rhizome above ground when planted.
🌿 Step 5: Mulch Lightly and Monitor for Pests
In late fall, apply a 1-inch layer of mulch around iris beds to protect rhizomes from freezing temperatures. I use straw or shredded leaves because they break down slowly and won't smother the plants. Avoid heavy mulch like wood chips, which can retain too much moisture and cause rot.
Keep an eye out for iris borers, which are the biggest threat to healthy blooms. These pests lay eggs in the leaf bases, and the larvae burrow into the rhizomes. If you notice sawdust-like frass or wilting leaves, treat immediately with neem oil or insecticidal soap. Healthy irises with proper care rarely fall victim to borers, but it's always better to be proactive.
Tips & tricks for reviving your iris garden
Let me share the secrets I've learned after years of coaxing irises back to life—these small tweaks make all the difference.
Pruning Precision: In Step 1, when cutting back those spent blooms, here's what nobody tells you—use a clean pair of pruners and make the cut at a 45-degree angle just above the base. This prevents water from pooling on the stub and causing rot. I've found that sterilizing the pruners with rubbing alcohol between cuts keeps diseases at bay, especially when working with multiple clumps. The angle also gives you a visual cue for where to cut next time.
Watering Wisdom: For Step 2's deep watering, I've discovered a simple trick to check moisture without digging: push a long screwdriver into the soil at the 12-inch mark. If it comes out clean, you need water; if it's damp, wait another week. This method saves your back and gives you precise feedback. And here's another pro move—water in the morning so any moisture on the leaves evaporates before evening, reducing fungal risks.
Soil Test Hack: Before amending your soil in Step 3, do this quick test: Fill a jar halfway with soil, then add water until it's three-quarters full. If water separates clearly after 15-20 minutes, your drainage is good. If it stays murky, you definitely need that sand or perlite. I've seen irises thrive in amended soil that would otherwise have drowned their roots.
Fertilizer Timing: In Step 4, when you spot those first 2-3 inches of spring growth, here's my secret: apply your fertilizer in a circular pattern about 6 inches away from the base, not directly on the rhizomes. This prevents burn while still nourishing the roots. I've found that mixing a handful of compost into the soil at this time gives an extra nutrient boost without overwhelming the plants.
Pro Tips for Make Irises Bloom
- Let me share the secrets I've learned after years of coaxing irises back to life—these small tweaks make all the diff...
- Pruning Precision: In Step 1, when cutting back those spent blooms, here's what nobody tells you—use a clean pair of ...
- Watering Wisdom: For Step 2's deep watering, I've discovered a simple trick to check moisture without digging: push a...
Frequently asked questions
Got questions about making your irises bloom their brightest? Here are some common concerns—and quick answers—to help you grow stunning spring flowers!
Why aren’t my irises blooming this year?
Irises often skip blooming due to overcrowding (too many rhizomes competing for nutrients) or poor soil. Divide clumps every 3–4 years in early summer, and amend soil with compost or a balanced fertilizer. If blooms are sparse, check for pests like iris borers or fungal diseases (like leaf spot), which can stress plants.
When is the best time to prune and feed irises for next year’s blooms?
Prune after blooming (late spring/early summer) to remove spent flower stalks—cut them down to the ground. Feed with a low-nitrogen, high-phosphorus fertilizer (like 5-10-10) in early spring or after pruning. Avoid fertilizing in fall, as it can encourage tender new growth vulnerable to frost.
Can I make irises bloom in containers or small gardens?
Yes! Use large containers (at least 12 inches deep) with well-draining soil and a mix of compost. Place pots in full sun (6+ hours daily) and water deeply but infrequently—irises hate soggy roots. Divide rhizomes every 2–3 years to prevent overcrowding, even in containers. Dwarf varieties (like Iris pumila) are perfect for small spaces!
How often should I divide iris rhizomes, and what’s the right way to do it?
Divide irises every 3–4 years in early summer (after blooming). Gently dig up clumps, separate rhizomes with a knife, ensuring each has 1–2 healthy fans of leaves and a fleshy root. Discard old, mushy centers. Replant rhizomes partially exposed (top third above soil) in sunny spots with sharp drainage.
My iris leaves are yellow or spotted—will this affect blooms?
Yellow leaves often signal overwatering, nutrient deficiency, or fungal issues (like iris leaf spot). Trim affected leaves, improve drainage, and apply a copper fungicide if needed. For nutrient issues, feed with iron sulfate (for yellowing) or a balanced fertilizer. Spotty leaves may reduce bloom quality, but healthy rhizomes can rebound with proper care.
Still stumped? Drop your iris woes below—we’re happy to help troubleshoot!
Wrapping up and next steps
Growing irises that burst into stunning blooms is all about patience, proper care, and a little extra love! 🌸 By mastering the art of pruning, feeding, and creating the right conditions, you’ll transform your garden into a vibrant spring spectacle.
Remember, healthy soil, consistent watering, and timely maintenance are your secret weapons.
Now that you’re armed with these tips, roll up your sleeves and get gardening! Start with one or two key steps this season—whether it’s dividing overcrowded clumps or adding a balanced fertilizer—and watch your irises thrive. Before you know it, your garden will be the talk of the neighborhood! 🌿✨