
How To
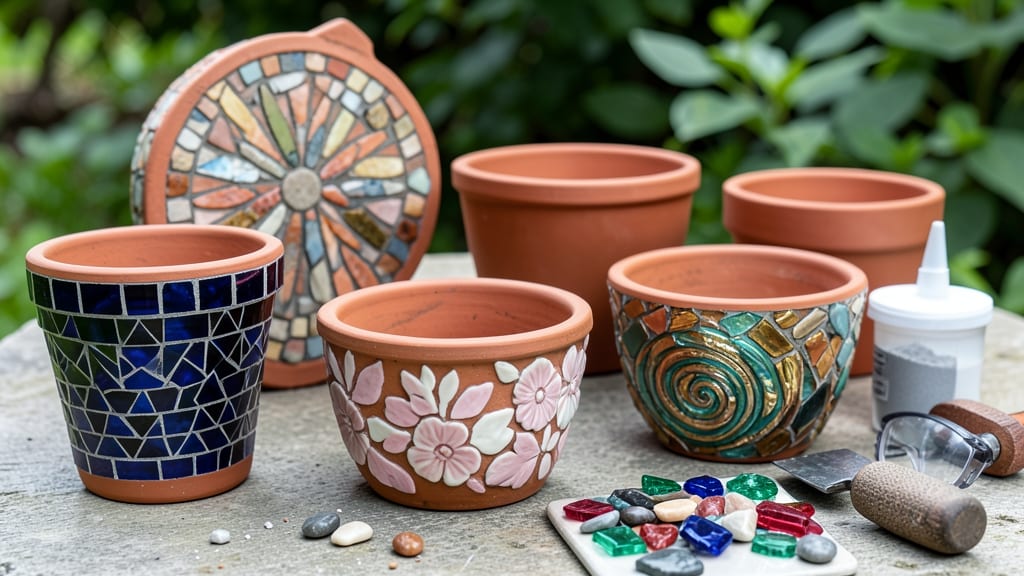
How to make mosaic plant pots from broken dishes and chipped tiles can transform your garden into a vibrant, artistic space. ✨ I’ve turned old plates, mugs, and even broken garden ornaments into eye-catching containers that brighten up any garden bed or patio corner—while giving new life to materials that would otherwise end up in the trash.
The process is simpler than you’d think: you’ll need basic supplies like adhesive, grout, and a plain terracotta or ceramic pot as your base.
Start with a sturdy pot, clean your tiles or ceramic pieces, and let your creativity guide the design—think geometric patterns, floral motifs, or even a mosaic that tells a story about your garden.
Once complete, your mosaic pots won’t just be functional; they’ll be conversation starters. The colors pop against greenery, and the texture adds depth to any space. With a little grout sealing, they’ll last for years, weathering rain and sun without losing their charm.
This project works for any skill level, whether you’re a seasoned crafter or a beginner eager to try something new. Plus, it’s a great way to upcycle materials you already have lying around—no need to buy expensive supplies. Let’s get started!
📚 In This Guide
- What you need
- Instructions
- Tips and common mistakes
- Wrapping up and next steps
What you need
- ● Broken ceramic pieces: Collect tiles, plates, or dishes (any shape/size). Aim for at least 10–15 pieces for a medium-sized pot.
- ● Base pot: A plain terracotta, plastic, or ceramic pot (choose one slightly larger than your desired final size).
- ● Mosaic adhesive: A waterproof, strong-bond glue like E6000 or Mod Podge Outdoor (avoid regular craft glue!).
- ● Grout: A sanded, waterproof grout (e.g., Mapei Kerabond) for filling gaps.
- ○ Grout sealer: Optional but recommended to protect your design.
- ● Sandpaper (120–220 grit): To roughen ceramic edges for better adhesion.
- ● Paintbrush or sponge: For applying adhesive and grout.
- ● Rubber gloves: To protect your hands from grout.
- ● Safety goggles: For sanding (if needed).
- ● Plastic wrap or newspaper: To cover your workspace.
- ○ Ruler & pencil: For sketching designs (optional but helpful!).
- ○ Drill (optional): With a tile bit to create drainage holes in the base pot.
- ● Decorative accents: Glass beads, sea glass, or small mirrors for extra flair!
Step-by-Step instructions for creating mosaic plant pots
Transforming ordinary containers into vibrant mosaic works of art is easier than you think—here's how to make four stunning pots that'll elevate any garden space.
🪴 Step 1: Select and Prep Your Base Containers
Choose four sturdy ceramic or plastic pots with a diameter between 6-12 inches—larger pots need more mosaic pieces but create bigger impact. I like to select containers with slightly textured surfaces because they grip the adhesive better. Clean them thoroughly with soapy water and let them dry completely before proceeding.
For a professional finish, sand any rough edges lightly with 120-grit sandpaper—this prevents sharp corners that could damage your hands later. If using plastic containers, rough up the surface with coarse sandpaper first to help the adhesive bond properly. This prep step ensures your mosaic stays securely in place for years of use.
🎨 Step 2: Gather and Prepare Mosaic Materials
Collect broken ceramic pieces, tiles, or even sea glass—anything with a smooth, flat back works best. I prefer pieces between ½ inch to 2 inches in size for a balanced look. Clean all pieces with rubbing alcohol to remove dirt and oils that could prevent proper adhesion. For a cohesive design, sort your pieces by color and pattern before arranging.
Cut larger pieces to fit your pot's surface using a tile cutter or heavy-duty scissors. Wear safety glasses during this step—ceramic shards can be sharp. I like to arrange my pieces dry first on the container to visualize the design before applying adhesive. This dry layout helps me see color transitions and balance before committing to glue.
💧 Step 3: Apply Adhesive and Position Mosaic Pieces
Use a PVA-based craft glue or mosaic-specific adhesive—these provide the strongest bond for outdoor conditions. Apply glue to small sections of the pot at a time with a notched trowel or putty knife. Work in 3-inch squares to prevent the adhesive from drying before you place your pieces. Spread the glue evenly but not too thickly—excess glue can squeeze out between pieces and create messy edges.
Press each mosaic piece firmly into the glue, using a rubber mallet for larger pieces to ensure full contact. Wipe away any excess glue with a damp cloth immediately—once it dries, it becomes nearly impossible to remove. For a professional look, stagger the edges of your pieces so no straight lines appear. I like to leave ¼-inch gaps between pieces for grout, which adds a polished finish.
✂️ Step 4: Grout and Seal for Durability
Mix sanded grout in a bucket according to package instructions—sanded grout prevents cracks and provides a smoother finish. Using a rubber float, spread grout over the mosaic at a 45-degree angle, working it into the gaps between pieces. Press firmly to ensure grout fills all spaces completely. Wipe away excess grout with a damp sponge after 10-15 minutes, before it hardens.
Let the grout cure for 24 hours before sealing. Apply a matte or satin outdoor sealant with a brush, following the manufacturer's drying times. Sealant protects your mosaic from moisture, UV rays, and general wear—critical for pots that'll spend time outdoors. I apply two thin coats for extra durability, letting each dry completely between applications. This final step transforms your mosaic into a long-lasting garden centerpiece.
☀️ Step 5: Cure and Display Your Finished Pots
Allow the sealant to cure for 48 hours in a dry, dust-free area before planting. This curing time ensures the sealant fully hardens and provides maximum protection. Once cured, your mosaic pots are ready for their first plants. I recommend using drought-tolerant succulents or herbs in the finished pots—they thrive with less watering and complement the artistic design beautifully.
Place your pots in a location that showcases their unique designs. Mosaics look stunning in sunny garden beds or on patio tables where their colors can truly shine. If you notice any loose pieces after a few weeks, simply reapply adhesive and press them back into place. With proper sealing, your mosaic pots will maintain their vibrant colors and structural integrity for years of garden enjoyment.
Tips & tricks for perfect mosaic plant pots
Between us, these little details make the difference between a charming weekend project and a show-stopping garden feature.
Surface Prep Matters: In Step 1, don't skip roughing up plastic containers—this is what makes your mosaic pieces actually stick. I use a wire brush to create tiny grooves in the surface before applying adhesive. For ceramic pots, lightly sanding the edges first prevents those sharp corners from cutting your hands during assembly.
Design Layout Secret: Before committing to glue in Step 2, arrange your mosaic pieces dry on the pot. This lets you visualize color transitions and balance. I like to start with the largest pieces first—they anchor your design. Pro tip: Use painter's tape to create temporary guides if you're working with geometric patterns.
Adhesive Application Technique: When applying glue in Step 3, work in those 3-inch squares but keep your glue pot nearby. The adhesive dries fast—if you have to pause, cover the exposed area with plastic wrap to prevent it from skinning over. A toothpick helps spread glue into tight corners where your notched trowel can't reach.
Grout Timing: That 10-15 minute window for wiping excess grout is tighter than it sounds. I set a timer and work in sections, using a damp sponge to clean between pieces. The key is to remove grout before it starts to harden—once it sets, you'll be scraping with a putty knife. For stubborn grout, I keep a small bottle of vinegar handy to break it down.
Pro Tips for Make Mosaic Plant Pots
- Between us, these little details make the difference between a charming weekend project and a show-stopping garden fe...
- Surface Prep Matters: In Step 1, don't skip roughing up plastic containers—this is what makes your mosaic pieces actu...
- Design Layout Secret: Before committing to glue in Step 2, arrange your mosaic pieces dry on the pot. This lets you v...
Frequently asked questions
Got questions about creating your own mosaic plant pots?
You’re not alone! Here are some of the most common queries—and their answers—to help you craft the perfect upcycled planter with confidence.
---
What’s the best adhesive to use for mosaic plant pots?
For outdoor pots, opt for a waterproof adhesive like PVA glue mixed with sand or a two-part epoxy for heavy tiles. For indoor projects, mod podge or tile adhesive works well. Always let it dry fully (24 hours) before adding soil!
How long does it take to complete a mosaic plant pot?
Timing depends on size and complexity! A small pot with simple tiles can take 1–2 hours (including drying time). Larger projects or detailed designs may require 2–4 hours or more. Plan ahead—adhesive and grout need time to cure.
Can I use broken dishes or ceramics from my kitchen?
Clean, food-safe ceramics
(like plates or mugs) are perfect for mosaics. Just avoid lead-glazed or chipped dishes that might leach harmful materials. Scrub pieces thoroughly before using—no grease or residue!
---
What if my mosaic pieces keep falling off?
This usually means your adhesive didn’t bond well. Reapply glue to loose pieces and press firmly. For stubborn spots, try hot-gluing the back of tiles as a temporary fix. If grout is crumbling, use a sandable grout next time for better grip.
How do I fix mistakes or uneven grout lines?
No worries—grout is forgiving! Wipe excess with a damp sponge while it’s still wet. For uneven lines, use a grout float or old credit card to smooth it out. If grout dries too dark, lightly sand it and reapply a thin layer.
Still stumped? Drop your question in the comments—we’re happy to help!
Wrapping up and next steps
Creating mosaic plant pots is a fantastic way to give new life to broken ceramics while adding a splash of color to your space! 🌈 With just a few supplies and a little creativity, you can transform plain pots into stunning, one-of-a-kind pieces that reflect your personal style.
Whether you're a beginner or a seasoned DIYer, this project is both rewarding and fun.
Now that you’ve got the know-how, pick up those broken dishes or tiles and start crafting! Share your masterpiece with friends or use it to brighten up your garden—your green thumb (and artistic flair) will thank you. Happy upcycling! 🌱✨