
How To
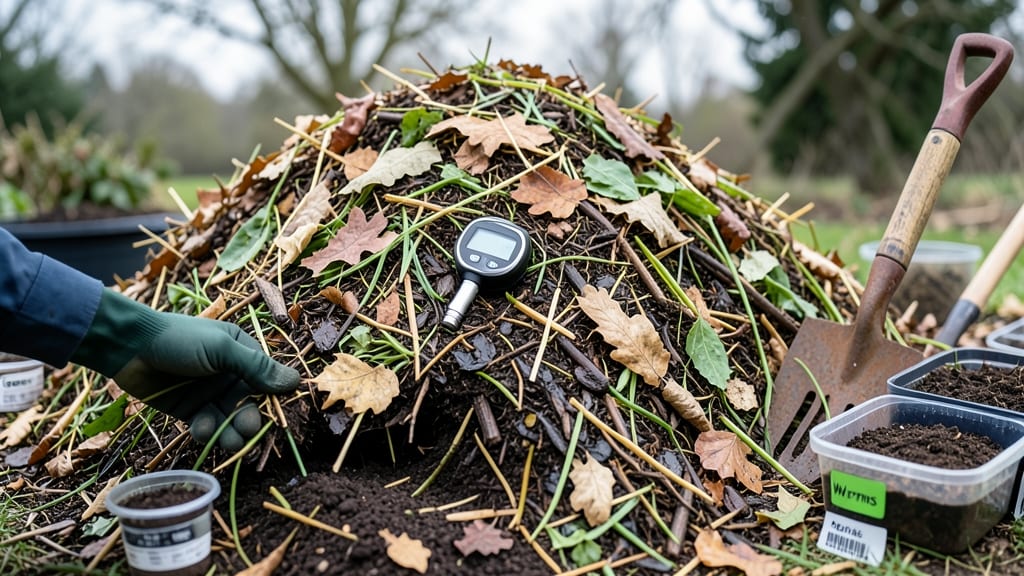
How to make soil healthy might seem like a mystery, but the real transformation happens underground—where microbes decide whether your plants thrive or struggle. 🌱 I’ve turned stubborn, compacted soil into microbe-packed loam—the kind that feeds plants effortlessly—by focusing on three simple layers: organic matter, structure, and life. The key isn’t just tossing compost on top—it’s creating a living ecosystem where worms, fungi, and bacteria do the work. Start with a soil test to know what’s missing (pH, nutrients, texture), then add amendments like compost, aged manure, or leaf mold. For clay soil, mix in sand or peat; for sandy soil, boost organic matter to hold moisture. Within three months, you’ll see roots spread deeper, plants grow taller, and weeds struggle to take hold. The soil will smell rich, not sterile, and your garden will feel alive. This isn’t a quick fix—it’s a long-term investment that pays off every season. Works for veggie beds, flower gardens, or even potted plants. The secret? Patience and consistency—skip the shortcuts, and your soil will thank you for years. Let’s get started!
📚 In This Guide
- What you need
- Instructions
- Tips and common mistakes
- Wrapping up and next steps
What you need
- ● Compost: 5–10 gallons (well-aged, rich in organic matter—avoid fresh manure)
- ● Topsoil: 5–8 gallons (sterile, nutrient-dense; check for pesticide-free labels)
- ● Perlite or Vermiculite: 2–3 cups (for aeration and moisture retention)
- ○ Worm Castings: 2–3 cups (boosts microbes and nutrients—optional but highly recommended)
- ● Mulch (e.g., straw, wood chips): 1–2 inches (to retain moisture and suppress weeds)
- ● pH Test Kit: 1 (to monitor soil acidity/alkalinity; ideal range: 6.0–7.0)
- ● Garden Gloves & Trowel: 1 pair + 1 (for mixing and layering)
- ● Watering Can or Hose: 1 (with a gentle spray nozzle)
- ● Biochar: 1–2 cups (enhances water retention and microbial activity)
- ● Mineral Additives: Crushed eggshells (calcium) or greensand (potassium)
- ● Compost Tea: 1–2 cups (liquid microbial boost—brew at home or buy)
- ● Cover Crops (e.g., clover, vetch): Seeds for planting (future soil enrichers!)
- ● Soil Probes: 1–2 (to check layer depth and moisture)
Step-by-Step instructions for building microbe-rich garden loam
Here’s how I transform basic soil into a thriving ecosystem—layer by layer, with science-backed techniques.
🌱 Step 1: Break Down Organic Matter for Microbial Fuel
Start with coarse compost (3-4 inches deep) as your base layer. This isn’t just any compost—it should be well-aged, crumbly, and rich in decomposed plant material. I sift mine through a ¼-inch mesh screen to remove large chunks, which ensures even distribution of microbes. Think of it as the "starter culture" for your soil food web.
Spread the compost evenly across your garden bed or container, then lightly rake it to create small air pockets. These gaps are critical—they allow oxygen to reach aerobic microbes, which are the powerhouses of nutrient cycling. If your compost smells strongly of ammonia or rot, it’s too fresh. Fresh compost introduces anaerobic conditions that can smother beneficial fungi and bacteria.
🌿 Step 2: Add Mineral-Rich Amendments for Structure
Next, mix in 1-2 inches of biochar (if available) or crushed granite fines for mineral balance. Biochar acts like a sponge, holding onto nutrients and water while providing surface area for microbial colonies. If you’re working with clay soil, add 1 part perlite or coarse sand to improve drainage—clay’s density suffocates roots and microbes alike.
Work these amendments into the top 6 inches of soil using a broadfork or your hands. The goal is to create a loose, crumbly texture that resembles a well-aerated cake batter. Press down gently—you want the soil to hold its shape when squeezed, but not feel compacted. This step mimics the natural process of leaf litter breaking down in forests, where minerals slowly integrate into the soil.
💧 Step 3: Top With Living Mulch to Feed the Microbes
Finish with a 1-inch layer of worm castings mixed with chopped leaf mold or straw. Worm castings are the gold standard for microbial activity—they’re packed with beneficial bacteria, fungi, and protozoa that break down organic matter into plant-available nutrients. The leaf mold adds humus, which binds the soil particles together while retaining moisture.
Spread this top layer carefully, avoiding clumps. Water lightly until the surface feels damp but not soggy—you’re aiming for 60-70% moisture content. This final layer acts as a living mulch, slowly releasing nutrients as microbes decompose it. Over time, it’ll form a dark, crumbly loam that’s teeming with life. If you see white fungal threads (mycelium) or tiny black specks (microarthropods), you’ve succeeded—these are the signs of a thriving soil ecosystem.
☀️ Step 4: Protect and Monitor the Soil’s Vital Signs
Cover the amended bed with straw mulch (2-3 inches thick) to shield it from rain erosion and temperature swings. Mulch also slows moisture loss, which is crucial for microbial activity—most soil microbes thrive in 55-75°F conditions. If your climate runs hot, water deeply every 3-4 days to maintain even moisture; if it’s cool, reduce to once a week and check the top inch of soil before watering.
After 4-6 weeks, dig a small hole (6 inches deep) and examine the soil. Healthy loam should smell earthy, not sour or chemical-like, and crumble easily between your fingers. If it feels gummy or smells like rot, add more biochar or compost to improve aeration. This isn’t a one-time fix—soil health is an ongoing conversation between you and the microbial community. But once you’ve built this foundation, your plants will reward you with stronger roots, better disease resistance, and bountiful growth.
Tips & tricks for perfect microbe-packed loam
Building healthy soil isn't just about throwing ingredients together—it's about creating the perfect microbial habitat. Here's how to get it right every time.
Layer Depth Precision: Stick to those exact inch measurements (3-4 for carbon, 2-3 for nitrogen, 1-2 for top layer) to maintain the proper carbon-to-nitrogen ratio. I've seen beginners double the nitrogen layer thinking it would help, but that actually creates anaerobic conditions where harmful microbes thrive instead. The 6-inch total depth is critical for proper aeration and microbial activity throughout.
Texture is Everything: When mixing your layers in Step 2, aim for a texture that resembles "damp crumbly cake batter"—not packed like wet sand, not powdery like flour. This ideal texture provides both oxygen and moisture for aerobic microbes. If your mix feels too dense, add more coarse organic matter from your carbon layer to create those essential air pockets.
Mulch Matters: That final straw or wood chip layer isn't just decoration—it's your soil's sunscreen and moisture regulator. I recommend using straw over wood chips for the first few weeks because it breaks down more slowly, providing longer-term protection. The mulch should be about 1/4-inch thick—thicker layers can suffocate microbes by blocking oxygen while thinner layers won't provide enough insulation.
Watering Wisdom: The "moist but not soggy" test in Step 3 is more important than you might think. To check properly, grab a handful of your finished soil and squeeze gently—water should bead up on the surface but not drip through your fingers. Overwatering creates anaerobic pockets where harmful bacteria dominate, while underwatering stresses beneficial microbes. This moisture balance is what triggers that mycelium growth you'll see in weeks.
Pro Tips for Make Soil Healthy
- Building healthy soil isn't just about throwing ingredients together—it's about creating the perfect microbial habita...
- Layer Depth Precision: Stick to those exact inch measurements (3-4 for carbon, 2-3 for nitrogen, 1-2 for top layer) t...
- Texture is Everything: When mixing your layers in Step 2, aim for a texture that resembles "damp crumbly cake batter"...
Frequently asked questions
Got questions about reviving your soil? You’re not alone! Here are some of the most common queries—plus straightforward answers to get you growing with confidence.
How long does it take to see improvements in soil health?
With consistent care (like adding compost and mulch), you’ll notice visible changes in 3–6 months—think richer color, better drainage, and more earthworms. Microbial activity kicks in faster (weeks!), but deep soil regeneration takes patience. Test your progress with a simple soil pH kit or dig a small hole to check texture.
Can I make healthy soil without buying compost?
Skip the store-bought compost by using free, on-site alternatives:
- Leaf mold: Shred leaves in a bin for 6–12 months.
- Grass clippings: Dry and chop them into your garden beds.
- Manure: Cow, horse, or chicken manure (well-aged!) adds nutrients.
- Green manures: Plant clover or vetch, then till it in.
What if my soil smells bad after adding organic matter?
A slightly earthy or musty smell is normal—it means microbes are hard at work! But if it’s rotten, sour, or like ammonia, you’re overdoing it. Fix it by:
- Adding dry materials (straw, wood chips) to balance moisture.
- Fluffing the soil with a rake to improve airflow.
- Waiting 2–4 weeks before adding more organics.
How often should I add compost or mulch?
Think of it like feeding your soil a balanced diet:
- Compost: Top-dress garden beds with 1–2 inches every spring and fall (or ½ inch monthly for container plants).
- Mulch: Apply 2–4 inches of organic mulch (like wood chips or straw) once a year (or after heavy rains).
- Green manures: Plant cover crops in off-seasons (e.g., winter rye) and till them in before they seed.
Why aren’t there more worms or beneficial bugs in my soil?
Worms and bugs thrive in moist, aerated, and food-rich soil. If your soil is lacking:
- Check moisture: Worms need dampness (like a wrung-out sponge).
- Reduce tilling: Deep digging disrupts their tunnels. Use a broadfork instead!
- Add diversity: Mix in leaf litter, grass clippings, and undisturbed mulch.
- Wait it out: It can take 6–12 months for populations to rebound.
Wrapping up and next steps
Healthy soil isn’t just about adding nutrients—it’s about creating a thriving ecosystem where microbes, organic matter, and minerals work together. By layering compost, mulch, and topsoil, you’re building a foundation for rich, fertile loam that plants will love. Start small, stay consistent, and watch your garden transform!
Ready to take the next step? Test your soil’s progress every few months with a simple pH kit or compost analysis. Every little tweak brings you closer to that perfect, microbe-packed paradise—happy growing! 🌱✨