
How To
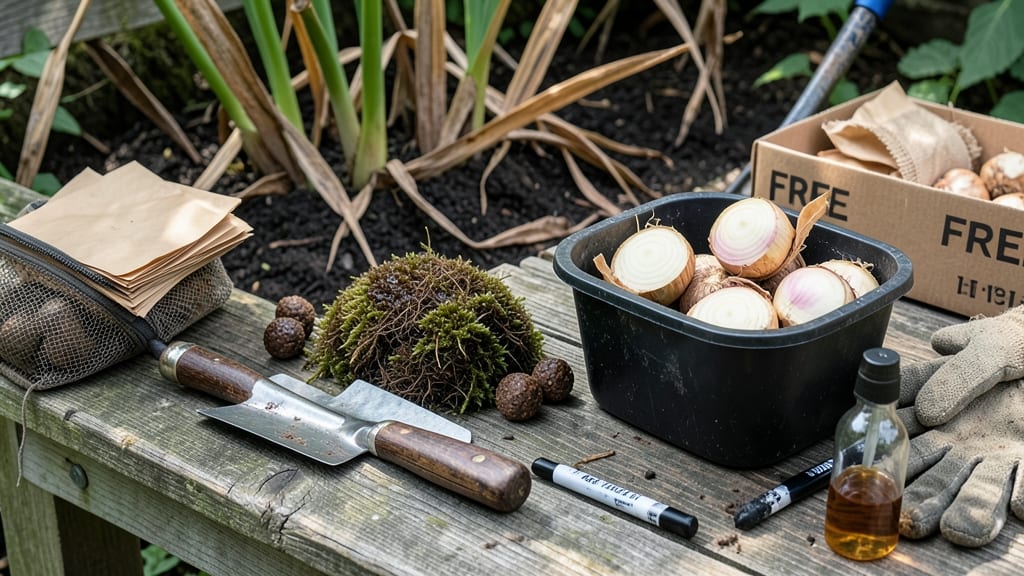
Overwintering calla lily bulbs ensures those striking velvety blooms return year after year. 🌿 I’ve learned the hard way—skipping this step means losing prized plants to frost. The secret lies in timing, proper storage, and mimicking their natural dormancy cycle.
You’ll need dry, well-draining substrate like peat moss or perlite, a cool dark space (40-50°F), and patience. Most bulbs enter dormancy after foliage yellows, but don’t rush—wait until first frost for best results. Humidity matters too; too dry, and they shrivel; too damp, and rot sets in.
By spring, you’ll see plump, firm bulbs ready to replant. The payoff? A garden bursting with calla’s signature elegance—nearly twice as many blooms as store-bought plants. Even in colder climates, this method works with a few adjustments.
Common mistakes? Storing bulbs too early or in fluctuating temps. I’ll show you how to avoid them—so next year’s display starts with healthy roots, not wilting disappointment. Let’s get those bulbs through winter unscathed.
📚 In This Guide
- What you need
- Instructions
- Tips and common mistakes
- Wrapping up and next steps
What you need
- ● Calla lily bulbs (rhizomes): Fresh, healthy rhizomes (1–3 per pot, depending on size).
- ● Well-draining potting mix: 1–2 bags (look for a blend labeled for tubers or bulbs, like a mix of peat, perlite, and compost).
- ● Containers: 2–4 pots (6–8 inches deep) with drainage holes. Plastic or terracotta works—just avoid metal!
- ● Gravel or perlite: A small bag (for the bottom layer of pots to ensure drainage).
- ● Watering can or spray bottle: For gentle hydration (avoid soggy soil!).
- ○ Plant labels: Optional but helpful to track varieties.
- ● Fungicide: A light dose (like copper fungicide) to prevent rot during dormancy.
- ● Thermometer: To monitor temperatures if overwintering indoors.
- ● Grow lights: If placing bulbs near a sunny window isn’t an option.
- ● Humidity tray: A shallow tray with pebbles and water to maintain moisture levels.
Step-by-Step instructions for overwintering calla lily bulbs
Here’s the foolproof method I’ve used to revive calla lilies for five straight seasons—no blackened bulbs or lost blooms.
🌱 Step 1: Dig Up Bulbs Before Frost
Wait until the first hard frost blackens the foliage, then dig up the bulbs with a garden fork. Callas are sensitive to cold, so timing matters—if you wait too long, the bulbs may rot. I like to work in dry weather when soil is workable but not muddy. Gently loosen the soil around the bulb, then lift it out with its attached rhizome intact.
Shake off excess soil and inspect each bulb for soft spots or mushy areas—these are signs of rot. Healthy bulbs feel firm and dry. Trim any damaged sections with sterilized pruners, but avoid cutting into healthy tissue. Store the bulbs in a dry, shaded spot for 24 hours to let the remaining soil dry completely.
🪴 Step 2: Cure and Prepare for Dormancy
Once the bulbs are dry, remove the remaining soil and trim the stems down to 1 inch above the bulb. This prevents moisture loss and reduces the risk of mold during storage. I like to dip the cut ends in a fungicide solution (like copper-based spray) to protect against fungal infections—callas are prone to rot if stored damp.
Next, let the bulbs cure in a dry, well-ventilated area for 1-2 weeks. Place them in a single layer on a mesh tray or paper towels, ensuring they don’t touch. The goal is to harden the outer skin, which helps them survive the dormant period. You’ll know they’re ready when the skin feels slightly tougher and the bulbs look shriveled but not mushy.
⏰ Step 3: Store in Cool, Dark Conditions
After curing, pack the bulbs in a container filled with dry peat moss or vermiculite—these materials retain minimal moisture while allowing airflow. I use a plastic storage bin with holes drilled in the sides to prevent condensation buildup. Store the container in a cool, dark place where temperatures stay between 45-55°F, like a basement or garage.
Check the bulbs monthly for signs of rot or mold. If you notice any soft spots or foul odors, remove the affected bulb immediately and discard it. Avoid storing them in plastic bags—trapped moisture causes rot. The bulbs should feel dry and papery to the touch, not damp or sticky.
☀️ Step 4: Wake Up Bulbs in Early Spring
In late winter, about 6-8 weeks before your last frost date, remove the bulbs from storage and inspect them again. Healthy bulbs will look shriveled but firm. Soak them in lukewarm water for 30 minutes to rehydrate—this jumpstarts growth. I like to add a rooting hormone to the water for extra insurance, though it’s optional.
After soaking, plant the bulbs in pots filled with well-draining potting mix (I use a blend of peat moss, perlite, and compost). Bury them 4 inches deep, leaving the tops exposed. Place the pots in a bright, indirect light spot and keep the soil lightly moist. You’ll see new shoots emerge within 2-3 weeks—that’s your cue to move them to a sunny window or under grow lights.
🌿 Step 5: Transition to Outdoor Planting
Once the danger of frost has passed and nighttime temperatures stay above 55°F, it’s time to plant the callas outdoors. Harden off the pots by placing them outside in a sheltered spot for 1-2 hours daily, gradually increasing exposure over 10 days. This helps the bulbs adjust to outdoor conditions without shock.
Choose a planting site with partial shade and moist, well-draining soil. Dig a hole 4 inches deep and space the bulbs 12 inches apart. Water thoroughly after planting, and mulch around the base to retain moisture. With proper care, your callas will reward you with bold blooms by mid-summer—just like the first time you planted them.
Tips & tricks for overwintering calla lily bulbs
These little details make all the difference between bulbs that thrive and ones that rot during dormancy.
Timing is Everything: Don't rush Step 1—wait until the first hard frost actually blackens the foliage before digging. Cold soil makes bulbs brittle, and digging too early can damage the rhizomes. I've learned this the hard way after losing bulbs to frost damage when I dug too soon. Also, work in dry conditions to prevent soil from sticking and trapping moisture during that critical 24-hour drying period.
Curing Done Right: The 1-2 week curing period in Step 2 is where many gardeners go wrong. Place your bulbs on a mesh tray or paper towels to ensure airflow—stacking them creates condensation that leads to rot. You'll know they're properly cured when the outer skin feels slightly papery and the bulbs look noticeably shriveled. This toughening process is what protects them through winter.
Storage Wisdom: When packing bulbs in dry peat moss or vermiculite for Step 3, resist the urge to use plastic bags—even if they seem convenient. The trapped moisture creates the perfect environment for mold. Instead, use a well-ventilated container with holes drilled in the sides. I've had success with plastic storage bins that allow airflow while keeping pests out. Maintain that 45-55°F temperature range religiously—any warmer and they'll start to sprout prematurely.
Spring Revival Strategy: That 30-minute soak in Step 4 is your secret weapon for jumpstarting growth. I've found adding a rooting hormone to the lukewarm water gives an extra boost, though it's completely optional. After soaking, resist the urge to plant immediately—let the bulbs sit in their pots for 2-3 weeks in bright, indirect light. This gradual transition prevents shock when you eventually move them to sunnier conditions.
Pro Tips for Overwinter Calla Lily Bulbs
- These little details make all the difference between bulbs that thrive and ones that rot during dormancy.
- Timing is Everything: Don't rush Step 1—wait until the first hard frost actually blackens the foliage before digging....
- Curing Done Right: The 1-2 week curing period in Step 2 is where many gardeners go wrong. Place your bulbs on a mesh ...
Frequently asked questions
Got questions about overwintering calla lily bulbs? Here are some common ones—and their answers—to help you keep your plants thriving for next season!
Can I store calla lily bulbs in the refrigerator?
While a refrigerator can work in a pinch, it’s not ideal. The humidity and ethylene gas (from fruits/veggies) can cause rot or premature sprouting. Instead, opt for a cool, dry, and well-ventilated space like a basement or garage, where temps stay between 45–55°F (7–13°C). If you must use the fridge, store bulbs in a paper bag with minimal moisture and check them monthly.
When is the best time to dig up calla lily bulbs for overwintering?
Wait until the first hard frost or when foliage turns yellow and dies back—usually 4–6 weeks after flowering (late fall). If you dig too early, bulbs won’t fully mature; too late, and they risk frost damage. Mark their location to avoid accidentally disturbing them while gardening. Pro tip: Wear gloves—calla rhizomes can be sharp!
What if my calla lily bulbs sprout too early during storage?
Early sprouting is a sign of warmth or moisture stress. If you notice green shoots, move bulbs to a cooler spot immediately (like a basement). Trim any sprouts back to 1 inch to redirect energy to the bulb’s roots. Avoid watering—just keep them in a dry, dark environment. Once spring arrives, you can repot them!
Do I need to treat calla lily bulbs for pests or diseases before storing?
Yes! Before storing, inspect bulbs for soft rot, mold, or insect damage. Trim away any mushy or discolored areas with a sterilized knife, then dust with fungicide (like neem oil or copper-based spray) to prevent issues. Store only healthy, firm bulbs—discard any that feel squishy or smell off. A little prevention goes a long way!
Can I overwinter calla lilies indoors in pots instead of digging them up?
If you live in a mild climate (Zone 8+), you can leave potted callas outdoors through winter with heavy mulch (like straw or leaves) around the base. In colder zones, move pots to an unheated garage or shed where temps stay above freezing. Reduce watering drastically—only enough to keep soil barely moist—and resume normal care in spring.
Wrapping up and next steps
Overwintering your calla lily bulbs doesn’t have to be complicated—just follow these simple steps to ensure vibrant blooms next season! 🌱 With the right chill-proof method, you’ll protect your plants from harsh winters and set them up for a stunning comeback.
Now that you’re armed with the know-how, grab those bulbs, prep your storage space, and give your calla lilies the care they deserve. Ready to see them thrive again? Start planning your spring planting today! 🌸