
How To
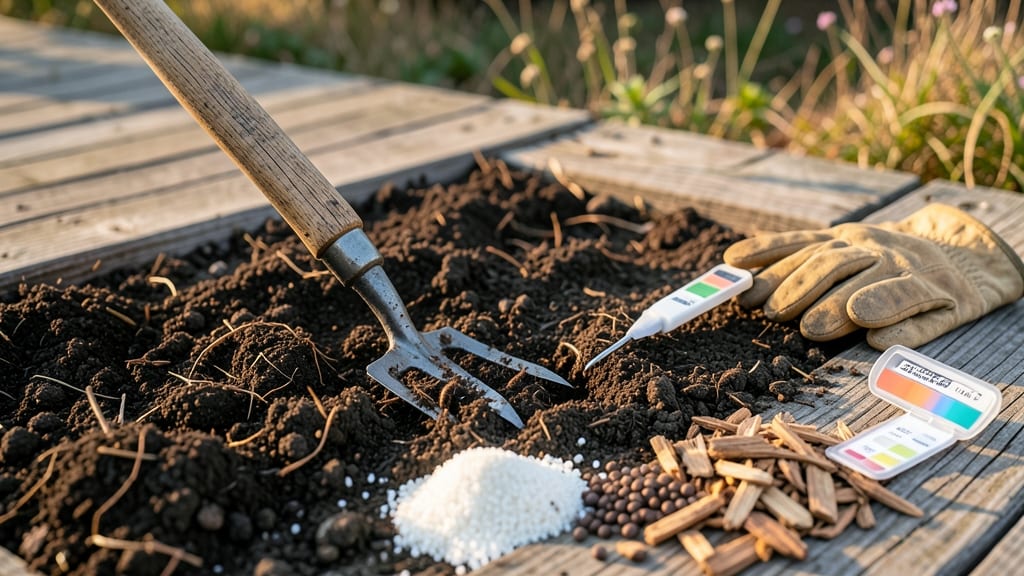
How to amend soil for planting is the first step to a thriving garden—because the problem isn’t you, it’s the dirt. That first shovel of soil holds the secret to whether your plants will flourish or fizzle, and I’ve spent years fixing the mistakes that kill growth before it starts. The trick isn’t buying expensive mixes—it’s reading your soil like a book. Too sandy? Add organic matter. Too clay? Loosen with compost. A simple pH test tells you what’s missing, and the right amendments (like worm castings or aged manure) transform heavy dirt into fluffy, root-happy loam within weeks. By the end, you’ll have soil that holds moisture, drains properly, and feeds plants naturally. The difference shows up in stronger stems, brighter blooms, and vegetables that actually taste like vegetables. Works for flower beds, vegetable patches, or container gardens—just adjust the ratios. Let’s get your soil right the first time.
📚 In This Guide
- What you need
- Instructions
- Tips and common mistakes
- Wrapping up and next steps
What you need
- ● Soil amendments: Compost (2–3 inches spread evenly) – homemade or store-bought
- ● Peat moss or coconut coir (1–2 inches) – for moisture retention
- ● Perlite or vermiculite (1–2 cups per sq. ft.) – for aeration
- ● Lime (if soil is acidic) or sulfur (if soil is alkaline) – adjust pH gradually
- ● Organic matter like leaf mold or well-rotted manure (1–2 inches) – boosts fertility
- ● Tools: Garden fork or tiller – for deep mixing (rent if needed)
- ● Garden gloves – to protect your hands
- ● Shovel or spade – for turning soil
- ● pH testing kit (digital or liquid) – to check soil pH before/after
- ● Wheelbarrow or bucket – for mixing amendments
- ● Biochar (1 cup per sq. ft.) – improves drainage and microbial life
- ● Worm castings (½ cup per sq. ft.) – natural fertilizer boost
- ● Slow-release fertilizer (like 10-10-10) – for extra nutrients
- ● Mulch (straw or wood chips) – to lock in moisture and suppress weeds
Step-by-Step instructions for amending soil for planting
Here's how I transform tough soil into rich, pH-balanced loam that gives plants the perfect start.
Test Your Current Soil
Before adding anything, grab a handful of your existing soil and squeeze it tightly. If it crumbles easily when dry but forms a hard clod when wet, you're working with clay. If it feels gritty and drains too fast, you've got sandy soil. Most gardeners need a mix of both—this is where amendments come in.
For a more precise reading, use a soil test kit to check your pH. Aim for 6.0-7.0 for most vegetables and flowers. If your soil tests acidic (below 6.0), you'll need to raise the pH with lime. If it's alkaline (above 7.0), sulfur or peat moss will help lower it. I always test first—it saves time and money by avoiding unnecessary additions.
Break Up Compacted Soil
Use a garden fork or tiller to loosen the top 12-18 inches of soil. Work in sections about 2 feet wide to avoid compacting the edges. The goal is to create a fluffy, aerated bed where roots can spread easily. If you're working in a small garden bed, a broadfork is my go-to tool—it won't turn the soil but will open up channels for air and water.
Pay attention to how the soil feels as you work. It should resist slightly but give way with gentle pressure. If it feels like you're pushing through concrete, you're still too compacted. Add a 2-3 inch layer of compost and work it in before tilling again. This extra organic matter helps break up stubborn clay.
Add Organic Matter for Structure
Spread 2-3 inches of compost evenly over the loosened soil. For heavier clay, I mix in 1-2 inches of coarse sand to improve drainage. If your soil is sandy, add 1-2 inches of peat moss or coconut coir to help retain moisture. Work these amendments into the top 6 inches of soil using a shovel or your hands.
Don't skip this step—organic matter feeds soil microbes, improves water retention, and creates the ideal crumbly texture. I like to think of it as building a sponge: the right mix holds moisture when it's dry and drains when it's wet. For best results, add amendments in layers if you're working with very poor soil.
Adjust pH if Needed
If your soil test showed a pH outside the ideal range, it's time to make adjustments. For acidic soil (below 6.0), sprinkle pelletized lime over the bed and work it into the top 4-6 inches. Use about 5 pounds per 100 square feet for each full point you need to raise the pH. For alkaline soil (above 7.0), mix in elemental sulfur at a rate of 1 pound per 100 square feet for each point you need to lower it.
Be patient—pH adjustments take time. Lime can take 2-3 months to fully take effect, while sulfur works more quickly, showing changes in 1-2 months. I always retest the soil 3 months after amending to confirm the pH is in the right range before planting.
Water and Let It Settle
After amending, water the bed thoroughly to help the soil particles bond and settle. You'll want to apply enough water to moisten the soil 6-8 inches deep. This step is crucial because it helps the amendments integrate with the existing soil. Let the bed sit for 1-2 weeks before planting. This resting period allows microbes to colonize the new organic matter and creates a stable environment for roots.
During this waiting period, keep an eye on the soil's moisture. It should feel like a well-wrung sponge—damp but not soggy. If it dries out completely, water lightly to maintain the ideal conditions. This final step ensures your hard work pays off with strong, healthy plants from day one.
Tips & tricks for perfect soil amendments
Transforming your garden soil into nutrient-rich loam takes more than just throwing in compost. Here's what I've learned after years of trial and error to get it right every time.
Soil Texture Test: In Step 1, when you squeeze your soil, pay attention to how it feels when it's dry versus wet. Clay soil will form a hard clod when wet but crumble when completely dry, while sandy soil will feel gritty and fall apart immediately. This simple test tells you exactly what amendments to use—clay needs sand for drainage, sandy soil needs peat moss for moisture retention.
Layering for Stubborn Soil: If your soil is particularly tough (like heavy clay that feels like concrete when you work it), don't just add amendments once. In Step 2, after loosening the top 12-18 inches, spread a 2-3 inch layer of compost, work it in, then till again. Repeat this process until the soil feels light and crumbly. I've seen dramatic improvements in soil structure after just two passes with this method.
pH Adjustment Precision: When adjusting pH in Step 4, remember that lime and sulfur work at different speeds. Lime takes 2-3 months to fully take effect, while sulfur shows changes in just 1-2 months. If you're in a hurry, sulfur is your best bet for lowering pH quickly. For raising pH, I've found that pelletized lime spreads more evenly than powdered lime and doesn't clump as much when worked into the soil.
Watering Wisdom: In Step 5, when you water to help the amendments settle, don't just give it a quick sprinkle. You need to moisten the soil 6-8 inches deep—this is about the depth of a standard trowel blade. I use a long screwdriver to check moisture levels after watering. If it comes out dry, I water again until it feels damp like a well-wrung sponge throughout that depth.
Pro Tips for Amend Soil For Planting
- Transforming your garden soil into nutrient-rich loam takes more than just throwing in compost.
- Soil Texture Test: In Step 1, when you squeeze your soil, pay attention to how it feels when it's dry versus wet.
- Layering for Stubborn Soil: If your soil is particularly tough (like heavy clay that feels like concrete when you work it), don't just add amendments once.
Frequently asked questions
Got questions about amending soil? You’re not alone—here are answers to the most common concerns to help you get it right the first time!
How often should I amend my soil?
For most gardens, amend soil once a year in early spring or late fall, before planting. If your soil is extremely compacted or depleted (like clay-heavy or sandy soil), you may need to amend it every 2–3 years or add organic matter seasonally. Test your soil first—if it’s already rich, less frequent amendments work!
Can I amend soil too much?
Yes! Over-amending—especially with synthetic fertilizers or excessive compost—can disrupt soil biology, raise salt levels, or create nutrient imbalances. Stick to a 5–10% organic matter ratio (e.g., 2–3 inches of compost per square foot) and avoid chemical-heavy mixes. When in doubt, less is more—your plants will thank you!
What’s the best time to amend soil in my climate?
Timing depends on your zone:
- Cool climates (Zones 3–7): Amend in early spring (before planting) or fall (6–8 weeks before frost).
- Warm climates (Zones 8–11): Focus on late winter/early spring or fall (avoid summer heat, which can dry out amendments).
- Tropical/rainy areas: Amend after heavy rains to prevent runoff.
Pro tip: Aim for soil temps between 50–75°F—ideal for microbial activity!
Are there cheap alternatives to compost or peat moss?
Skip expensive amendments with these budget-friendly swaps:
- Compost: Use free yard waste (leaves, grass clippings) or manure (aged cow, horse, or chicken).
- Peat moss: Try coconut coir (sustainable) or pine bark fines (local mulch suppliers).
- Perlite/vermiculite: Crushed egg shells (baked to kill bacteria) or sand (coarse, not fine).
Check local composting programs or urban farming groups—they often give away organic matter!
My plants still look unhealthy after amending. What went wrong?
Troubleshoot with this
Wrapping up and next steps
Amending your soil is like giving your plants a nutrient-packed hug—it sets the stage for healthy roots, vibrant growth, and bountiful harvests! 🌱 By balancing pH, enriching with organic matter, and adjusting texture, you’re creating the perfect foundation for thriving gardens.
Start small, test your soil, and experiment to find what works best for your space.
Now that you’re armed with the know-how, roll up those sleeves and get planting! Grab your gloves, pick a patch of soil, and watch your green thumb shine. Happy gardening! 🌿