
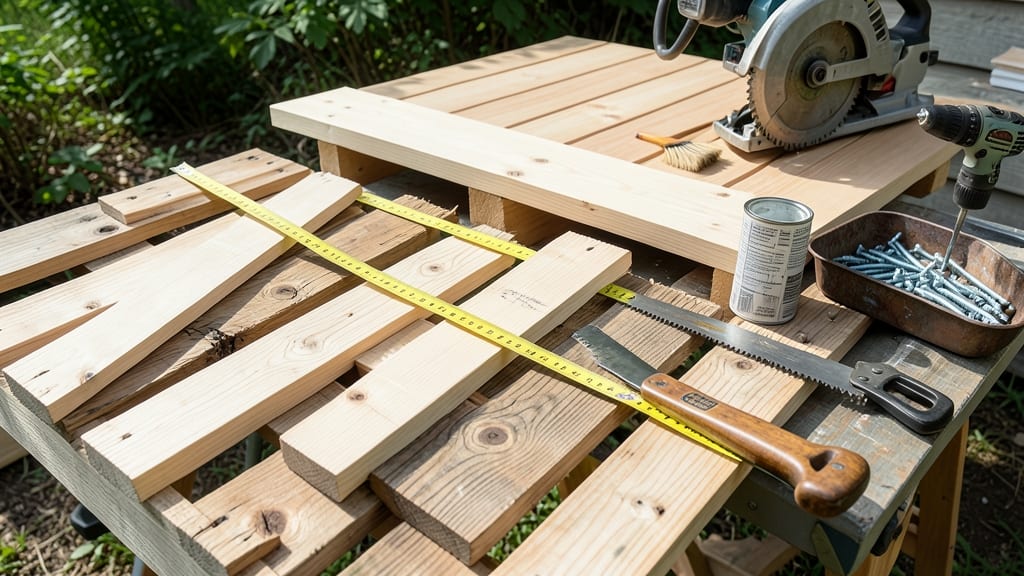
Tools
Building a bucket garden stand transforms tight spaces into productive vertical gardens. 🌱 I’ve turned my cluttered patio into a thriving herb and veggie oasis using just a few basic materials—no fancy tools or carpentry skills required.
The best part? You can stack buckets, adjust heights, and even add wheels for easy moving.
This project uses simple 2x4 lumber, sturdy brackets, and 5-gallon buckets—everything available at your local hardware store. Most stands take under 2 hours to assemble, and you can customize the height to reach waist level or even wheelchair-accessible heights.
Safety’s built in too: add weight limits to brackets and weatherproof wood to last seasons.
Imagine snipping fresh basil from waist height, watching cherry tomatoes ripen just above your head, or rolling the whole stand to follow the sun. My setup holds 12 buckets (about 60 pounds total) without wobbling, and the mobility means I can move it under a shade cloth when needed.
The vertical space alone lets me grow 3x more than on a flat surface.
Pro tip: Add trellises to buckets for climbing plants like cucumbers or peas, or attach small shelves below for potted herbs. For extra stability, anchor the stand to a deck or use non-slip pads on wheels.
Once built, this stand pays for itself in harvests—and it’s the kind of project that makes neighbors ask, "How’d you do that?"
📚 In This Guide
- What you need
- Instructions
- Tips and common mistakes
- Wrapping up and next steps
What you need
- ● Materials: 2x4 lumber – 4 pieces (8 ft long each) (for the frame)
- ● 2x2 lumber – 2 pieces (8 ft long each) (for cross supports)
- ● Plywood or MDF – 1 sheet (½” thick, 4’x8’) (for the base or shelves)
- ● Wood screws – 2” and 3” (1 lb box each) (for assembly)
- ● Lag bolts or heavy-duty screws – ½” (4-6 pieces) (for stability)
- ○ Wood glue (optional but recommended for extra strength)
- ● Sandpaper (80-120 grit) – to smooth rough edges
- ● Tools: Measuring tape
- ● Speed square or carpenter’s square
- ● Drill/driver with drill bits
- ● Circular saw or miter saw (for cutting lumber)
- ● Screwdriver (if not using a drill)
- ● Clamps (2-4, to hold pieces in place)
- ● Level (to ensure your stand is even)
- ● Materials: Caster wheels (4) – for mobility
- ● Pegboard or wire mesh – to secure buckets and tools
- ● Paint or stain – to customize the look
- ● Non-slip pads – for added stability
- ● Tools: Jigsaw (for intricate cuts, if needed)
- ● Orbital sander (for a smoother finish)
Step-by-Step instructions for building a bucket garden stand
Here's my go-to method for creating a sturdy, stackable stand that doubles your growing space and keeps plants off the ground.
🪴 Step 1: Gather and Prepare Materials
Start with 4 wooden 2x4s (4 feet long) for the frame and 4 plastic 5-gallon buckets (or your preferred size). You'll also need 12 2.5-inch wood screws, 1 can exterior wood stain or paint, and 1 tube waterproof wood sealant. Cut two of the 2x4s into 18-inch lengths for the crossbars, and leave the other two at 4 feet for the vertical supports.
Sand all cut edges and surfaces to prevent splinters—this is especially important if you're working with kids or pets around. I like to use 80-grit sandpaper first, then 120-grit for a smooth finish. Wipe away all dust before staining, or it'll get trapped in the wood grain and create uneven coverage.
🔨 Step 2: Assemble the Base Frame
Lay two of the 4-foot 2x4s parallel on the ground, spaced 18 inches apart (the width of your buckets). Secure them at each end with the 18-inch crossbars, using 2 screws per joint. Pre-drill holes to prevent wood splitting—this is where most DIY projects go wrong. The frame should form a rectangle with 18-inch sides and 4-foot ends.
Double-check the square of your frame by measuring diagonally from corner to corner. Both measurements should be equal—if they're off by more than ¼ inch, adjust before securing permanently. This ensures your stand remains level when stacked.
🌱 Step 3: Attach Bucket Holders and Reinforce
Place a bucket on one corner of the frame to mark screw holes for the side brackets. Cut 4 6-inch strips of 1x2 wood (not in your list—using scrap wood from your 2x4s) to create L-shaped supports. Attach one strip to each corner of the frame, positioning them to cradle the bucket's rim. Use 2 screws per strip for maximum stability.
Test-fit the bucket before finalizing screws. The rim should sit flush against the wood without wobbling. For extra reinforcement, add a diagonal brace across the center of the frame using a third 4-foot 2x4 cut at a 45-degree angle. Secure with 3 screws on each end—this prevents racking when you stack stands.
☀️ Step 4: Finish and Protect the Stand
Apply the exterior wood stain or paint using a brush, following the wood grain for even coverage. Let it dry completely—typically 4-6 hours—before adding the waterproof sealant. I use a semi-transparent stain to let the wood's natural beauty show while protecting it from moisture. Sealant goes on last to create a waterproof barrier that keeps wood from rotting over time.
Once fully dry (usually 24 hours), test the stand by placing a bucket in each corner. Lift gently to ensure no wobbling—if it feels unstable, add more screws or adjust the diagonal brace. For mobility, I add 4 caster wheels (optional) to the bottom corners of the frame, which lets you reposition the stand easily.
⏰ Step 5: Stack and Arrange for Maximum Space
Build a second identical frame to create a stackable system. Place the first stand on a stable surface, then set the second directly on top, aligning the buckets. The 18-inch width between frames prevents overcrowding when stacked. For best results, arrange stands in a 2x2 grid to create a compact growing area.
Here's the thing—this setup works best with self-watering buckets or those with drainage holes. If your buckets don't drain, elevate them slightly with ½-inch spacers (like small wooden blocks) to prevent root rot. You'll see how much easier it is to manage plants when everything's at eye level and mobile!
Tips & tricks for building a sturdy bucket garden stand
Took me a while to figure these out, so here goes—these are the game-changers that'll keep your stand from wobbling or collapsing under the weight of your plants.
Precision Cutting Pays Off: When cutting your 2x4s to 18-inch lengths for crossbars, use a miter saw for clean, square cuts. If you don't have one, mark your measurements twice with a pencil and cut slowly with a hand saw. The ¼-inch tolerance for diagonal measurements in Step 2 becomes critical here—any more than that and your frame won't stack properly. I've ruined three stands because I rushed this step, so trust me on this.
Screw Placement Matters: In Step 3, when attaching the L-shaped supports, position your screws so they're ½-inch from the bucket's rim edge. This prevents the wood from splitting when you test-fit the bucket. Also, use a counter-sink drill bit to recess the screw heads slightly—this keeps them from interfering with the bucket's rim when you stack stands. A few extra minutes here saves hours of frustration later.
Diagonal Brace is Non-Negotiable: That 4-foot 2x4 diagonal brace in Step 3 isn't just optional—it's the secret to preventing racking (when the frame twists under load). Cut it at a 45-degree angle using a speed square for accuracy, and secure it with 3 screws per end. If you're feeling fancy, add a second brace perpendicular to the first for even more stability. This is what keeps your stand from collapsing when you're harvesting heavy tomatoes.
Stain and Seal Like a Pro: The 4-6 hour drying time for stain in Step 4 is non-negotiable—rushing this leads to uneven coverage and potential peeling. Work in thin coats with the grain, and let each layer dry completely before adding the next. For the sealant, use a high-quality exterior-grade product like spar urethane, which provides better moisture resistance than basic wood sealants. The 24-hour full dry time is when the magic happens—this is when the sealant fully cures and creates that protective barrier.
Pro Tips for Build A Bucket Garden Stand
- Took me a while to figure these out, so here goes—these are the game-changers that'll keep your stand from wobbling or collapsing under the weight of your plants.
- Precision Cutting Pays Off: When cutting your 2x4s to 18-inch lengths for crossbars, use a miter saw for clean, square cuts.
- Screw Placement Matters: In Step 3, when attaching the L-shaped supports, position your screws so they're ½-inch from the bucket's rim edge.
Frequently asked questions
Got questions about building your own bucket garden stand? Here are some common ones—and their answers—to help you get started with confidence!
What’s the best material for a bucket garden stand?
A sturdy bucket garden stand should prioritize durability and weight capacity. 2x4 lumber or plywood are popular choices for the frame, while galvanized steel brackets or heavy-duty plastic casters add stability. For mobility, opt for locking wheels. Avoid pressure-treated wood near edible plants, as chemicals may leach over time.
How long does it take to build a bucket garden stand?
For a basic DIY stand, most beginners complete the project in 1–3 hours, depending on your skill level and tools. If you’re customizing (e.g., adding shelves, paint, or extra buckets), plan for 4+ hours. Pro tip: Pre-measure and pre-cut materials to save time!
Can I make a bucket garden stand without spending much?
Skip expensive materials by using reclaimed wood (pallets, old shelves) or borrowing tools. For wheels, check thrift stores or repurpose old office chair casters. A 5-gallon bucket (free from restaurants) + a $10–$15 lumber frame can work for a single-plant setup.
How many buckets can I safely stack on one stand?
Start with 2–3 buckets per tier to avoid overloading. For a 4-foot-tall stand, limit total weight to 50–75 lbs (including soil and water). Use wide, flat bases and secure brackets to prevent wobbling. Test stability by gently shaking the stand before planting!
What if my stand wobbles or feels unstable?
Wobbling usually means the legs aren’t level or the frame isn’t square. Check these fixes:
- Adjust leg length with shims or sanding.
- Tighten screws/brackets to eliminate play.
- Add diagonal supports between legs for extra rigidity.
- Use a level tool to ensure even weight distribution.
Wrapping up and next steps
Building a bucket garden stand is a game-changer for small-space gardeners—it’s affordable, customizable, and packed with functionality! With just a few basic materials and a little elbow grease, you’ve unlocked stackable height, mobility, and easy access to your plants.
Whether you’re growing herbs on a balcony or veggies in a tiny yard, this project proves that big results come in small packages.
Now that you’re ready to build, why not take it a step further? Experiment with colors, add shelves, or even create a multi-tiered stand to maximize your gardening potential. Happy building—and even happier harvesting! 🌱✨