
Propagation
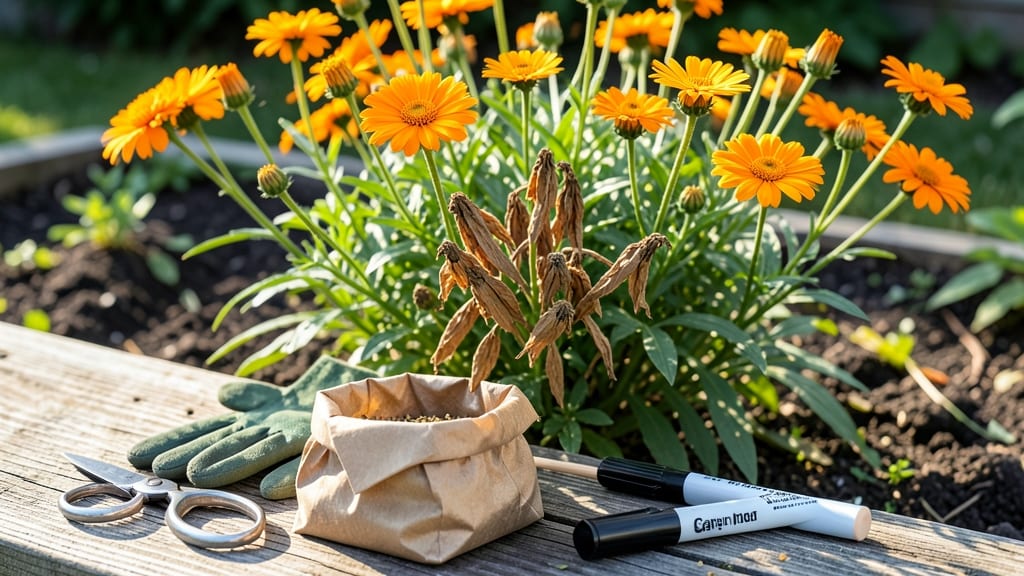
Collecting calendula seeds from your garden is easier than you think—once you know the right steps to follow. These vibrant 🌼 flowers don’t just brighten up your space; they’re also a goldmine for future plantings if you harvest their seeds correctly.
Timing is everything when it comes to seed collection. If you wait too long, the pods dry out and release their seeds prematurely, while harvesting too early means you’ll end up with immature seeds that won’t germinate. The key is knowing exactly when those pods are ready to be picked.
In this guide, I’ll walk you through the entire process—from identifying ripe seed heads to drying and storing them properly. Whether you’re a beginner gardener or a seasoned pro, these simple techniques will ensure you have healthy, viable seeds for next year’s garden.
Ready to save money and expand your garden? Let’s dive into the step-by-step method for collecting calendula seeds like a pro.
When and how to identify ripened calendula seed pods for harvesting
Collecting calendula seeds starts with identifying the perfect seed pods. These pods form after the vibrant orange and yellow flowers fade and dry. The key is watching for visual and tactile cues that signal maturity. Miss this window, and the pods may split open, scattering seeds prematurely.
First, look for color changes in the flower centers. When the petals wilt and turn brown, the center transforms from green to a papery brown. This shift indicates the pod is nearing readiness.
The pods themselves will also darken to a deep brown and develop a wrinkled texture, almost like dried paper.
🌼 Pro Tip: Gently shake a mature pod over your hand—you should hear a dry rattle inside, confirming seeds are fully developed. If it feels hollow or makes no sound, wait a few more days.
Timing matters too. Aim to harvest calendula seed pods in late summer to early fall, typically between July and October in most climates. In USDA Zone 6a, this aligns with mid-August to September, just before the first frost.
Early morning harvests are ideal because pods are dry and crisp, reducing the risk of humidity-related issues.
Use clean, sharp scissors or pruners to snip the stems just above the pod. Leave a short stem attached to make handling easier during drying. Avoid pulling pods off by hand, as this can damage the plant or cause seeds to spill out prematurely.
🌿 Seasonal Note: If you’re in a warmer climate (like Zones 8-10), calendula may continue producing seed pods into late fall or even winter. Monitor your plants closely, as extended wet conditions can lead to mold or rot in drying pods.
🌱 Step-by-Step: How to Spot Ready Calendula Seed Pods
- Step 1: Wait for petals to wilt and turn brown.
- Step 2: Check for deep brown, wrinkled pods with a papery texture.
- Step 3: Give pods a gentle shake—listen for a dry rattle.
- Step 4: Harvest in dry morning conditions to avoid humidity.
- Step 5: Cut stems with clean scissors, leaving a short stalk.
One common mistake is harvesting pods that are too green or still firm. These seeds won’t germinate well. Conversely, waiting too long risks the pods splitting open and losing seeds to the wind or rain. Aim for a dry, crisp pod that’s fully browned but hasn’t cracked yet.
💡 Bonus Tip: If you’re unsure about maturity, split open a pod and inspect the seeds. They should be plump, dark, and firm, not shriveled or dusty. Save a few seeds for a quick germination test later to confirm viability.
Once you’ve collected your pods, the next critical step is proper drying. This preserves seed quality and prevents mold. We’ll cover the best methods—air-drying vs. oven-drying—in the next section to ensure your seeds stay potent and ready for next year’s garden.
Proper drying techniques: air-drying vs. oven-drying for calendula seeds
Once you’ve harvested your calendula seed pods, the next critical step is drying them correctly to preserve seed viability. Improper drying can lead to mold growth or shriveled seeds that won’t germinate.
I’ve found that both air-drying and oven-drying work, but each has unique advantages depending on your climate and tools.
For air-drying, choose a spot with low humidity (below 50%) and good airflow, like a well-ventilated garage or sunny windowsill. Spread pods on a paper towel-lined tray and leave them undisturbed for 1-2 weeks. This method mimics natural conditions and is ideal for large batches of seeds.
Air-Drying
Pros
- Natural process preserves seed potency
- No equipment needed (cost-effective)
- Low risk of overheating or burning
Cons
- Slower process (1-2 weeks)
- Humidity-dependent (may fail in damp climates)
- Requires space for proper airflow
If you’re short on time or live in a humid climate, oven-drying is a faster alternative. Preheat your oven to 170°F (77°C)—never higher—to avoid damaging the seeds.
Place pods on a baking sheet lined with parchment paper and dry for 1-3 hours, checking frequently. The seeds are ready when they rattle easily when shaken.
Regardless of method, always avoid moisture exposure during drying. Store dried seeds in a paper envelope or glass jar with a silica gel packet to prevent mold. Label with the harvest date—seeds typically stay viable for 2-3 years under ideal conditions.
One common mistake I’ve seen is overdrying seeds in the oven, which can reduce germination rates. Test a few seeds by gently crushing them—if they powder easily, they’re overdone. Aim for a slightly crisp texture with intact seed coats.
For best results, combine methods: air-dry for 3-4 days first, then finish in the oven if needed. This balances speed and seed quality, ensuring you’ll have healthy calendula plants next season.