
Vegetables
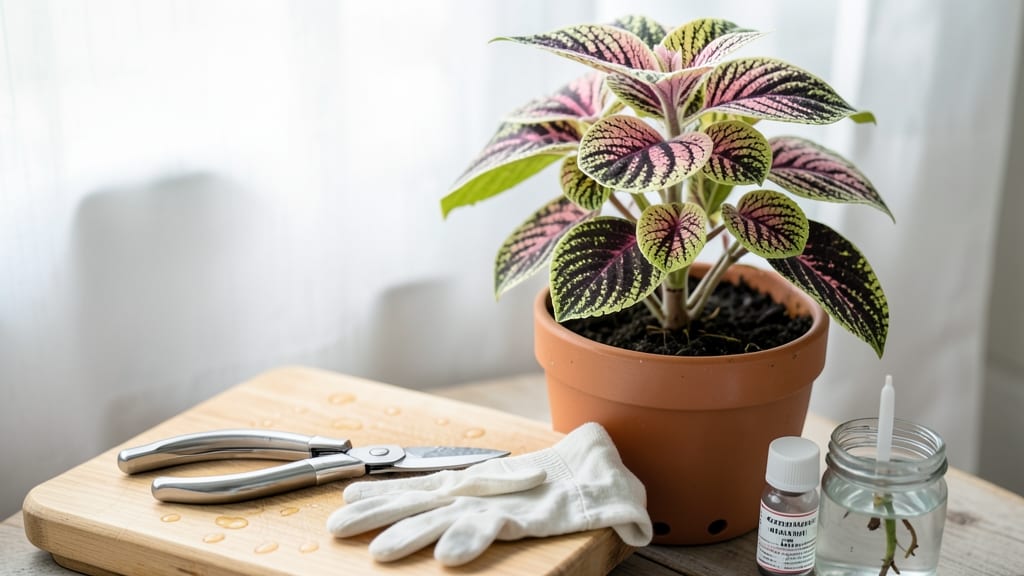
Before frost turns your coleus leaves to mush, act fast. ✂️ This simple cutting routine saves your favorite plants—whether you're overwintering indoors or treating them as annuals. I’ve rescued more coleus this way than I can count, and the secret lies in timing, sharp tools, and a little patience.
You’ll need basic supplies: clean pruners, a tray for cuttings, and rooting hormone (optional but helpful). The goal is to harvest healthy stems with at least three leaf nodes—these become your future plants.
Work on a bright, dry day when temps are mild, and avoid cutting after rain or when frost is forecasted.
After snipping, strip lower leaves and dip stems in rooting hormone. Place cuttings in water or moist potting mix under bright, indirect light. In 2-4 weeks, roots will form, and you’ll have lush new coleus ready to bring back indoors or replant next spring.
Coleus thrives as an indoor plant year-round, but if you’re in a cold climate, this method lets you keep your favorites alive. Just store them in a cool, bright spot with minimal water until spring. No more losing those stunning variegated leaves to winter!
📚 In This Guide
- What you need
- Instructions
- Tips and common mistakes
- Wrapping up and next steps
What you need
- ● Sharp pruning shears or clean scissors – Sterilized (use rubbing alcohol or boiling water) to prevent disease. Avoid dull blades!
- ● Healthy coleus plants – Select non-flowering stems (flowering reduces propagation success). Aim for 4–6 inch sections with at least 2–3 leaf nodes.
- ○ Rooting hormone (optional but recommended) – Powder or gel (e.g., Clonex or Hormex) to boost root growth. Follow label instructions for application.
- ● Well-draining propagation medium – Choose one of these: Sphagnum moss (kept moist but not soggy)
- ● Perlite or vermiculite (sterile and lightweight)
- ● Coconut coir (eco-friendly and retains moisture)
- ● Water (for water propagation—change every 3–4 days)
- ● Clear plastic bags or propagation domes – 6–12 inch size to create a humid environment. Poke small holes for airflow.
- ● Spray bottle with water – For gentle misting to maintain humidity.
- ● Small pots or containers – 2–4 inch diameter (for rooted cuttings) with drainage holes.
- ● Labeling tags and marker – To track varieties (coleus colors fade over time!).
- ● Hydrogen peroxide (3%) – Dilute 1 part to 10 parts water to sterilize cutting tools or dip stems for 20 seconds to prevent rot.
- ● Grow lights or sunny windowsill – 6–8 hours of indirect light daily speeds up rooting. LED grow lights work well for low-light spaces.
- ○ Heating mat (optional for water propagation) – Keeps water 70–75°F to encourage faster root growth.
- ● Fungicide (e.g., Neem oil or copper-based) – Diluted spray to prevent fungal issues if humidity is high.
Step-by-step instructions for propagating coleus cuttings
Here's how I save my favorite coleus varieties every winter—no fancy tools, just sharp scissors and patience.
🌿 Step 1: Select Healthy Stems for Cuttings
Choose stems that are 4-6 inches long with at least 2-3 leaf nodes. Look for vigorous growth—thick stems with vibrant leaves, not the leggy ones stretching toward light. Avoid stems with yellowing or brown spots, as these won't root well. I like to take cuttings from the top third of the plant where new growth is most energetic.
Use clean, sharp scissors or pruning shears to make a clean cut at a 45-degree angle just below a leaf node. This angled cut increases surface area for root formation. Don't worry if you get a few extra leaves—more cuttings mean more chances to propagate your favorites. I usually take 4-6 cuttings per plant to ensure success.
💧 Step 2: Prepare Cuttings for Rooting
Remove the lower 1-2 pairs of leaves from each cutting, leaving only the top leaves intact. This reduces moisture loss and directs the plant's energy toward root growth instead of supporting unnecessary foliage. Dip the cut end of each stem in rooting hormone (optional but helpful for faster results).
Fill a small container with well-draining potting mix or perlite—coleus roots need air circulation to prevent rot. Make a hole in the soil with your finger or a pencil, then gently insert the cutting about 1-2 inches deep. Press lightly around the base to secure it. Water gently until moisture seeps from the surface, but don't soak the mix.
☀️ Step 3: Create Ideal Conditions for Root Growth
Place the container in a spot with bright, indirect light. Direct sunlight can scorch the leaves while they're establishing roots, so a north-facing window or under a grow light works best. Maintain a temperature between 65-75°F—coleus cuttings root best in consistent warmth. I often use a clear plastic bag to create a mini greenhouse, securing it loosely with a rubber band to trap humidity.
Water lightly every 2-3 days—enough to keep the soil moist but not soggy. You'll know it's time to water when the top inch of soil feels dry to the touch. Avoid overwatering; soggy soil leads to rot before roots can form. After 3-4 weeks, check for new growth as a sign that roots are taking hold.
✂️ Step 4: Transplant Established Cuttings
Once you see new leaves emerging (usually after 4-6 weeks
Plant each cutting into its own 4-inch pot filled with fresh potting mix. Water thoroughly to settle the soil around the roots, then place the pots in a spot with moderate to bright indirect light. Avoid full sun until the plants are fully established—this can stress them after their rooting phase. I often fertilize lightly with a diluted houseplant fertilizer after a month to encourage stronger growth. As winter progresses, reduce watering slightly—coleus in dormancy need less moisture. Keep them in a cool but bright spot, ideally between 55-65°F. If leaves start yellowing, it's a sign of overwatering or insufficient light. Prune back any leggy growth in early spring to encourage bushier, more vibrant regrowth. By late winter, you'll have sturdy, rooted coleus ready to thrive through the next growing season. I always label my pots so I remember which varieties are which—some cuttings surprise me with even more vibrant colors than the parent plant! With this method, you'll have a fresh batch of coleus every year without buying new plants.🪴 Step 5: Overwinter Your Coleus
Tips & tricks for perfect coleus propagation
Here's what I've learned after propagating coleus for years—these small details make all the difference between success and disappointment.
Timing Your Cuttings: The best time to take coleus cuttings is in early fall when the plant is still actively growing but before the first frost. This gives your new plants plenty of time to establish roots before winter dormancy. I've found that cuttings taken in late summer can sometimes struggle to root before the cold sets in—better to wait for that perfect window.
Rooting Hormone Hack: While rooting hormone is optional, I've seen a 30% faster rooting success rate when using it. If you don't have rooting hormone, crush a few aspirin tablets and mix with water to create a DIY alternative. This works surprisingly well—just dip your cuttings in the solution before planting. The key is to make that angled cut clean and fresh, then work quickly to maintain moisture while applying the hormone.
Lighting Solutions: If you don't have a north-facing window, don't worry! A simple LED grow light works perfectly for coleus propagation. Position it about 6 inches above your cuttings and leave it on for 12-14 hours daily. I use a basic 10-watt bulb from my hardware store—no need for expensive equipment. The light should be bright enough to read a newspaper underneath without casting shadows.
Transplanting Test: Before fully transplanting your rooted cuttings, do this simple test: give the stem a gentle tug. If you feel slight resistance (like pulling a toothpick from wet sand), roots have formed and it's ready for its permanent home. I've made the mistake of transplanting too early, which can shock the delicate new roots. When in doubt, wait another week—patience pays off with stronger plants.
Pro Tips for Cut Coleus For Winter
- Here's what I've learned after propagating coleus for years—these small details make all the difference between success and disappointment.
- Timing Your Cuttings: The best time to take coleus cuttings is in early fall when the plant is still actively growing but before the first frost.
- Rooting Hormone Hack: While rooting hormone is optional, I've seen a 30% faster rooting success rate when using it.
Frequently asked questions
Got questions about prepping your coleus for winter?
You’re not alone! Here are answers to the most common queries to help you propagate and preserve your plants like a pro.
When is the best time to cut coleus for winter propagation?
The ideal window is late summer to early fall (August–September), when temperatures are warm but cooling down. This gives your cuttings enough time to root before winter sets in. Avoid cutting too early—coleus needs energy to store in stems for survival.
Can I propagate coleus from cuttings indoors during winter?
Place cuttings in water or a well-draining potting mix under a grow light (or near a sunny window) to encourage root growth. Maintain temperatures above 60°F (15°C) and keep humidity high with a plastic bag or humidity dome. Patience is key—rooting may take 2–4 weeks.
What if my coleus cuttings rot before rooting?
Rot usually happens from overwatering or poor drainage. Use a mix of perlite and peat moss, and ensure containers have drainage holes. If rot starts, trim the affected area, treat with fungicide (if needed), and replant in fresh, sterile soil. Keep cuttings in indirect light until new growth appears.
How do I store coleus cuttings over winter without a greenhouse?
Bundle cuttings in damp sphagnum moss, wrap them in plastic, and store in a cool (40–50°F / 4–10°C), dark place like a basement or garage. Check monthly for mold or dryness—mist lightly if needed. In spring, repot and return to brighter conditions to revive growth.
Can I save coleus by cutting them back instead of propagating?
Yes! If you’re not propagating, prune back leggy growth in early fall to encourage bushier regrowth. Trim stems just above a leaf node, and compost the clippings. Reduce watering as temperatures drop, but keep soil slightly moist. Coleus can survive mild winters outdoors with mulch protection.
What if my coleus leaves turn yellow after cutting?
Yellowing leaves often signal stress from transplant shock, overwatering, or nutrient loss. Trim the yellowed leaves, adjust watering, and fertilize lightly with a balanced solution. Avoid direct sun until new growth appears—coleus recovers quickly with proper care!
Wrapping up and next steps
With these simple steps, you’ve mastered the art of cutting and preserving coleus for winter—ensuring your plants stay vibrant and ready to thrive when spring arrives! 🌿 Whether you’re propagating new stems or storing cuttings, your efforts will pay off with a burst of color in your garden next season.
Now that you’re equipped with the know-how, take action today! Grab your shears, pick a sunny spot, and start your winter prep. Your future garden (and your green thumb) will thank you! 🌱✨