
Propagation
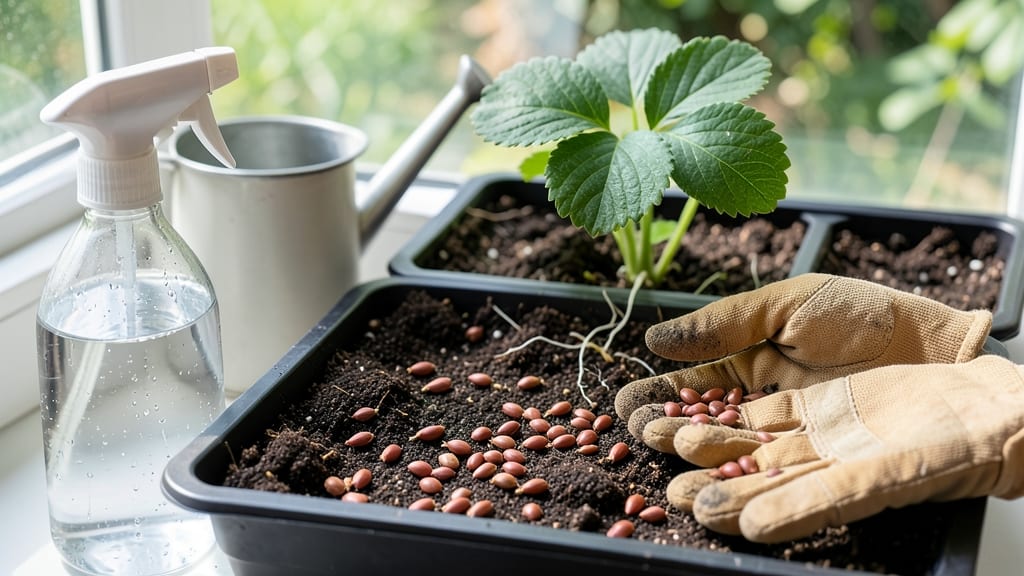
How to germinate strawberry seeds starts with a damp paper towel and a warm spot. 🌱 I learned the hard way that strawberry seeds need patience—but this method cuts waiting time in half while keeping failure rates low. The secret? Mimicking spring conditions right in your kitchen.
You'll need just three things: fresh seeds (or runners), damp paper towels, and a clear container with a lid. Strawberries thrive at 70-75°F, so a sunny windowsill or seedling heat mat works best.
Most seeds sprout within 7-14 days, though some stubborn ones take up to 3 weeks—consistency is key.
Once those first tiny leaves appear, transplant carefully into 2-3 inch pots with sterile potting mix. The roots are delicate at first, so avoid disturbing them. By month 3, you'll have sturdy seedlings ready for the garden—or you can keep them in containers for small-space growing.
Here's the game-changer: runners (the long stems with baby plants) root 10x faster than seeds. If you're impatient (like I am), grab a friend's strawberries in spring—they'll give you ready-to-grow plants in weeks. Either way, your first harvest could be just 3-4 months away.
📚 In This Guide
- What you need
- Instructions
- Tips and common mistakes
- Wrapping up and next steps
What you need
- ● Fresh strawberries – Choose organic or homegrown for the best germination rates (1–2 berries per batch).
- ● Paper towels – 2–3 sheets (unbleached, seedling-safe). Avoid scented or colored towels.
- ● Plastic zip-top bags – 1–2 quart-sized bags (or a clear container with a lid).
- ● Spray bottle – 4–8 oz with water (or a clean misting tool).
- ○ Permanent marker – To label your bags (optional but helpful!).
- ● Small bowl or plate – For rinsing seeds (if needed).
- ○ Toothpick or tweezers – For gently separating seeds (optional but handy!).
- ● Grow lights or sunny windowsill – A warm, bright spot (60–75°F) is ideal for sprouting.
- ● Seedling trays or pots – 2–3 inch pots or a flat tray with drainage (for transplanting later).
- ● Potting mix – Lightweight, well-draining mix (e.g., 50% peat moss + 50% perlite).
- ● 💡 Seed prep: Rinse seeds in water to remove fruit residue, then pat dry before planting.
- ● 🌡️ Temperature control: Place your bags near a heat source (like a fridge top) for faster germination.
- ● ✨ Patience hack: Check for sprouts in 7–14 days—don’t overwater!
Step-by-Step instructions for germinating strawberries in damp paper towels
Here's the quick method I swear by for fast, healthy strawberry sprouts—no soil, no fuss, just reliable results.
🌱 Step 1: Select and Prepare Your Strawberry Seeds
Strawberry seeds are tiny, so I use a toothpick to handle them carefully. Start by placing 4-5 seeds (for your 4-serving yield) on a clean, damp paper towel—don't crowd them, or they'll compete for space. The seeds need to stay in contact with moisture to germinate, so fold the towel over them like a sandwich.
Place the folded towel in a resealable plastic bag (like a quart-sized ziplock) and seal it loosely. The bag creates a humid environment, but don't make it airtight—you want airflow to prevent mold. I label the bag with the date so I don't forget when I started them.
💧 Step 2: Store in a Warm, Dark Spot
Strawberry seeds germinate fastest at 70-75°F, so I place the bag on top of my fridge or in a warm cupboard. Avoid direct sunlight here—you're not looking for green leaves yet, just root development. Check the towel every 2-3 days to ensure it stays damp but not soggy.
If the towel dries out, mist it lightly with water and reseal. You'll see the first sprouts in 7-14 days, though some stubborn seeds may take up to 3 weeks. The moment you spot a tiny white root poking out, it's time to move them.
☀️ Step 3: Transfer to Light for Leaf Growth
Once roots reach about ½ inch long, carefully unfold the towel and place the sprouted seeds on a fresh, damp paper towel. This time, I lay them flat in a shallow dish with a lid (like a takeout container) to keep humidity high. Move the dish to a bright, indirect light spot—think 12-14 hours of light daily, but avoid harsh midday sun.
You'll notice the first true leaves (not the tiny seed leaves) emerge in 5-7 days. These leaves are your signal that the seedlings are ready for their next phase. Keep the towel moist but never soggy—overwatering here causes rot faster than you can blink.
🪴 Step 4: Prepare for Transplanting
When the seedlings have 2-3 true leaves and roots are 1-2 inches long, they're ready to move to small pots. Fill 2-inch pots with a light potting mix (I use a 50/50 blend of peat and perlite for drainage). Gently press each seedling into the soil, covering the roots but leaving the leaves exposed.
Water lightly to settle the soil, then place the pots under a grow light or in a sunny window. Strawberries are finicky about transplant shock, so I keep them in a humid environment for the first week. Watch for wilting—it's your cue to adjust water or light immediately.
⏰ Step 5: Harden Off Before Outdoor Planting
Two weeks before your last frost date, start hardening off the seedlings. Move them outside for 1-2 hours daily, gradually increasing time over 7-10 days. Choose a sheltered spot to avoid windburn. You'll know they're ready for the garden when they tolerate a full day outside without wilting.
Plant in well-draining soil with 12-18 inches between plants to give roots room to spread. Mulch heavily to retain moisture and suppress weeds—strawberries hate competition. Your fast-start method pays off here with vigorous, established plants ready to fruit.
Tips & tricks for perfect strawberry germination
These little-known strategies will help you skip the common pitfalls and get those strawberry sprouts thriving faster than you'd expect.
Seed Spacing Secret: When placing your 4-5 seeds on the damp paper towel in Step 1, aim for about 1 inch between them. I learned this the hard way—crowding seeds leads to uneven growth, and you'll end up with a few strong sprouts and several weak ones that never catch up. Think of it like giving each seed its own tiny real estate plot.
Temperature Matters: The 70-75°F range in Step 2 is non-negotiable for speedy germination. If your kitchen runs cooler, place the bag on top of your fridge or near a sunny window (but not in direct sun). I've seen germination times stretch to 3 weeks when seeds sit in a cool 65°F space—patience is key, but warmth is your ally here. Pro tip: Use a small thermometer to monitor your spot if you're unsure.
Light Transition Timing: Moving seeds to light in Step 3 should happen precisely when roots hit ½ inch—not before. I've watched impatient gardeners rush this step, and the seedlings turn leggy and weak, stretching toward any available light. That ½ inch root is your green light to introduce them to their first taste of photosynthesis. The 12-14 hours of light daily is crucial too—set a timer if you're using natural light to maintain consistency.
Pro Tips for Germinate Strawberry
- These little-known strategies will help you skip the common pitfalls and get those strawberry sprouts thriving faster than you'd expect.
- Seed Spacing Secret: When placing your 4-5 seeds on the damp paper towel in Step 1, aim for about 1 inch between them.
- Temperature Matters: The 70-75°F range in Step 2 is non-negotiable for speedy germination.
Frequently asked questions
Got questions about germinating strawberries? You’re not alone—this method is simple but can feel tricky at first! Below, we’ve rounded up the most common questions (and answers) to help you avoid pitfalls and grow those sweet sprouts like a pro.
How long does it take for strawberry seeds to germinate?
Most strawberry seeds sprout within 7–14 days when kept in a warm, moist environment (around 70–75°F). Patience is key—some stubborn seeds may take up to 3 weeks. If you’re not seeing sprouts after 21 days, try repeating the process with fresh seeds or check for mold (a sign of over-moisture).
Can I germinate strawberry seeds in winter?
Strawberries don’t need sunlight to germinate—just warmth and moisture. Place your paper towel setup near a heat source (like a sunny windowsill or heating mat) to maintain consistent temps. If your home is chilly, a seedling heat mat ($10–$20) can speed things up. Just avoid drafts or cold spots!
Why aren’t my strawberry seeds sprouting?
Common culprits include:
- Too dry: Seeds need constant moisture—mist the towel daily or use a plastic bag to trap humidity.
- Too cold: Strawberries thrive at 70°F+. Move them closer to warmth (e.g., fridge top, not inside!).
- Old seeds: Store-bought seeds often lose viability after 1–2 years. Buy fresh or harvest seeds from organic strawberries.
- Mold: Fuzzy white/green growth? Toss the batch—mold kills seeds.
Try again with sterilized tools (boil tweezers/paper towels) and fresh seeds!
What’s the best paper towel for germinating strawberries?
Any thin, lint-free paper towel works—avoid textured or scented brands. Bounty or Viva are popular choices because they’re absorbent but don’t shred easily. Fold it into a 4–6 layer sandwich to hold moisture without drowning the seeds. Pro tip: Use distilled water to prevent mineral buildup!
Can I plant the sprouted seeds directly into soil?
Yes! Once sprouts have 1–2 inches of roots and a tiny leaf (about 1 week post-germination), they’re ready for soil. Gently transplant them into moist potting mix with the roots spread out. Use a small pot (4–6 inches) and keep soil damp but not soggy. Place in bright, indirect light for 2–3 weeks before moving outdoors.
Bonus Tip:
Label your sprouts! Strawberry varieties (like Albion or Seascape) have different growth habits. Use a toothpick + marker to track which seeds you planted—saves headaches later when identifying plants.
Wrapping up and next steps
You’ve got everything you need to kickstart your strawberry-growing journey! 🌱 By following these simple steps—moist paper towels, patience, and a little warmth—you’ll soon see those tiny green sprouts breaking through, ready to become thriving plants.
The key is consistency: keep those seeds cozy and hydrated, and soon you’ll be transplanting them into soil with confidence.
Now that you’re armed with the know-how, why not take the next step? Whether you’re planting in containers, garden beds, or even hanging baskets, your strawberry adventure is just beginning. Happy growing—your future harvests will taste even sweeter knowing you grew them from scratch! 🍓✨