
Size
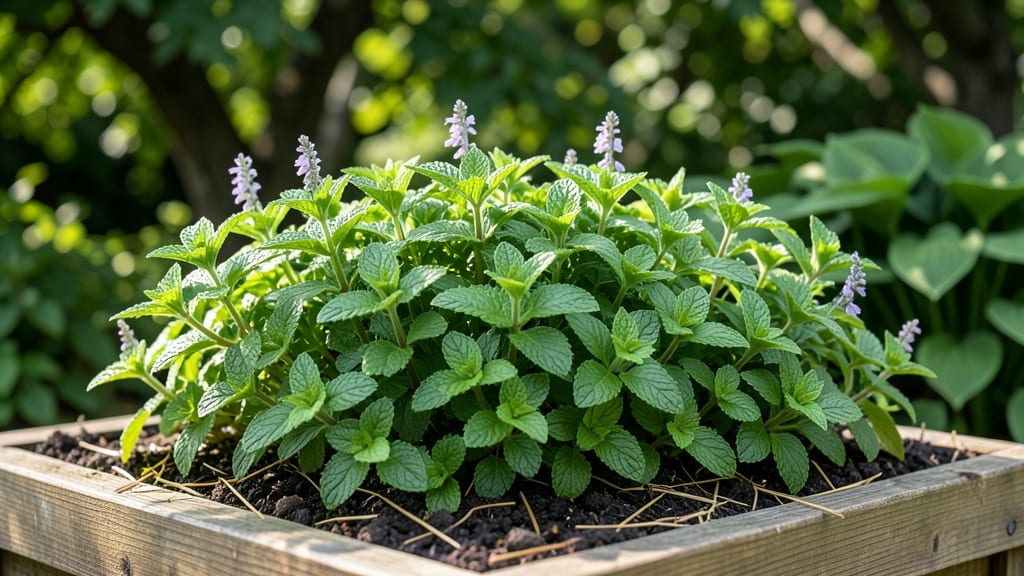
How to grow the chocolate mint herb means unlocking rich cocoa notes in your garden. 🌿 I’ve battled its aggressive roots before, but with the right approach, this fragrant herb thrives without taking over. The key? Containers or careful spacing—it rewards patience with lush, aromatic foliage perfect for teas, desserts, or cocktails.
Start with cuttings (easier than seeds) in well-draining soil and partial shade. It loves moisture but hates soggy roots—think of it like a thirsty friend who needs boundaries. A 12-inch pot or 18-inch garden spacing keeps it manageable, while regular pruning after harvests prevents sprawl.
By summer, you’ll have glossy, chocolate-scented leaves ready to harvest. The aroma alone makes it worth growing, but the versatility—from mojitos to homemade chocolates—is the real magic. Just watch for powdery mildew in humid climates.
Container growers, rejoice: this herb adapts beautifully to balconies or windowsills. For in-ground plantings, mulch heavily to contain roots. With these tricks, you’ll enjoy chocolate mint’s charm without the chaos.
📚 In This Guide
- What you need
- Instructions
- Tips and common mistakes
- Wrapping up and next steps
What you need
- ● Chocolate mint seeds or cuttings: Choose high-quality seeds (e.g., from a trusted nursery) or propagate from an existing plant. Pro tip: Cuttings root faster than seeds!
- ● Containers or garden bed: Containers: 6–12-inch pots with drainage holes (1–2 plants per pot). Use fabric grow bags or terracotta pots to prevent root invasion.
- ● Garden bed: A 6-inch-deep, well-drained spot in partial shade (4–6 hours of sunlight daily). Avoid full sun—it can scorch the leaves!
- ● Potting soil: A well-draining, peat-based mix (e.g., 50% potting soil + 50% perlite/sand) to prevent soggy roots.
- ● Watering can or spray bottle: Mint loves moisture but hates waterlogged soil. A gentle spray works best for seedlings.
- ○ Organic fertilizer (optional but helpful): A balanced 10-10-10 or fish emulsion (diluted to half-strength) to boost growth.
- ● Pruning shears or scissors: For trimming stems (sterilize with rubbing alcohol!).
- ○ Gloves (optional): Mint can be slightly fuzzy—wear gloves if you’re sensitive to texture.
- ○ Mulch (optional): Straw or shredded leaves to retain moisture and suppress weeds.
- ○ Spray bottle with neem oil (optional): For pest control (e.g., aphids or spider mites).
- ● Patience: Chocolate mint grows aggressively—expect fast spread (hence the "root invasion" warning!). Plan to harvest often or contain it in pots.
- ● Climate check: Thrives in USDA Zones 3–9. If you’re in a hotter zone, prioritize shade and consistent watering.
- ● Space planning: If growing in the ground, install a root barrier (e.g., buried plastic or metal edging) to keep it contained.
Step-by-step instructions for growing chocolate mint herb
This fragrant spreader thrives with the right balance of sun, soil, and containment—here's how to keep it lush without letting it take over.
🌱 Step 1: Select and Prepare Containers for Controlled Growth
Chocolate mint spreads aggressively, so containment is key. Choose wide, shallow containers (at least 12 inches in diameter) with drainage holes—plastic or terra cotta works well. I use two 12-inch pots for my four-plant setup, placing a 3-inch layer of gravel at the bottom to prevent root congestion. The shallow depth discourages deep rooting while giving the plant room to spread horizontally.
Fill the pots with well-draining potting mix—avoid garden soil, which compacts and suffocates roots. Mix in a slow-release fertilizer (like 5-10-5) at planting time for steady nutrition. Press the soil down lightly but don’t compact it; you want it loose enough for roots to penetrate easily. Water thoroughly until it drains from the bottom holes.
☀️ Step 2: Plant and Position for Optimal Light
Plant 4-6 inch tall chocolate mint starts (or divide established plants) 2-3 inches apart in each container. The spacing gives roots room to expand without crowding. If using seeds, sow them ¼ inch deep and thin to the same spacing once seedlings are 2 inches tall. Here’s the thing—chocolate mint loves morning sun and afternoon shade in hot climates, but it tolerates full sun if kept consistently moist.
Place containers in a spot with 4-6 hours of direct sunlight daily. If growing indoors, a south-facing window or grow light (12-14 hours/day) works best. Watch for leggy growth—if stems stretch toward the light, it’s too far away. You’ll see strong, bushy plants when leaves stay dark green and compact. Mulch the soil surface with 1 inch of shredded bark to retain moisture and suppress weeds.
💧 Step 3: Water and Feed for Vigorous, Fragrant Growth
Chocolate mint thrives on consistent moisture but hates soggy soil. Water when the top 1-2 inches of soil feel dry—usually every 2-3 days in warm weather, less often in cooler months. I water deeply at the base, avoiding the leaves to prevent fungal issues. The plant’s fragrance intensifies when it’s well-watered, so don’t skimp.
Feed every 4-6 weeks with a balanced liquid fertilizer (like 10-10-10) diluted to half strength. Over-fertilizing leads to weak growth and fewer leaves for harvesting. Prune back one-third of the plant after flowering to encourage bushier, more fragrant foliage. This also prevents the plant from becoming leggy and woody.
✂️ Step 4: Prune and Divide to Maintain Health and Prevent Spread
Regular pruning keeps chocolate mint compact and fragrant. Trim back overgrown stems to 3-4 inches in early spring and again after flowering. Use clean, sharp scissors to avoid damaging the plant. Here’s a pro tip: harvest leaves in the morning when essential oils are at their peak. You’ll notice the scent is strongest right after pruning—this is your cue that the plant is thriving.
Every 2-3 years, divide crowded plants to prevent root competition. Remove the plant from its container, separate the root ball into smaller sections with 3-4 stems each, and replant in fresh potting mix. This rejuvenates the plant and gives you more chocolate mint to share or propagate. Discard any roots that look mushy or discolored—these are signs of rot.
🪴 Step 5: Overwinter and Propagate for Year-Round Enjoyment
Chocolate mint is perennial in USDA zones 5-9 but often treated as an annual in colder climates. In fall, reduce watering and stop fertilizing as growth slows. Move containers to a sheltered spot (like a garage or basement) where temperatures stay above 30°F. If frost threatens, cover the pot with burlap to protect the plant.
To propagate, snip 4-inch stem cuttings in spring or early summer. Remove the lower leaves, dip the cut end in rooting hormone, and place in moist potting mix. Keep the cuttings in bright, indirect light and mist lightly until roots form (3-4 weeks). You’ll know they’ve rooted when new leaves appear. This is how I expand my chocolate mint collection without spending a dime!
Tips & tricks for growing fragrant chocolate mint herb
Here's what nobody tells you about keeping chocolate mint lush and contained—these tricks make all the difference.
Container Depth Matters: Chocolate mint's aggressive roots need horizontal space more than depth. The 12-inch diameter containers specified give roots room to spread without congesting. If you must use deeper pots, add a 3-inch gravel layer at the bottom to discourage deep rooting—this mimics the plant's natural shallow growth habit. I've seen chocolate mint take over entire garden beds when planted too deeply, so shallow is better.
Light Balance is Everything: That 4-6 hours of direct sunlight recommendation isn't just about growth—it's about flavor. Too much sun (especially afternoon heat) can make leaves bitter, while too little causes leggy, weak plants. I've found that placing pots near a south-facing window with morning sun and afternoon shade gives the perfect balance. For indoor grow lights, 12-14 hours of light mimics natural day length and prevents stretching.
Pruning for Peak Fragrance: The one-third pruning after flowering isn't just about tidiness—it's when the plant's essential oils concentrate most intensely. I harvest leaves immediately after pruning and notice the scent is strongest right then. For maximum flavor, always harvest in the morning when essential oils are at their peak concentration. This simple timing makes a huge difference in the mint's aromatic quality.
Overwintering Strategy: When temperatures drop below 30°F, chocolate mint's growth slows dramatically. I've learned that moving pots to a sheltered spot (like a garage) and reducing watering prevents winter die-off. The key is keeping roots above freezing while allowing natural dormancy. If you must protect from frost, burlap works better than plastic—it breathes while shielding from cold winds.
Pro Tips for Grow Chocolate Mint Herb
- Here's what nobody tells you about keeping chocolate mint lush and contained—these tricks make all the difference.
- Container Depth Matters: Chocolate mint's aggressive roots need horizontal space more than depth.
- Light Balance is Everything: That 4-6 hours of direct sunlight recommendation isn't just about growth—it's about flavor.
Frequently asked questions
Got questions about growing chocolate mint? You’re not alone—this fragrant herb has a few quirks! Here are answers to the most common questions to help you cultivate a thriving (and non-invasive) chocolate mint patch.
Is chocolate mint hard to grow?
Not at all! Chocolate mint is one of the easiest herbs to grow—it thrives in partial shade, tolerates moist soil, and spreads quickly. Just be mindful of its invasive nature (more on that below) and give it consistent water until established. With the right conditions, you’ll have a lush, aromatic plant in no time! Pro tip: Start with a container if you’re worried about it spreading.
How long does it take for chocolate mint to grow?
You’ll see noticeable growth within 2–4 weeks after planting, especially if you keep the soil moist. Once established, it grows aggressively, reaching 12–18 inches tall with a spread of 1–2 feet per year. For the fastest results, plant in spring or early summer when temperatures are mild.
How do I prevent chocolate mint from taking over my garden?
Chocolate mint spreads via runners, so containment is key. Grow it in containers with drainage holes or use underground barriers (like buried plastic pots) to limit its reach. If it escapes, trim the runners regularly or replant in a dedicated spot. Warning: It’s best to avoid planting it near other herbs or flowers—it’ll outcompete them!
Does chocolate mint taste like real chocolate?
Close, but not exactly! It has a warm, minty-sweet flavor with hints of cocoa and peppermint. While it’s delicious in teas, desserts, and cocktails, it’s not a direct chocolate substitute. Pair it with vanilla, citrus, or berries to enhance its chocolatey notes.
Can I grow chocolate mint indoors?
Chocolate mint does well indoors near a sunny window or under grow lights. Use a 6–8 inch pot with drainage and keep the soil consistently moist. Just watch for leggy growth—rotate the pot occasionally for even light exposure. Bonus: It’s perfect for kitchen windowsills!
Are there any pests or diseases I should watch for?
Chocolate mint is generally pest-resistant, but keep an eye out for aphids, spider mites, or fungal issues (like powdery mildew) in humid conditions. Improve airflow, avoid overwatering, and treat pests with neem oil if needed. Healthy plants are less prone to problems!
Wrapping up and next steps
Growing chocolate mint herb is a rewarding journey that brings fragrant, flavorful rewards to your garden—or even your windowsill! 🌱 With the right soil, sunlight, and care, you’ll enjoy its rich aroma and versatility in teas, desserts, and cocktails without worrying about it taking over.
Remember, patience and consistency are key, and soon, you’ll be harvesting lush, vibrant leaves to share with friends.
Now that you’re equipped with the know-how, why not start small? Try growing a few plants in pots first, and once you’ve mastered the basics, expand your mint garden. Happy growing—and may your kitchen always smell like a sweet, minty paradise! 🍫🌿