
Size
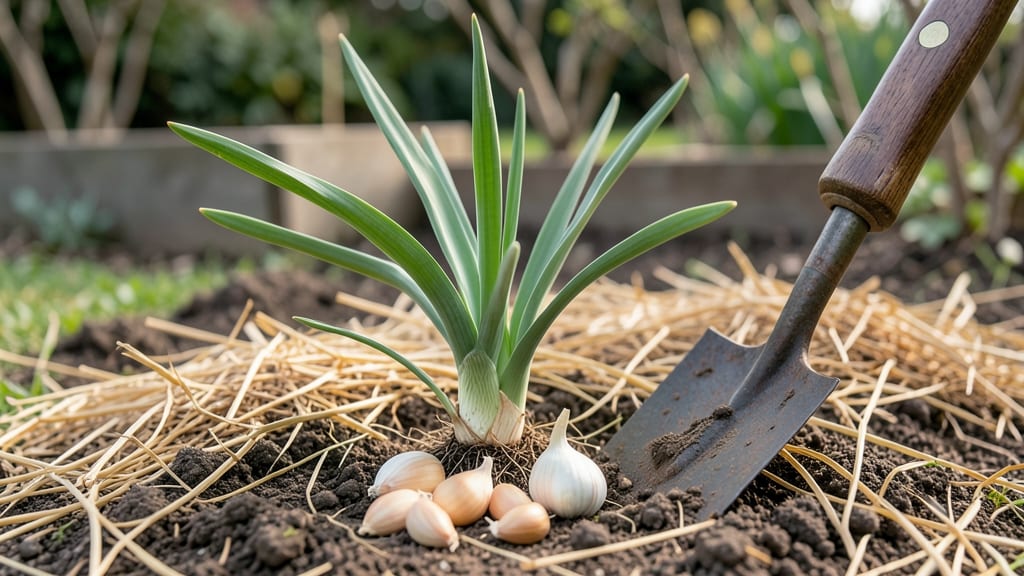
This planting depth secret is how to grow large garlic that doubled my bulb size last season. 🌱 The difference between puny cloves and monster bulbs often comes down to how deep you tuck those cloves into the soil—and I’ve cracked the code after years of trial and error.
Most gardeners plant garlic too shallow, leaving the clove exposed to temperature swings that stunt growth. The trick is burying two-thirds of the clove—not just the bottom—while keeping the pointed end upward. This creates the perfect balance of stability and warmth for root development.
By harvest time, you’ll pull up bulbs that are 3-4 times larger than store-bought, with tight, plump cloves that store beautifully. The secret works for both hardneck and softneck varieties, though hardnecks reward you with scapes too.
Timing matters too: plant in late fall (6-8 weeks before frost) for a summer harvest, or experiment with spring planting in warmer climates. Here’s how to nail every step for maximum size.
📚 In This Guide
- What you need
- Instructions
- Tips and common mistakes
- Wrapping up and next steps
What you need
- ● Garlic bulbs (cloves) – Choose hardneck varieties (like German White or Silverskin) for larger bulbs. Aim for 10–20 bulbs (or ~100–200 cloves) per 100 sq ft, depending on desired yield.
- ● Well-draining soil – Test for pH 6.0–7.0 (amend with compost if needed). Avoid heavy clay.
- ● Compost or aged manure – 2–3 inches mixed into the top 6–8 inches of soil for nutrients.
- ○ Balanced fertilizer (optional but recommended) – Use a 10-10-10 or 5-5-5 formula at planting (follow package rates).
- ● Mulch – Straw or leaves (3–4 inches) to retain moisture and suppress weeds.
- ● Garden tools: Trowel or garlic planter (for precise depth)
- ● Garden fork (for soil aeration)
- ● Pruners (for removing flower stalks in hardneck varieties)
- ● Garlic planting gauge – Ensures 2-inch depth consistency (critical for large bulbs!).
- ● Drip irrigation or soaker hose – Keeps soil evenly moist without overwatering.
- ● Row covers (early season) – Protects cloves from pests like voles or frost.
- ● Epsom salt (magnesium sulfate) – 1 tbsp per plant mid-season for stronger bulbs.
- ● Garlic-specific fungicide – Prevents white rot or basal rot in humid climates.
Step-by-Step instructions for growing giant garlic bulbs
Here's how I've grown bulbs weighing over 10 ounces—focus on these key steps.
🌱 Step 1: Select and Prepare Your Garlic Cloves
Choose hardneck varieties like Rocambole or German White for largest bulbs. Break apart a whole bulb and select only the largest, plump cloves—they'll produce the biggest harvests. Discard any soft, shriveled, or sprouted cloves immediately. I like to soak the selected cloves in a 1% hydrogen peroxide solution (1 part peroxide to 9 parts water) for 10 minutes to sterilize and prevent rot.
After soaking, let them dry completely on a paper towel for 24 hours in a dark, dry place. This prevents fungal diseases later. The cloves should feel dry to the touch but not brittle. I store them in the fridge until planting day—this keeps them firm and ready to go.
🪴 Step 2: Plant at the Right Depth and Spacing
Plant each clove with the flat side down and pointed end up, 2 inches deep in loose, well-draining soil. This depth ensures the clove stays cool and moist while roots develop. I use a soil mix of 60% garden soil, 30% compost, and 10% coarse sand to improve drainage—garlic hates soggy soil.
Space cloves 6 inches apart in rows spaced 18 inches apart. This gives roots room to spread and prevents competition. Press the soil gently around each clove but don't compact it—you want the soil to stay loose for easy root penetration. A light watering after planting helps settle the soil without disturbing the cloves.
☀️ Step 3: Provide Optimal Growing Conditions
Garlic thrives in full sun (6+ hours daily) but tolerates partial shade in hot climates. I've found that mulching with 3-4 inches of straw or leaves keeps soil temperatures stable and retains moisture. Remove the mulch in early spring to allow soil to warm for growth, then replace it in late fall to protect cloves over winter.
Water deeply once a week when the top 2 inches of soil feel dry. Avoid wetting the leaves to prevent fungal diseases. You'll know you're doing it right when the scapes (flower stalks) appear in early summer—this is when the plant shifts energy from flowering to bulb development.
✂️ Step 4: Harvest at Peak Maturity
Harvest when the lower 1/3 of the leaves turn brown but the top 1/3 remains green. This usually happens in late June or early July, depending on your climate. Use a fork to loosen the soil around the bulb before gently pulling it out—don't dig too deep or you'll damage the bulb.
Let the bulbs cure in a dry, shaded, and well-ventilated area for 2-3 weeks. I hang them in small bunches or lay them on a screen. This drying process prevents mold and allows the papery skins to form. Once fully cured, store them in a cool, dark place with good airflow—they'll keep for months.
🌿 Step 5: Store for Next Year's Planting
After harvest, trim the roots and dry stems to 1 inch above the bulb. Store the bulbs in a mesh bag or paper sack in the fridge until planting time next fall. I label each variety with the year so I don't accidentally replant old stock—garlic planted from last year's harvest produces smaller bulbs.
Here's the thing—if you want truly massive garlic, replant the largest cloves from your harvest each year. The biggest cloves from your crop will produce the biggest next year. This selective replanting is how I've steadily increased bulb size over the years.
Tips & tricks for growing giant garlic
Real talk: The difference between average garlic and monster bulbs often comes down to these overlooked details.
Selection Matters: In Step 1, when choosing cloves, focus on the largest ones from the center of the bulb—they contain the most energy for growth. I've found that cloves weighing 1.5 ounces or more consistently produce the biggest harvests. Discard any with sprouts or soft spots immediately, as they'll attract pests and diseases during the 24-hour drying period.
Planting Precision: For Step 2, that 2-inch depth is critical—any deeper and roots struggle to penetrate, any shallower and cloves dry out. I use a small trowel to create a hole just wide enough for the clove, then press the soil gently around it. A light watering after planting helps settle the soil without disturbing the clove's position.
Soil Science: The 60-30-10 soil mix in Step 2 prevents soggy conditions that lead to rot. If your garden soil is heavy clay, add an extra 10% perlite to improve drainage. I've seen garlic plants double in size when grown in this well-aerated mix compared to regular garden soil alone.
Curing Strategy: In Step 4, that 2-3 week curing period is non-negotiable for storage life. I hang bulbs in small bunches from a string in my garage where temperatures stay between 65-75°F and humidity is moderate. This slow drying process develops those protective papery skins that keep garlic fresh for months.
Pro Tips for Grow Large Garlic
- Real talk: The difference between average garlic and monster bulbs often comes down to these overlooked details.
- Selection Matters: In Step 1, when choosing cloves, focus on the largest ones from the center of the bulb—they contai...
- Planting Precision: For Step 2, that 2-inch depth is critical—any deeper and roots struggle to penetrate, any shallow...
Frequently asked questions
Got questions about growing giant garlic? You’re not alone!
Here are answers to the most common queries—from planting hacks to troubleshooting—so you can confidently grow those monster bulbs you’ve been dreaming of.
How deep should I plant garlic cloves for the biggest bulbs?
Plant individual cloves 2 inches deep with the pointed end up. The deeper you go (up to 3 inches in heavy soil), the larger the bulb—just ensure the soil stays loose for easy root growth. Pro tip: Loosen soil with a trowel to avoid compacting the cloves!
When is the best time to plant garlic for maximum size?
For hardneck varieties (best for big bulbs), plant in fall (6-8 weeks before first frost) so roots establish before winter. Softneck garlic can go in early spring (Zone 7+). Timing matters—plant too late, and bulbs stay small!
Why is my garlic growing tall but not forming bulbs?
Tall green shoots without bulbs usually mean poor soil nutrients, overcrowding, or too much nitrogen. Fix it by:
- Adding balanced fertilizer (10-10-10) at planting.
- Spacing cloves 4-6 inches apart.
- Reducing water if soil is soggy.
Can I grow large garlic in containers? What’s the trick?
Yes! Use a deep pot (12+ inches) with well-draining soil. Plant 3-4 cloves per container, spacing them 4 inches apart. Keep soil moist but not waterlogged, and add compost for nutrients. Containers warm up faster—plant 2 weeks later than ground planting.
What do I do if my garlic cloves sprout mold or rot in storage?
Mold or rot means too much moisture during curing or storage. Fix it by:
- Drying bulbs in a well-ventilated, shady spot for 2-3 weeks.
- Storing in a cool (50-60°F), dry place with good airflow (braid softnecks or mesh bags).
- Avoid plastic bags—they trap humidity!
Bonus Tip: Want even larger bulbs?
Remove garlic scapes (the curly stems) early—they steal energy from bulb growth! Use them in pesto or stir-fries instead.
Wrapping up and next steps
Growing large garlic is all about patience, proper technique, and a little extra care—especially when it comes to planting depth. By selecting the right cloves, preparing your soil, and planting them at the ideal depth (about 2 inches for hardneck varieties), you’re setting the stage for monster bulbs.
Don’t forget to mulch, water consistently, and protect your crop from pests—your efforts will pay off with plump, flavorful garlic that rivals store-bought (but tastes so much better!).
Ready to harvest your bounty? Start small—try a few cloves this season, refine your method, and soon you’ll be growing garlic so big, it’ll make your neighbors jealous! 🌱✨ Next, learn how to harvest and store your garlic for maximum freshness.