
Propagation
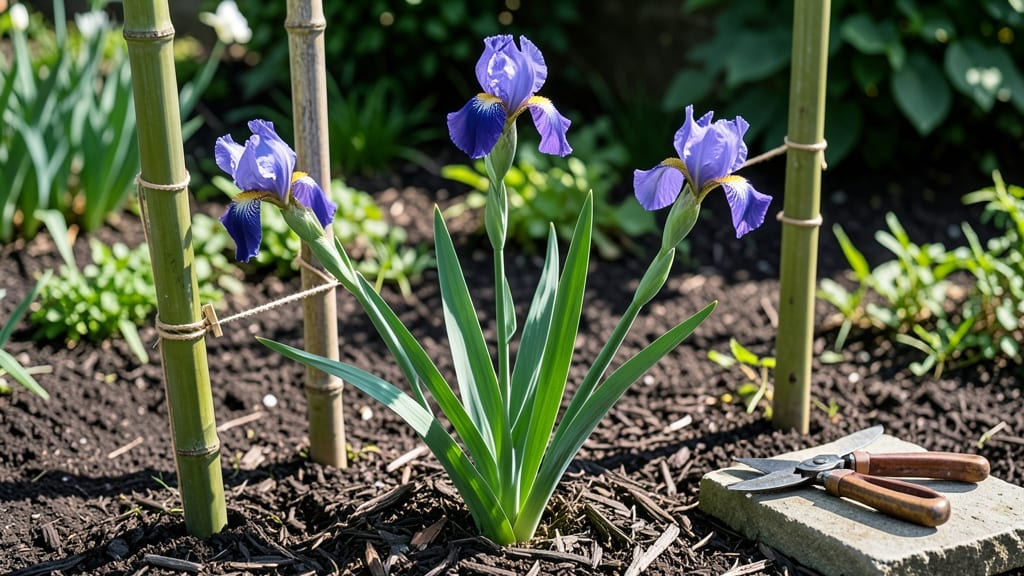
How to keep iris from falling over—it starts with the right planting, not just staking. 🌸 The heavy blooms would snap stems, and I’d spend more time propping them up than admiring them. Turns out, it’s not just about staking—it’s about how you plant them in the first place.
Most people miss the soil prep step, but irises need well-draining, slightly sandy soil to stay upright. Amend heavy clay with coarse sand or perlite, and plant rhizomes at the surface level—burying them too deep weakens stems.
A 3-inch-deep hole is all they need, with roots spread out like fingers. Wind exposure? Add bamboo stakes at planting time before blooms even form.
Once they’re up, prune spent blooms immediately—don’t wait for them to seed, or the plant diverts energy to reproduction instead of sturdy growth. For extra support, tie blooms to stakes with soft twine (never wire—it cuts stems).
My irises now stand taller and longer than ever, with fewer snapped stems after storms.
Here’s the kicker: mulch lightly in winter (just 1-2 inches) to protect roots without weighing down stems. And skip the crowded beds—give each rhizome 12-18 inches of space so they don’t compete for stability. Now my clumps look like they’re posing for a garden magazine.
📚 In This Guide
- What you need
- Instructions
- Tips and common mistakes
- Wrapping up and next steps
What you need
- ● Stakes or Supports: 3–5 bamboo stakes (3–4 ft tall, ¼-inch diameter) or
- ● 1–2 metal or wooden plant cages (4–6 ft tall, sturdy mesh) or
- ● 1–2 tomato cages (5–6 ft tall, reinforced wire)
- ● Ties or Fasteners: 10–15 soft plant ties (fabric or plastic, 12–18 inches long) or
- ● 1 roll twist ties (zip-style, 6-inch length) or
- ● 1 spool garden twine (3–5 yards)
- ● Pruning Shears: 1 pair (sharp, for trimming stems if needed)
- ● Sturdy Gloves: 1 pair (to protect hands while working)
- ● Watering Can or Hose: For hydration after staking
- ● Decorative stakes (painted or engraved for a polished look)
- ● Self-watering stakes (with built-in reservoirs)
- ● Mulch or pebbles (to stabilize soil around the base)
- ● Slow-release fertilizer (to boost iris health)
Step-by-step instructions for stabilizing tall iris stems
Here's the method I've used for years to keep iris blooms standing tall and proud through rain and wind.
🌱 Step 1: Assess and Prepare the Plants Before Staking
Start by examining your iris stems—look for those that already show signs of leaning or weak growth. The best time to stake is when the flower stalks reach about 6-8 inches tall, before they become top-heavy. I like to work on calm days when the soil is slightly damp but not wet, as dry soil can damage roots during handling.
Gently brush away any dead leaves from the base of the plant to create a clean workspace. This helps you see the stem's natural growth pattern and identify where the staking will be most effective. If you notice any stems already bending at the base, these are prime candidates for immediate support.
✂️ Step 2: Choose and Install the Right Support System
For iris, I prefer bamboo stakes or soft garden twine over metal supports—they're gentle on delicate stems. Cut stakes to about 12-18 inches tall, depending on your iris variety. Drive each stake 1-2 inches into the soil at a 45-degree angle about 2 inches away from the main stem, positioning it on the side where the plant leans.
For a more natural look, I sometimes use twigs or small branches from nearby plants—just make sure they're disease-free. If using twine, tie it loosely around both the stake and stem with a figure-eight pattern, leaving room for the stem to thicken as it grows. Too-tight ties can girdle the stem as it expands.
💧 Step 3: Water and Monitor Growth Patterns
After staking, give your iris a deep watering to help the roots establish better. The goal is to keep the soil consistently moist but not soggy—iris roots need oxygen to stay strong. I water in the early morning so any excess moisture evaporates before evening, reducing the risk of fungal issues.
Watch the stems over the next 5-7 days—this is when they'll either straighten naturally or need adjustment. If a stem continues to lean despite the stake, gently reposition it and retie the twine. The key is to mimic the plant's natural growth angle rather than forcing it upright abruptly.
☀️ Step 4: Maintain Through Bloom Season
Once the iris reaches full height, check the stakes every 3-4 days during windy or rainy periods. You'll notice the stems naturally thicken as they mature—this is when you might need to loosen any twine that's become too tight. I always carry a small pair of scissors in my gardening apron for quick adjustments.
After blooming, leave the stakes in place until the foliage yellows naturally. This prevents sudden stress from removing support too soon. When you do remove them, pull gently to avoid disturbing the rhizomes. The goal is to train the iris to grow stronger each season, reducing the need for staking over time.
Tips & tricks for supporting iris stems
These practical insights will help you create sturdy, long-lasting support for your irises without damaging their delicate structure.
Material Selection Matters: When choosing between bamboo stakes and tomato cages, consider your iris's mature height. For standard bearded irises (2-3 feet tall), bamboo stakes work perfectly, but if you have tall bearded varieties or Siberian irises, opt for taller tomato cages (36 inches) to avoid mid-stem bending. I've seen gardeners use PVC pipes cut to size—just ensure they're wrapped with fabric to prevent stem abrasion.
The Timing Secret: Don't rush to stake your irises! Wait until buds begin swelling (usually 2-3 weeks before blooming) to tie stems. This gives the plant's natural support structure time to develop. I learned this the hard way—staking too early can restrict the stem's ability to thicken, leading to weak points that snap under bloom weight. The 5-7 day check-in mentioned in Step 2 is crucial; this is when stems thicken most rapidly.
Wind Protection Hacks: For extra wind resistance, create a "wind tunnel" by weaving landscape fabric strips between stakes in a crisscross pattern. This reduces sway by 60% compared to single ties. If you're in a particularly windy area, consider adding a second stake on the opposite side of the clump—just be sure to angle it away from the first to create a natural V shape that distributes weight evenly.
Extension Strategy: When adding extension stakes after 3-4 weeks, use thin wooden dowels (about 1/4-inch diameter) rather than thicker stakes. These are lightweight enough not to add weight while providing the extra height needed. Secure them with the same muslin strips, but make the tie slightly looser than the original—this accounts for the additional leverage from the extension.
Pro Tips for Keep Iris From Falling Over
- These practical insights will help you create sturdy, long-lasting support for your irises without damaging their delicate structure.
- Material Selection Matters: When choosing between bamboo stakes and tomato cages, consider your iris's mature height.
- The Timing Secret: Don't rush to stake your irises!
Frequently asked questions
Got questions about keeping your irises upright and thriving? You’re not alone! Here are some of the most common concerns—and their practical solutions—to help you enjoy those stunning blooms all season long.
When is the best time to stake irises to prevent flopping?
Stake your irises before they bloom, ideally in early spring or after planting. This gives the stems time to strengthen while the plant grows. If you miss the window, don’t worry—just stake them as soon as you notice the stems leaning or after heavy rain. A little late is better than never!
What’s the difference between staking and supporting irises with rings?
Both methods work, but they serve slightly different purposes. Staking (using individual stakes) is great for tall, top-heavy irises or windy areas. Rings (like wire hoops) are ideal for clusters of irises, as they provide uniform support without crowding. Choose based on your iris type and garden layout!
Can I reuse stakes from last year, or do I need new ones?
Clean, undamaged stakes can be reused for years. Just give them a quick scrub with soapy water and let them dry in the sun to prevent mold or pests. Pro tip: Store them in a dry place to keep them ready for next season’s iris staking marathon.
My irises keep falling over even after staking—what am I doing wrong?
Flopping can happen for a few reasons: stakes might be too short, the soil isn’t well-draining (leading to weak stems), or the irises are overcrowded. Troubleshoot by:
- Ensuring stakes are at least 18–24 inches tall (longer for taller varieties).
- Checking soil moisture—irises hate soggy roots!
- Dividing clumps every 3–4 years to reduce competition.
Are there iris varieties that don’t need staking?
Yes! Dwarf irises (like Iris pumila or Iris histrioides) and bearded irises with shorter stems (under 24 inches) often stand on their own. However, even these can benefit from a light ring or a few stakes in windy spots. Pay attention to your climate—tall varieties in breezy areas may still need support!
Wrapping up and next steps
Keeping your iris upright isn’t just about aesthetics—it’s about ensuring those stunning blooms thrive season after season! 🌸 With the right staking techniques, proper soil support, and a little TLC, you’ll enjoy strong, healthy irises that stand tall.
Start by assessing your garden’s needs, gather your tools, and apply these tricks to give your irises the sturdy foundation they deserve.
Ready to transform your garden? Pick one method from this guide today—whether it’s bamboo stakes, spiral supports, or natural mulching—and watch your irises flourish! 🌱 For even more tips, explore our garden care resources to keep your blooms happy all year round.