
Propagation
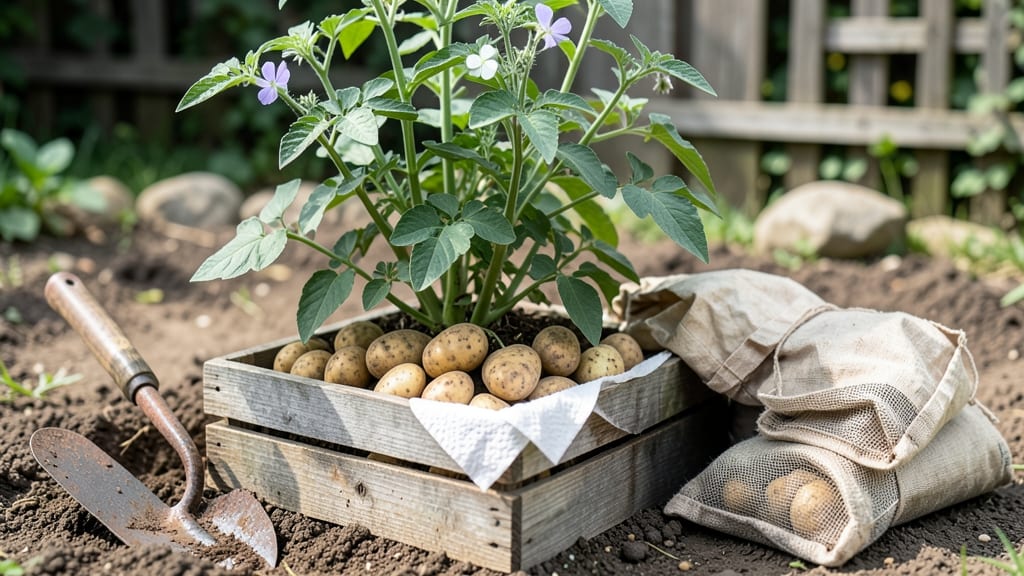
How to keep these potatoes for seed starts with a careful harvest—because storing tubers for next season isn’t just about saving scraps. It’s about preserving the best genetics from your garden for stronger, more productive plants. I’ve learned the hard way that skipping proper storage leads to rot, weak sprouts, or worse, total failure when planting time comes.
The secret lies in curing them first: let harvested potatoes rest in a dark, 55-60°F spot for 1-2 weeks to toughen their skins. Then, move them to a cool, humid (but not damp) environment—think basement or root cellar—where they’ll stay dormant until spring.
Avoid plastic bags (they trap moisture and cause rot), and check monthly for soft spots or sprouts that need trimming.
By spring, you’ll have plump, disease-free tubers with strong chits (those tiny sprouts) ready to plant. These potatoes will outperform store-bought seed stock, giving you bigger yields and varieties tailored to your climate. The best part? You’ll save money and ensure your garden’s future is in your own hands.
This method works for all potato types—Russets, Yukon Golds, or fingerlings—but timing is everything. Start storing in late fall, and by March, you’ll be ready to plant with confidence. No more guessing which potatoes will grow best; you’ll know exactly what’s coming next season.
📚 In This Guide
- What you need
- Instructions
- Tips and common mistakes
- Wrapping up and next steps
What you need
- ● Healthy seed potatoes: Choose disease-free, certified organic seed potatoes (avoid grocery-store potatoes—they’re often treated to prevent sprouting!). Aim for 5–10 medium-sized tubers per variety (e.g., Yukon Gold, Red Pontiac, or Fingerlings).
- ● Chitting tray or egg cartons: A shallow tray with drainage holes (or repurposed egg cartons) to hold potatoes while they chit (sprout).
- ● Potting soil or peat moss: Lightweight, well-draining mix (avoid garden soil—it can harbor pests/diseases). 1–2 gallons should suffice for a small batch.
- ● Spray bottle with water: For gentle misting to keep soil moist (not soggy!).
- ● Sharp knife or pruners: For trimming damaged sprouts or cutting potatoes (if necessary).
- ● Storage container: A cool (35–45°F), dark, and humid (85–90% humidity) space like a root cellar, basement, or even a cardboard box with damp burlap lined with newspaper.
- ● Newspaper or burlap sacks: To cushion potatoes and maintain humidity during storage (2–3 sheets per 10 lbs of potatoes).
- ● Labeling tags & marker: To track varieties and planting dates (trust us, you’ll forget!).
- ● Grow lights: If chitting indoors with limited sunlight, a low-watt LED bulb (6–12 inches above potatoes) speeds up sprouting.
- ● Humidity tray: A shallow tray filled with pebbles and water to boost moisture levels in storage.
- ○ Potato curing spray: A 1% copper fungicide solution (optional but prevents rot during storage).
- ● Thermometer & hygrometer: To monitor temperature and humidity like a pro!
Step-by-Step instructions for storing potatoes as seed stock
Here’s how I prepare potatoes for seed saving—proven to produce vigorous, disease-free tubers year after year.
Select and Cure the Healthiest Tubers
Choose 4-6 medium-sized, blemish-free potatoes from your best harvest—the ones with the strongest stems and deepest eye development. Avoid any with soft spots, sprouts, or signs of disease, as these traits will carry over to next year’s crop. Store them in a cool, dark place (around 40-50°F) for 2-3 weeks to let the skin toughen. This curing period prevents bruising during storage and helps prevent rot.
I like to inspect each tuber under bright light, rotating them to check for hidden damage. The goal is to start with genetically stable stock that will produce uniform, high-quality seed potatoes. If you’re saving heirlooms, select tubers from the most vigorous plants—those with the largest, most consistent tubers and earliest maturity.
Chit Potatoes in Bright Light
Place the cured potatoes in a well-ventilated container (like a cardboard box with holes punched in the sides) and position them in bright, indirect light for 4-6 weeks. This process, called "chitting," encourages uniform sprouting. You’ll see small green shoots (chits) emerge from the "eyes" (buds) on the tuber’s surface—these are your future plants.
Turn the potatoes every few days so all eyes receive equal light exposure, preventing lopsided growth. Avoid direct sunlight, which can cause the sprouts to turn green and bitter. Once the chits reach ½ to 1 inch long, they’re ready for planting. This pre-sprouting gives your seed potatoes a 2-3 week head start, ensuring faster emergence and stronger early growth in spring.
Store Until Planting Season
After chitting, transfer the potatoes to a dark, cool storage area (around 35-40°F) until 2-3 weeks before your last frost date. Use a paper bag or breathable container with a bit of sphagnum moss or peat to maintain humidity and prevent drying. Check them monthly—remove any tubers that develop soft spots or mold, as these can spread and ruin the whole batch.
I label each variety and date the storage container to avoid confusion. The key is consistent moisture without sogginess—too much humidity encourages rot, while too little causes the sprouts to dry out. If your basement runs warmer, store them in a root cellar or unheated garage instead. Proper storage keeps the chits dormant but ready to grow as soon as soil temperatures warm to 45°F.
Plant Chitted Seed Potatoes Early
As soon as the ground can be worked (usually 2-3 weeks before your average last frost), plant the chitted potatoes 4-6 inches deep and 12 inches apart in rows spaced 2-3 feet apart. The pre-sprouted chits will emerge 7-10 days earlier than unchitted seed potatoes, giving you a longer growing season. Water lightly after planting to settle the soil around the tubers.
Mulch with 2-3 inches of straw or grass clippings to retain moisture and suppress weeds. Avoid overwatering at first—too much moisture can cause the tubers to rot before they establish roots. Once the plants reach 6 inches tall, hill the soil around the stems to encourage tuber formation deeper in the soil. This method ensures a stronger, more productive crop compared to store-bought seed potatoes.
Harvest and Repeat the Process
When the top growth yellows and dies back (usually 90-120 days after planting, depending on variety), carefully dig up a few tubers to check for size. Leave the rest in the ground for 2 more weeks to cure the skins. Harvest on a dry, sunny day to prevent soil-borne diseases from spreading. Handle the tubers gently to avoid bruising.
Let them dry in the sun for 1-2 hours, then store in a cool, dark place for 1-2 weeks before using some for seed next year. The remaining tubers can be eaten fresh or stored for winter. This cycle ensures you always have high-quality, disease-free seed stock tailored to your climate and growing conditions.
Tips & tricks for perfect potato seed storage
Common pitfalls—and how to sidestep every one when preserving your potato harvest for next season's planting.
Selection is Everything: In Step 1, when choosing your 4-6 medium-sized tubers, focus on those with the deepest eyes and strongest stems. The eyes should be firm and undamaged—press gently to check for soft spots beneath the skin. I've learned the hard way that even small imperfections can lead to rot during storage, so take that extra time to inspect each tuber under bright light. Rotating them while examining helps reveal hidden damage that might not be visible from one angle.
Chitting Consistency: During the 4-6 week chitting process in Step 2, consistency is key. I've found that using a shallow cardboard box with holes punched in the sides works perfectly for ventilation. Place the box on an east-facing windowsill to ensure bright, indirect light—direct sunlight can cause the sprouts to turn bitter. The goal is to turn the potatoes every few days so all eyes receive equal light exposure, preventing lopsided growth that could affect next year's plants.
Storage Temperature Precision: Maintaining the correct 35-40°F temperature range in Step 3 is absolutely critical. Too warm and you risk sprouting before planting time; too cold and the chits may dry out. I've had success using a basement with a thermostat, but if your basement runs warmer, consider a root cellar or unheated garage. The key is consistent moisture without sogginess—too much humidity encourages rot, while too little causes the sprouts to dry out. A paper bag with a bit of sphagnum moss helps maintain that perfect balance.
Planting Timing: When it comes time to plant in Step 4, don't rush the process. The 2-3 week window before your last frost date is ideal because soil temperatures need to reach at least 45°F for proper germination. I've found that planting chitted potatoes gives you a 7-10 day advantage over unchitted ones, which can make a significant difference in your growing season. The pre-sprouted chits will emerge faster, giving your plants more time to establish before summer heat arrives.
Pro Tips for Keep Potatoes For Seed
- Common pitfalls—and how to sidestep every one when preserving your potato harvest for next season's planting.
- Selection is Everything: In Step 1, when choosing your 4-6 medium-sized tubers, focus on those with the deepest eyes ...
- Chitting Consistency: During the 4-6 week chitting process in Step 2, consistency is key. I've found that using a sha...
Frequently asked questions
Got questions about saving potato seed? You’re not alone! Here are answers to the most common concerns—so you can store with confidence and grow a thriving crop next season.
How do I know if my potatoes are good for seed?
Choose certified seed potatoes or save disease-free tubers from your healthiest plants. Look for firm, medium-sized potatoes with no signs of sprouting (chitting), rot, or blemishes. Avoid store-bought potatoes—many are treated to prevent sprouting and may carry diseases.
Can I store potatoes for seed in the fridge?
No! Refrigerators (below 45°F) convert starches to sugars, making potatoes sweet and inedible—and worse, they can freeze and rot. Store them in a cool (40–50°F), dark, humid space like a root cellar, basement, or even a cardboard box in your garage.
What if my chitted potatoes sprout too early?
Early sprouting means your potatoes are waking up too soon! Keep them in low light (not pitch-black) and store at 40–50°F. If sprouts get too long (3+ inches), trim them back to 1–2 inches to redirect energy into the tuber. Avoid storing near apples or onions—they release ethylene gas, which can speed up sprouting.
What’s the best alternative if I don’t have a root cellar?
No root cellar? No problem! Use a cool, dark closet, garage, or even a well-ventilated cardboard box lined with newspaper. Bury them in a shallow trench in your garden (cover with 2–3 inches of soil) if temps stay above freezing. Just check them monthly for rot or pests!
Why are my stored potatoes turning green or moldy?
Green spots = solanine (toxic if eaten raw). This happens from light exposure—move them to a darker spot immediately. Moldy or mushy potatoes? Toss them! Cut off only small dry rot areas (with a clean knife), but discard any tubers with soft, foul-smelling spots to prevent spreading disease.
Wrapping up and next steps
Keeping potatoes for seed is all about patience, preparation, and a little know-how! By chitting your tubers and storing them properly, you’ll ensure strong, disease-free plants for next year’s harvest. Remember: healthy seed potatoes mean a thriving garden. 🌱
Ready to take the next step? Try experimenting with a small batch this season—track your progress and adjust as needed. Soon, you’ll be a pro at growing your own seed potatoes and enjoying bountiful harvests for years to come! 💪