
Pests
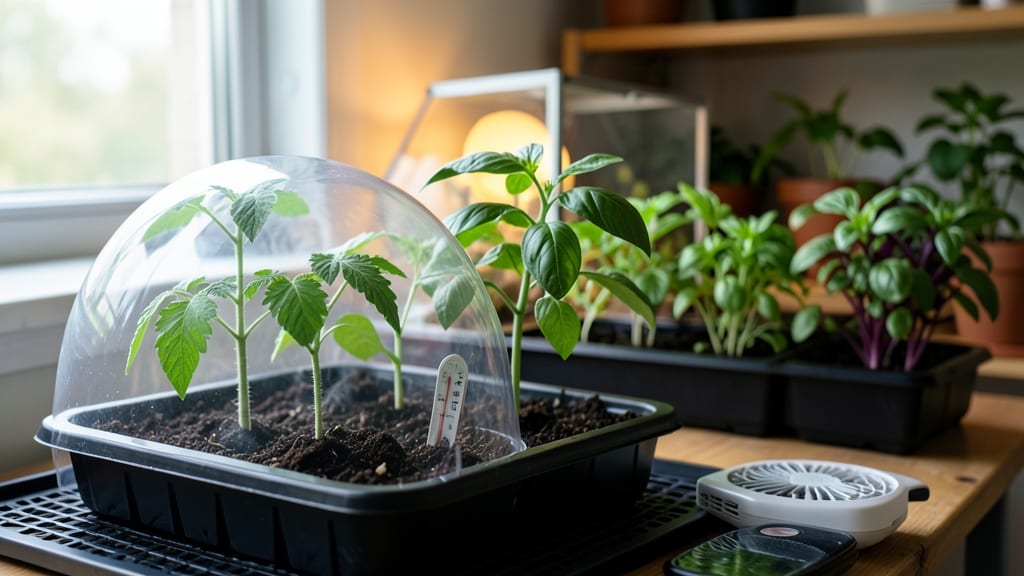
How to keep seedlings warm—no more frost-bite fears! ✨ Keeping seedlings warm isn’t just about survival—it’s about giving them the strong start they need to thrive. I’ve lost count of the seedlings I’ve watched shrivel overnight, but these cozy shelter hacks turned my chilly spring into a productive one.
You don’t need fancy gear—just a few smart setups. A simple heat mat under trays keeps roots warm, while cloches (even DIY ones from plastic bottles) trap heat like a greenhouse.
For indoor starts, a sunny windowsill or grow light does the trick, but consistency is key—seedlings need steady temps between 65-75°F to avoid stunting.
The payoff? Sturdy, fast-growing seedlings that outpace their cold-shocked neighbors. No more leggy, weak stems or delayed germination. With the right balance of warmth and airflow, you’ll see those first true leaves emerge strong and vibrant—exactly what you want before transplanting.
Works for both tender veggies and flowers, whether you’re starting them indoors or hardening off outdoors. Here’s how to pick the perfect method for your setup—no guesswork, just foolproof warmth.
📚 In This Guide
- What you need
- Instructions
- Tips and common mistakes
- Wrapping up and next steps
What you need
- ● Seedling containers: Small pots (2-4 inches in diameter), seedling trays, or egg cartons (biodegradable preferred). Quantity: Enough to hold all seedlings individually.
- ● Growing medium: Seed starter mix or potting soil (sterilized, well-draining). Quantity: Enough to fill containers 2-3 inches deep.
- ● Clear plastic domes or lids: For seedling trays (e.g., plastic clamshells or humidity domes). Quantity: 1 per tray.
- ● Heat mat: Electric seedling heat mat (60-75°F range). Size: Large enough to fit all containers.
- ● Thermometer: Digital soil or air thermometer to monitor temperatures.
- ● Watering can or spray bottle: With a fine mist nozzle (avoid overwatering!).
- ● Scissors or knife: For trimming materials (e.g., plastic bottles, cardboard).
- ● Twine or string: For securing DIY covers (e.g., plastic tunnels). Length: 1-2 feet per setup.
- ● Insulating materials: Bubble wrap, old towels, or newspaper strips to wrap around containers.
- ● Mini greenhouse: Clear plastic tent or pop-up greenhouse (e.g., 18" x 18" x 24" size).
- ● LED grow lights: Full-spectrum bulbs (12-16 hours/day) for warmth and light.
- ● Rocks or pebbles: For drainage layers at the bottom of containers.
- ● Frost cloth: Lightweight, breathable fabric (30-50% shade) for outdoor setups.
- ● Fan (small, low-speed): To circulate air and prevent mold (place on lowest setting!).
Step-by-Step instructions for keeping seedlings warm
Here's how to shield tender seedlings from chilly drafts and ensure steady growth.
🌱 Step 1: Create a Mini Greenhouse with Clear Covers
Use a clear plastic dome, plastic wrap, or glass cloche to trap heat around seedlings. Place the cover directly over your seedling tray, leaving just enough space for air circulation—about ½ inch at the top. I like to secure it loosely with clothespins or rubber bands so it doesn’t crush stems as they grow.
This creates a microclimate that holds warmth like a greenhouse. Check daily for condensation—if you see heavy fogging inside, your humidity is too high. Remove the cover for 10-15 minutes every other day to prevent fungal issues. Seedlings thrive in 70-75°F during the day, so this setup mimics ideal tropical conditions.
☀️ Step 2: Position Seedlings Near a Reliable Heat Source
Place your seedlings within 3 feet of a south-facing window where sunlight streams in strongest. If natural light is weak, supplement with a grow light positioned 2-4 inches above the plants. I’ve found that LED grow lights with a red-blue spectrum encourage faster growth without overheating.
For extra warmth, set the tray on a seedling heat mat (keep soil temp at 70-75°F). Avoid placing seedlings near drafts—even a gentle breeze can chill them. If your home runs cool, group trays together to share warmth. Watch for yellowing leaves or stunted growth, which signal cold stress.
🪴 Step 3: Layer Insulation Around the Base
Place a thin layer of bubble wrap (shiny side down) under the seedling tray to reflect heat upward. I also tuck a towel or fleece blanket around the sides of the tray to block cold air. This extra insulation helps maintain soil temperatures, especially in 50-60°F rooms where seedlings struggle.
For outdoor seedlings, create a low tunnel with PVC pipes and row covers to trap heat. Bury the edges 1-2 inches into the soil to seal out drafts. In extreme cold (below 40°F), add a second layer of row cover or a mini greenhouse tent for overnight protection. Always remove covers during the day to prevent overheating.
⏰ Step 4: Monitor and Adjust for Temperature Stability
Use a small thermometer placed near the seedlings to track soil and air temps. Ideal daytime temps are 70-75°F, dropping to 60-65°F at night. If temps dip below 55°F, seedlings may stop growing—add a heat source or insulation immediately. I’ve seen seedlings recover from brief cold snaps, but prolonged chills stunt growth permanently.
Ventilate briefly each morning by lifting covers for 5-10 minutes to prevent mold. If seedlings look dark green and leggy, they’re stretching for light—move them closer to the heat source. For outdoor setups, harden off seedlings gradually by removing covers for 1-2 hours daily before full exposure.
Tips & tricks for perfect seedling shelters
Took me years of trial-and-error to master these tricks—now your seedlings will grow like they're in a tropical paradise.
The Humidity Factor: In Step 1, when you notice heavy condensation inside your clear cover, that's actually a good sign—it means your humidity is perfect for seedling growth. However, if you see water droplets forming on the leaves themselves, that's a red flag for fungal issues. I've found that lifting the cover for exactly the 10-15 minutes every other day (as instructed) creates the perfect balance between humidity and air circulation. This ventilation trick prevents mold while maintaining that greenhouse effect.
Light Source Strategy: For Step 2, if you're using a grow light, position it just 2-4 inches above the seedlings—closer than you might think. I learned this the hard way after my seedlings turned leggy from being too far away. The red-blue spectrum LED is ideal because it mimics natural sunlight perfectly, but if you're using a regular bulb, opt for a full-spectrum option. And here's a pro move: rotate your trays 180 degrees daily so all seedlings get equal light exposure, preventing them from leaning toward one side.
Insulation Upgrade: When you're adding that bubble wrap layer in Step 3, don't stop at just the bottom. I've discovered that wrapping the sides of your tray with towel or fleece creates a thermal barrier that keeps the entire environment warmer. For outdoor setups, burying the edges of your low tunnel 1-2 inches deeper than instructed can make a surprising difference in windy conditions—it creates an extra barrier against cold air infiltration.
Temperature Troubleshooting: That 70-75°F daytime range is critical, but here's what to watch for: If your seedlings are growing slowly despite the heat, check your soil temperature—it might be cooler than the air. Use a small thermometer placed directly in the soil to get accurate readings. And if you're in a 50-60°F room, consider adding a second layer of insulation around your trays at night—the difference in growth can be dramatic. Remember, seedlings can recover from brief cold snaps, but prolonged exposure below 55°F will stunt their development permanently.
Pro Tips for Keep Seedlings Warm
- Took me years of trial-and-error to master these tricks—now your seedlings will grow like they're in a tropical paradise.
- The Humidity Factor: In Step 1, when you notice heavy condensation inside your clear cover, that's actually a good sign—it means your humidity is perfect for seedling growth.
- Light Source Strategy: For Step 2, if you're using a grow light, position it just 2-4 inches above the seedlings—closer than you might think.
Frequently asked questions
Got questions about keeping your seedlings toasty? You’re not alone! Here are some common concerns—and quick, practical answers to help your little green friends thrive even when the weather turns chilly.
How low can temperatures go before seedlings need extra warmth?
Most seedlings struggle below 40°F (4°C). If frost is forecasted (32°F/0°C or lower), act fast! Use row covers, cloches, or move potted seedlings indoors near a sunny window. Even a 10°F (5°C) dip can stunt growth—so don’t wait!
Can I use a regular light bulb to warm seedlings overnight?
Yes, but choose wisely! A 40–60-watt incandescent bulb (not LED) placed 6–12 inches above seedlings can add 5–10°F (3–5°C) of warmth. Hang it in a reflective container (like a cardboard box) to amplify heat. Safety first: secure the bulb out of reach of plants and flammable materials.
What’s the best DIY way to insulate seedlings in the ground?
Try a mini greenhouse in a milk jug! Cut the bottom off a plastic jug, bury it around your seedling (like a bell), and leave the top open. For larger areas, lay cardboard or bubble wrap over seedlings, securing it with bricks or stakes. Pro tip: Remove covers during the day to avoid overheating!
My seedlings look wilted after a cold night—how do I revive them?
Don’t panic! First, water gently (cold stress dehydrates plants). If leaves are crispy, trim the damaged parts with sterilized scissors. Move seedlings to a warm, bright spot (like a sunny windowsill) and monitor for 3–5 days. If they perk up, they’ll bounce back—if not, they may need replanting.
Are there warm-weather plants that don’t need extra heat?
Some seedlings handle cooler temps better! Peas, lettuce, and spinach tolerate 35–40°F (2–4°C), while kale and Swiss chard can survive light frosts. For heat-lovers like tomatoes or peppers, always use warmth strategies—even a 50°F (10°C) night can shock them.
| Quick Fix | Best For |
|---|---|
| Row covers (floating fabric) | Large garden beds, overnight protection |
| Coffee cans or jars (DIY cloches) | Single seedlings, portable warmth |
| Heat mats (electric) | Indoor starts, consistent bottom heat |
| Straw mulch (3–4 inches deep) | Ground insulation, soil temperature regulation |
Wrapping up and next steps
Keeping your seedlings warm doesn’t have to be complicated—just a little creativity and the right tools! Whether you’re using row covers, heat mats, or a DIY greenhouse, small adjustments can make a big difference in frost-prone climates.
Remember, consistency and monitoring are key to giving your young plants the cozy start they deserve. 🌱✨
Now that you’re armed with these frost-fighting hacks, it’s time to put them into action! Start by assessing your seedlings’ current environment—then pick one or two methods to test first. Happy growing, and may your garden flourish under the warmest (and coziest) conditions! 🌿💚