
Shrubs
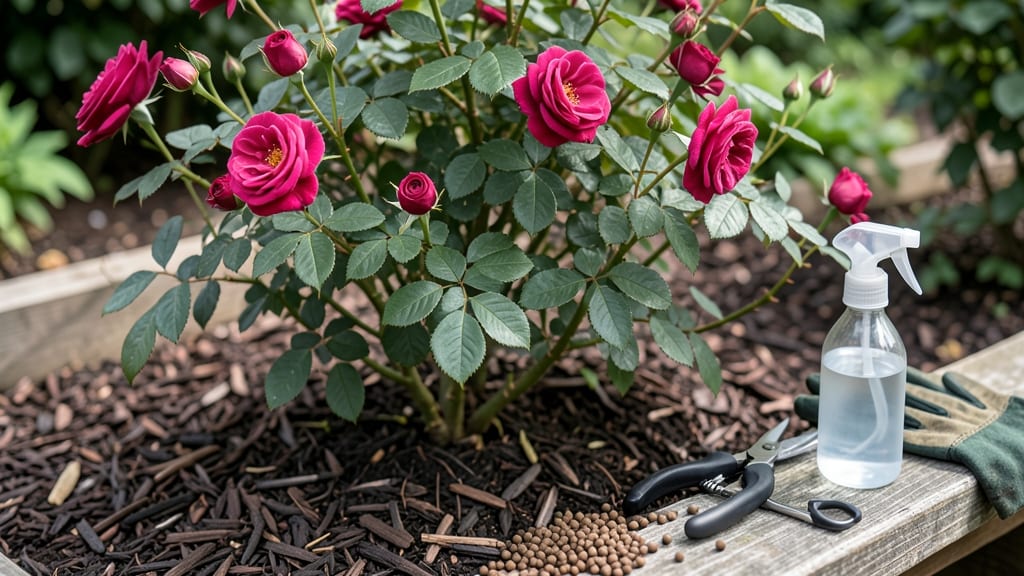
Your rose bush looks like a lonely skeleton instead of how to make a rose bush fuller with a lush cloud of blooms. 🌹 That’s because most people prune wrong—or don’t feed enough.
I’ve turned my own sparse bushes into thick, repeat-blooming powerhouses with just three key moves: strategic pruning, smart feeding, and sunlight optimization. The results? More flowers, stronger canes, and a bush that fills out in just one growing season.
First, prune in late winter when the plant is dormant. Cut back one-third of the oldest canes to the ground and shape the rest to open the center. Use clean, sharp shears and make cuts at a 45-degree angle just above an outward-facing bud.
Skip the fancy techniques—this simple approach works for hybrid teas, floribundas, and shrub roses alike. Feed with balanced organic fertilizer (like 10-10-10) right after pruning, then again in early summer. Most gardeners overlook the soil—roses need well-draining, slightly acidic soil (pH 6.0-6.5) to thrive.
By midsummer, you’ll see the difference: thicker canes, more buds, and flowers that last longer. The secret isn’t complicated—it’s consistency. Water deeply once a week (unless it rains), mulch to retain moisture, and watch your bush transform from sparse to showstopping.
Even my first attempt last year went from three blooms to a dozen stems by July. The best part? These methods work for any rose type, whether you’re dealing with a rambling climber or a compact patio variety.
Here’s the kicker: most problems—like leggy growth or weak stems—come from pruning too late or not feeding enough. If your bush looks sad after pruning, it’s not too late to fix it.
Start now, and by next spring, your neighbors will be asking for your secret. (Spoiler: There isn’t one—just good old-fashioned rose care.)
📚 In This Guide
- What you need
- Instructions
- Tips and common mistakes
- Wrapping up and next steps
What you need
- ● Pruning shears or bypass pruners – Sharp, clean, and sterilized (rubbing alcohol or bleach solution works). Size: 5–7 inches for medium branches.
- ○ Gloves – Heavy-duty gardening gloves (thorns are no joke! 😉). Optional: Nitrile-coated for extra grip.
- ● Disinfectant (bleach or hydrogen peroxide) – 1 part bleach to 10 parts water (or 3% hydrogen peroxide) to sterilize tools between cuts.
- ● Compost or well-aged manure – 2–3 gallons (or a 5-gallon bucket’s worth) to enrich the soil.
- ○ Balanced fertilizer – 10-10-10 or 20-20-20 NPK ratio (follow label instructions for application rates). Optional: Slow-release granules for convenience.
- ○ Mulch (optional but recommended) – 2–3 inches of organic mulch (straw, wood chips, or shredded leaves) to retain moisture and suppress weeds.
- ● Watering can or hose with a gentle spray nozzle – For post-pruning hydration (aim for 1–2 gallons per bush).
- ● Rose fertilizer (high in phosphorus) – Like Miracle-Gro Shake ’n Feed Roses for a blooming boost.
- ● Epsom salt (magnesium sulfate) – 1 tablespoon dissolved in a gallon of water (spray on leaves monthly for greener foliage).
- ● Plant food with micronutrients – Like Fish emulsion or seaweed extract for extra vigor.
- ○ Pruning sealant (optional for large cuts) – Like Tanglefoot Tree Wound Pruning Sealer (only for cuts wider than ½ inch).
- ● Knee pads or a small stool – Because bending over roses all day is not a flex. 😅
Step-by-Step instructions for pruning and feeding roses
Here's how I transform leggy, sparse rose bushes into dense, repeat-blooming powerhouses—no fancy tools required.
✂️ Step 1: Time Your Pruning for Maximum Impact
Prune your roses in early spring when new growth begins but before buds swell—this is when the plant is most resilient. I wait until daytime temperatures consistently stay above 50°F for at least a week. Pruning too early risks damaging dormant buds, while waiting too long means you'll cut back new growth that could have bloomed.
Look for fat, plump buds along the stems—these indicate where new branches will emerge. Avoid cutting into old, woody growth that's completely bare. You'll know you're pruning at the right time when you see pinkish-green buds starting to form at the base of the plant.
🌿 Step 2: Cut Back with Precision for Dense Growth
Use clean, sharp pruners to make cuts at a 45-degree angle, about ¼ inch above an outward-facing bud. This angle helps water run off the cut and prevents rot. I always cut just above the bud, never below—this ensures new growth emerges in the right direction and doesn't get buried in soil.
Remove dead, diseased, or crossing branches first—they compete for nutrients and can spread problems. For each remaining stem, cut back to half its height if it's woody and overgrown, or to just above the first set of strong buds if it's more flexible. You'll see a dramatic difference in how full the bush looks immediately after pruning.
💧 Step 3: Feed with the Right Nutrients for Bushy Growth
After pruning, apply a balanced, slow-release rose fertilizer (10-10-10 or similar) around the base of the plant, keeping it 3-4 inches away from the stem. Water deeply to help the granules dissolve into the soil. I avoid high-nitrogen fertilizers early in the season—they promote leafy growth at the expense of flowers, which is the opposite of what we want.
For an extra boost, mix in 2-3 inches of compost into the top layer of soil. This improves soil structure and provides a steady supply of micronutrients. Water the soil until it's moist 6 inches down—you'll know it's right when water drips out of the holes in your pot (if container-grown) or when the soil feels damp but not soggy.
☀️ Step 4: Support New Growth with Proper Care
Keep the soil evenly moist but never soggy for the first 4-6 weeks after pruning. Roses need consistent moisture to establish new roots and shoots. I water deeply every 2-3 days during dry spells, checking moisture by sticking my finger 2 inches into the soil. If it feels dry, it's time to water.
Place your rose bush in a location with at least 6 hours of direct sunlight daily. Without enough light, new growth will be weak and leggy. You'll see strong, upright stems with dark green leaves and multiple buds forming within 3-4 weeks of proper care. If growth looks sparse, it might need more sunlight or a light application of phosphorus-rich fertilizer to encourage blooming.
⏰ Step 5: Deadhead and Repeat for Continuous Blooms
As flowers fade, deadhead them immediately by cutting the stem back to the nearest outward-facing bud. This redirects the plant's energy into producing more blooms instead of seed pods. I always carry a small pair of pruners with me when I'm near the roses—it only takes a second to snip and keeps the bush looking tidy.
Every 4-6 weeks after the initial pruning, give your roses a light feeding with a bloom-boosting fertilizer (like 5-10-5). This keeps the plant energized for continuous flowering. You'll notice new branches filling in gaps and more buds forming throughout the season. With this method, my roses stay full and blooming from early summer until frost.
Tips & tricks for pruning and feeding roses
Transforming a leggy rose bush into a lush, blooming beauty takes more than just cutting branches—here's what I've learned after years of trial and error in my own garden.
Timing is Everything: In Step 1, when you're waiting for temperatures to stay above 50°F consistently, don't rush—this is when the plant's energy shifts from dormancy to growth. I've found that checking for those pinkish-green buds at the base (as mentioned in Step 1) is the most reliable indicator. If you prune too early, you risk cutting back buds that haven't even started growing yet, while waiting too long means you'll remove potential blooms. The sweet spot is when you see both new growth starting AND those fat buds forming—this is when your rose is ready for a dramatic transformation.
The Precision Cut Technique: When making those 45-degree angle cuts in Step 2, imagine you're drawing a line from the bud outward—this is where new growth will emerge. I always make my cuts just above the bud, never below, because this ensures the new shoot grows away from the stem rather than getting buried in soil. For stubborn branches, I use a small notched pruner to make the cut perfectly clean. The angle isn't just for looks—it prevents water from pooling on the cut, which can lead to rot. You'll notice the difference immediately in how full the bush looks after pruning.
Fertilizer Placement Matters: In Step 3, when applying that balanced 10-10-10 fertilizer, think of it like creating a nutrient donut around your rose—keep it 3-4 inches away from the stem. I've made the mistake of piling fertilizer right against the trunk, which can actually burn the roots. For container-grown roses, I make small trenches in the soil around the edges of the pot to place the fertilizer granules before watering. This ensures the nutrients get distributed evenly throughout the root zone. The deep watering (until soil is moist 6 inches down) is just as important as the fertilizer placement—it helps dissolve the granules and carry nutrients to the roots where they're needed most.
Sunlight Strategy: The 6 hours of direct sunlight mentioned in Step 4 is non-negotiable for bushy growth, but here's what I've learned about maximizing it: If your roses are in partial shade, rotate the pot every few weeks so all sides get equal exposure. For garden roses, I've found that positioning them slightly north of their current location can actually increase sunlight exposure by 30-40 minutes in the afternoon. You'll see this in the plant's response—strong, upright stems with dark green leaves appear within 3-4 weeks when the light conditions are right. If you notice leaves turning yellow or stems growing weak, it's usually a sign they need more light.
Pro Tips for Make A Rose Bush Fuller
- Transforming a leggy rose bush into a lush, blooming beauty takes more than just cutting branches—here's what I've le...
- Timing is Everything: In Step 1, when you're waiting for temperatures to stay above 50°F consistently, don't rush—thi...
- The Precision Cut Technique: When making those 45-degree angle cuts in Step 2, imagine you're drawing a line from the...
Frequently asked questions
Got questions about transforming your rose bush into a lush, full masterpiece? Here are some of the most common ones—and their answers!
When is the best time to prune for fuller blooms?
Prune your rose bush in late winter or early spring (just before new growth starts) for the best results. This timing encourages strong, healthy growth and more blooms. Avoid pruning in fall—it can leave your bush vulnerable to winter damage.
What if I prune too late or too early?
Pruning too late (after buds swell) can reduce flowering, while pruning too early (mid-winter) may stress the plant. If you miss the ideal window, don’t worry—just focus on light shaping cuts in spring to encourage new growth. Over time, consistency matters more than perfection!
How often should I fertilize for fuller roses?
Feed your rose bush every 4–6 weeks during the growing season (spring to fall) with a balanced rose fertilizer. In winter, skip fertilizing—your bush is dormant! For organic options, compost or fish emulsion works well too.
Why aren’t my roses getting fuller after pruning and feeding?
Check for pests (aphids, spider mites) or diseases (black spot, powdery mildew)—they can stunt growth. Also, ensure your bush gets 6+ hours of sunlight daily and well-draining soil. If issues persist, adjust your pruning technique or test your soil’s pH (aim for 6.0–6.5).
Can I use the same tips for climbing roses?
Yes, but with a few tweaks! Climbing roses need less aggressive pruning—focus on shaping and thinning to encourage long canes. Prune after blooms fade to promote repeat flowering. Also, provide a sturdy trellis or support for their vines to grow fuller and stronger.
Wrapping up and next steps
Transforming your rose bush into a fuller, more vibrant beauty is totally within reach! With the right pruning techniques, balanced fertilization, and a little patience, you’ll enjoy lush blooms all season long. 🌹 Start small—pick one method this week, and watch your progress grow.
Ready to take the next step? Grab your pruners and feed schedule, then revisit your bush in a few weeks to admire the difference. Happy gardening—your roses will thank you!