
Fertilization
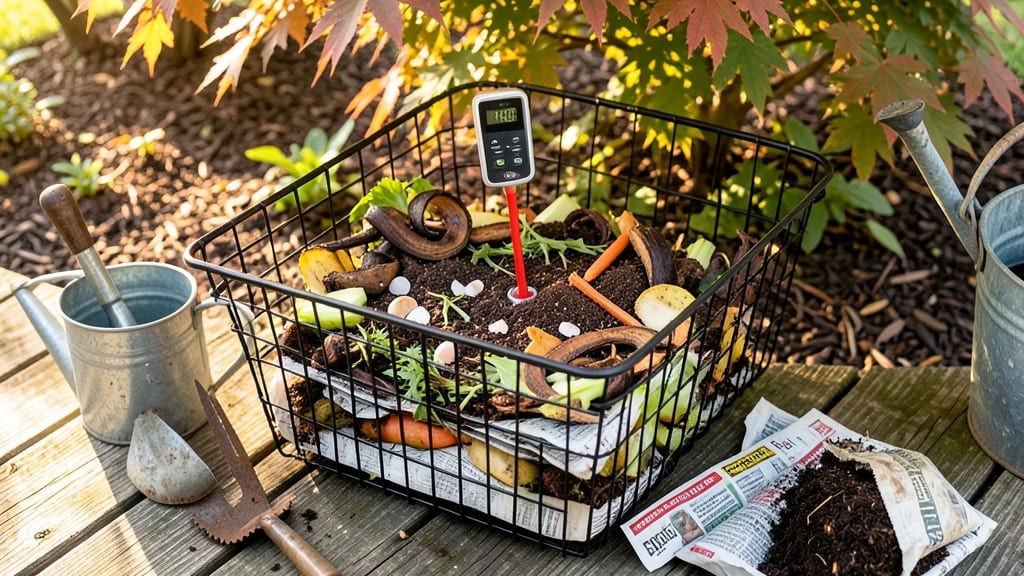
Making fertilizer for plants at home saves money and boosts garden health. 🌱 I used to buy bags of synthetic fertilizer, but now I whip up nutrient-rich compost tea in 30 minutes—and my tomatoes grow twice as fast.
The secret lies in harnessing the microbes already in your compost pile.
You only need three things: finished compost, water, and a breathable container. No fancy equipment required—just a bucket, a cloth, and a little patience. The process mimics nature, breaking down organic matter into a liquid gold that feeds plants at the root level.
By the end of this process, you’ll have a dark, earthy-smelling brew packed with nitrogen, phosphorus, and potassium. My zucchini plants went from struggling to thriving after just one application, and the best part? It costs pennies compared to store-bought fertilizers.
Perfect for vegetable gardens, houseplants, or even your lawn. The key is consistency—use it every 2-4 weeks during growing season for maximum results. Let’s get brewing!
📚 In This Guide
- What you need
- Instructions
- Tips and common mistakes
- Wrapping up and next steps
What you need
- ● Compost: 1–2 cups (well-aged, not fresh manure—think 6+ months decomposed). Pro tip: Avoid compost with weeds or chemical residues!
- ● Water: 5 gallons (use dechlorinated water—let tap water sit out for 24 hours or use rainwater).
- ● Breathable container: A 5-gallon bucket with a lid (drill small holes for aeration) or a burlap sack for aerobic tea.
- ● Aeration tool: A small aquarium pump (1–2 watts) with an air stone or a battery-powered drill with a paint mixer attachment.
- ● Stirring stick: Wooden or plastic (avoid metal to prevent contamination).
- ● Fine mesh strainer or cheesecloth: To filter the tea before use.
- ● Molasses: 1–2 tbsp (boosts microbial activity—like a snack for your soil microbes!)
- ● Worm castings: ½ cup (extra dose of nutrients and beneficial bacteria).
- ● Seaweed extract: 1 tbsp (adds trace minerals and growth hormones).
- ● Epsom salt: 1 tbsp (magnesium boost for flowering plants).
- ● pH test strips: To check water acidity (ideal range: 6.0–7.0).
Step-by-step instructions for crafting nutrient-rich compost tea
Here’s how I brew a potent, plant-boosting fertilizer in under an hour—no fancy equipment needed.
🌱 Step 1: Prepare Your Compost Base
Start with 2-3 cups of finished compost (fully decomposed, dark, and crumbly). If your compost is still chunky, sift it first to remove large particles—those won’t break down in time. I like to use compost that’s been curing for at least 6 months, as it’s rich in microbes and nutrients. Avoid fresh manure or unfinished compost, which can introduce harmful pathogens or ammonia burns to your plants.
Place the compost in a 5-gallon bucket (or similar container) and add 4 gallons of non-chlorinated water—rainwater or dechlorinated tap water works best. Chlorine kills beneficial microbes, so if you’re using tap water, let it sit uncovered for 24 hours before using. Stir the mixture gently with a wooden stick or clean spoon, ensuring the compost is fully submerged and no clumps remain.
💧 Step 2: Aerate and Steep for Microbial Activation
Cover the bucket loosely with a clean cloth or breathable lid—this keeps debris out while allowing airflow. Now, aerate the mixture every 10-15 minutes for the first hour. Use a small aquarium pump with an air stone or a bicycle pump (blow bubbles directly into the liquid) to oxygenate it. Aeration is critical—it prevents anaerobic conditions, which create foul odors and harmful compounds. You’ll see tiny bubbles and a slight effervescence; that’s your sign the microbes are waking up.
After the initial hour, reduce aeration to every 30 minutes for the remaining 30 minutes of steeping. The tea should smell earthy, not rotten. If it develops a strong ammonia or sulfur stench, you’ve over-aerated or used poor-quality compost. Drain and start over—this batch won’t work.
☀️ Step 3: Strain and Apply to Plants
After 60 minutes total, strain the tea through a fine mesh bag, cheesecloth, or coffee filter lined with a clean kitchen towel to catch fine particles. Press gently to extract all liquid—compost tea is most potent when used fresh. The strained liquid should be a light amber color with a fresh, soil-like aroma. If it’s murky or smells like sewage, discard it and try again with better compost.
Dilute the tea 1:1 with water before applying—undiluted compost tea can scorch plants or disrupt soil microbiology. Use it immediately: foliar spray for quick nutrient uptake or soil drench around the base of plants. Apply in the early morning or late afternoon to avoid sunburn on leaves. I like to use a spray bottle for small plants or a watering can with a fine rose for larger ones. Refrigerate any leftover tea for up to 3 days, but it loses potency quickly.
⏰ Step 4: Schedule and Monitor for Best Results
Feed your plants with compost tea every 2-4 weeks during the growing season, alternating between foliar sprays and soil applications. Observe your plants for 3-5 days after each application: healthy leaves should stay vibrant, and new growth should appear stronger. If leaves yellow or crisp at the edges, you’ve over-fertilized—rinse the soil with plain water and reduce frequency.
This tea is especially effective for container plants, seedlings, and nutrient-hungry crops like tomatoes, peppers, and leafy greens. For houseplants, dilute it further (1:3 with water) to avoid salt buildup. Keep a journal of when and how you apply it—you’ll notice faster recovery from stress, better flowering, and more robust root systems over time.
Tips & tricks for perfect plant fertilizer
These simple yet powerful tricks will help you craft a nutrient-packed compost tea that gives your garden the boost it deserves.
Compost Quality Matters: The secret to a potent brew starts with your compost. Look for dark, crumbly material that crumbles easily between your fingers—this indicates fully decomposed organic matter. If your compost still contains large chunks or has a strong ammonia smell, it hasn't finished breaking down. I've learned the hard way that using unfinished compost can actually harm your plants by introducing harmful bacteria. For best results, use compost that's been curing for at least 6 months, as this ensures a rich microbial population.
Timing Secret: Those first 10-15 minutes of aeration are absolutely critical. This is when you're waking up the microbial communities that will transform your compost into plant food. I like to set a timer and keep my aeration consistent—no skipping! If you notice the mixture starting to smell sour or develop bubbles that look like rotten eggs, you're creating anaerobic conditions. This happens when you either don't aerate enough or use poor-quality compost. The good news is you can fix this by adding more oxygen right away.
Equipment Upgrade: While you can absolutely use a bicycle pump to aerate, investing in a small aquarium pump with an air stone makes this process so much easier and more effective. The steady stream of bubbles creates optimal conditions for microbial activity. If you don't have either, a clean straw or even a whisk can work in a pinch—just stir vigorously for 30 seconds every 10-15 minutes during that first hour. The key is keeping those microbes happy and oxygenated throughout the entire 60-minute process.
Visual Cues: Pay attention to the color and smell of your finished tea—these are your best indicators of quality. The perfect compost tea should be a light amber color with a fresh, earthy aroma. If it looks murky or smells like sewage, you've got problems. This usually means either your compost wasn't fully decomposed or you over-aerated. Don't worry—just start over with better quality compost and more careful aeration. The good news is that once you get it right, you'll notice your plants respond dramatically within just a few applications.
Pro Tips for Make Fertilizer For Plants
- These simple yet powerful tricks will help you craft a nutrient-packed compost tea that gives your garden the boost it deserves.
- Compost Quality Matters: The secret to a potent brew starts with your compost.
- Timing Secret: Those first 10-15 minutes of aeration are absolutely critical.
Frequently asked questions
Got questions about DIY plant fertilizer? You’re not alone! Here are answers to the most common concerns—whether you're a gardening newbie or a seasoned green thumb looking for shortcuts.
Can I use compost tea on all plants?
Most plants benefit from compost tea, but avoid using it on succulents, cacti, or drought-tolerant plants—they prefer minimal moisture. For vegetables, herbs, and flowering plants, it’s a nutrient goldmine! Always dilute tea for seedlings or sensitive plants (like ferns) to prevent over-fertilizing. Pro tip: Test a small area first if your plant is new to tea!
How often should I fertilize with compost tea?
Frequency depends on your plants’ needs. For fast-growing veggies (like lettuce or tomatoes), apply tea every 1–2 weeks. Slow growers (e.g., perennials or shrubs) can use it monthly during active growth (spring–fall). Over-fertilizing can burn roots—when in doubt, dilute and observe! Watch for yellow leaves or wilting as signs to reduce frequency.
What’s a quick alternative if I don’t have time for compost tea?
No problem! Try these 5-minute fixes:
- Banana peel water: Steep peels in water for 24 hours, then use as a potassium-rich spray.
- Eggshells: Crush and mix into soil for calcium (great for tomatoes!).
- Coffee grounds: Sprinkle around acid-loving plants (blueberries, azaleas) for nitrogen.
- Store-bought liquid fertilizer: Dilute with water (follow package instructions) for an instant boost.
Why does my compost tea smell bad or have mold?
A rotten egg or sour smell means anaerobic bacteria took over—dilute heavily or remix with fresh aerated tea. Mold (fuzzy growth) is a red flag: discard the batch and start over with filtered water and a 1:5 tea-to-water ratio. Always use clean containers and avoid over-steeping (max 24–48 hours). Prevent mold by adding a splash of hydrogen peroxide (1 tsp per gallon) to the mix!
Can I reuse compost tea?
Nope! Compost tea is a one-and-done fertilizer because it’s teeming with living microbes that die quickly. Reusing it can lead to bacterial buildup or imbalances. Instead, save your compost materials (like food scraps or yard waste) for future batches. Think of it like fresh-squeezed lemonade—best enjoyed immediately!
Wrapping up and next steps
Making your own nutrient-rich compost tea is simpler—and more rewarding—than you think! With just a few household items, you’ve unlocked a free, eco-friendly way to supercharge your plants while reducing waste.
Whether you’re a seasoned gardener or just starting out, this DIY method proves that great results come from small, sustainable steps.
Now that you’re armed with the know-how, roll up your sleeves and brew your first batch today! 🌱 Ready to take it further? Experiment with different composting methods or explore plant-specific nutrient blends to tailor your fertilizer like a pro.