
Flowers
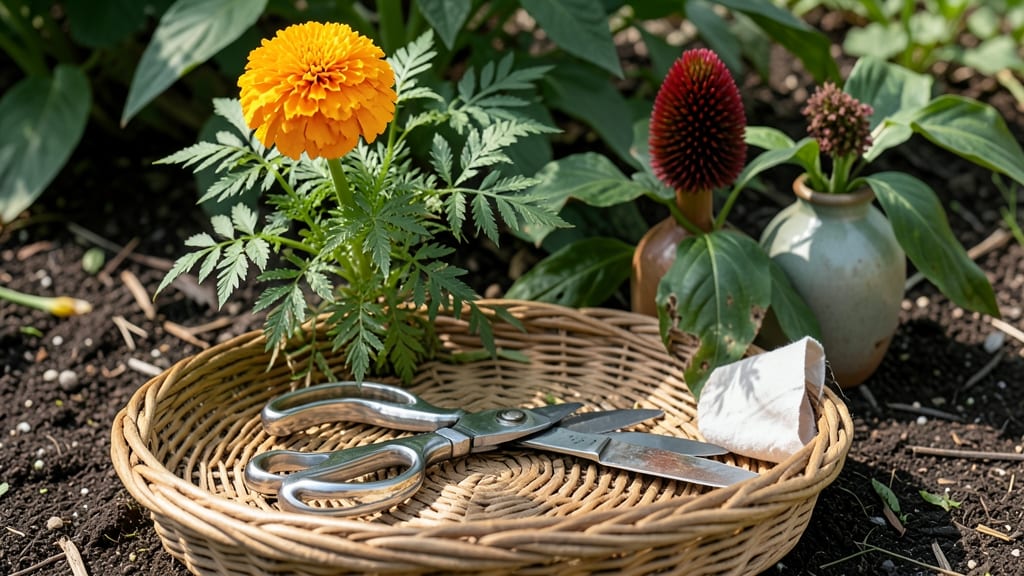
How to make flowers for the Day of the Dead brings bright orange marigolds to life on altars, blending fresh garden blooms with delicate papel picado for a vibrant, meaningful display that honors tradition while keeping it personal.
The beauty of this project lies in its simplicity—no advanced skills needed. Start with fresh marigolds from your garden or a local florist, then pair them with store-bought papel picado or hand-cut tissue paper for that signature layered look.
A sturdy base like foam or a simple wire frame keeps everything in place without the fuss.
By the end, you’ll have an altar that feels alive with color and memory. The scent of real marigolds fills the air, while the intricate paper designs add depth. These arrangements last for days, making them perfect for celebrations or year-round keepsakes.
Whether you’re decorating for a family gathering or creating a quiet tribute, this method works for any space—indoor altars, outdoor gardens, or even small table displays. Let’s bring your traditions to life with these handcrafted blooms.
📚 In This Guide
- What you need
- Instructions
- Tips and common mistakes
- Wrapping up and next steps
What you need
- ● Marigold seeds or seedlings: 10–20 plants (orange or yellow varieties work best).
- ● Potting soil: 2–3 bags (well-draining mix for outdoor pots).
- ● Containers: Small pots (6–8 inches wide) or garden space (if planting directly).
- ● Watering can or hose: For consistent hydration.
- ○ Fertilizer (optional): Balanced liquid fertilizer (e.g., 10-10-10) for faster growth.
- ● Scissors or pruning shears: For trimming stems to desired lengths.
- ● Construction paper: Bright orange, yellow, or multicolored sheets (20–30 sheets, 8.5x11 inches).
- ● Scissors (sharp): For clean cuts and petal shapes.
- ● Glue or double-sided tape: To attach petals to stems.
- ● Wire or pipe cleaners: 10–15 pieces (22–24 gauge) for stems.
- ○ Green paper or paint: For stem leaves (optional).
- ● Ruler and pencil: For measuring and marking petal templates.
- ○ Hole punch (optional): For easy stem attachment.
Step-by-step instructions for crafting Day of the Dead marigolds and papercraft flowers
Bring the vibrant traditions of Día de los Muertos to life with these handcrafted floral arrangements—simple yet deeply meaningful.
Gather Traditional Materials for Authentic Crafts
For real marigolds, start with 4-6 fresh orange or yellow marigold blooms—their bold color symbolizes the sun and guides spirits home. If using dried flowers, select fully opened blossoms with intact petals to maintain structure. For papercraft flowers, gather bright orange, yellow, and white tissue paper (or construction paper) cut into 3-inch squares. You’ll also need green floral wire for stems and scissors with sharp points for clean cuts.
I like to set up my workspace with all materials within reach—organize papers by color and lay out stems in a small bowl to keep them straight. The key here is precision: uneven petals or crooked stems will make the final arrangement look rushed. Take your time folding and shaping each piece, as the craftsmanship honors the tradition.
Create Papercraft Flowers Using Folding Techniques
Take one 3-inch paper square and fold it diagonally into a triangle. Unfold carefully, then fold each corner toward the center to form a smaller triangle. This creates the base for your flower. Next, fold the edges inward again to form 8 equal petal points, pressing firmly to hold the shape. Gently pull the center apart to open the flower fully—it should resemble a 5-pointed star with layered petals. Repeat with all squares, alternating colors for depth.
For a more realistic look, slightly crumple the center of each flower before unfolding the final petals. This mimics the natural texture of real blooms. As you work, set aside 2-3 flowers per stem—you’ll assemble them later. The goal is to create 4 distinct clusters, each with 3-4 flowers per stem, to mimic a traditional bouquet.
Assemble Papercraft or Fresh Marigold Stems
For papercraft stems, cut 6-inch lengths of floral wire and wrap the bottom with a small piece of green paper to mimic a stem. Slide 2-3 flowers onto each wire, spacing them evenly. Twist the wire gently at the base of each flower to secure them in place. For real marigolds, strip the lower leaves and insert 3-4 blooms per stem, securing with floral tape if needed. Arrange stems in a low, rounded vase or a clay pot filled with water (for fresh flowers) or sand (for dried arrangements).
Here’s where the magic happens: position stems in an asymmetrical, organic shape—traditional Día de los Muertos arrangements often look wild and natural, not perfectly symmetrical. If using dried marigolds, let them sit for 1-2 hours before arranging to allow the stems to soften slightly. This prevents breakage when you adjust the final display.
Add Cultural Details for Meaningful Decor
To deepen the cultural significance, incorporate small sugar skulls (store-bought or hand-painted) into your arrangement. Place them among the flowers or use them as miniature centerpieces alongside the bouquets. For a rustic touch, scatter dried beans or seeds around the base of the stems—these represent the offerings (ofrendas) made to honor loved ones. If crafting entirely from paper, add black tissue paper bats or white paper candles to complete the altar-like effect.
Step back and assess the balance. The colors should feel warm and inviting, with no single hue dominating. If a stem looks sparse, add an extra flower or two. The arrangement should evoke a sense of celebration and remembrance—just as a real Día de los Muertos altar would.
Preserve and Display Your Crafts
For papercraft flowers, store them in a flat box between layers of tissue paper to prevent crushing. If you’ve used wire, wrap the stems in bubble wrap to protect them. Real marigolds will last 3-5 days in water, while dried flowers can be preserved for months if kept in a cool, dry place away from direct sunlight. For long-term storage, place dried blooms in a breathable cloth bag with a silica gel packet to absorb moisture.
Display your arrangement on an altar (ofrenda) with photos of loved ones, candles, and favorite foods of the departed. The key is to create a space that feels personal and sacred. If you’re crafting for an event, set up the display 24 hours in advance—this allows the scents (especially from real marigolds) to fill the room, enhancing the sensory experience. The aroma of marigolds is said to attract spirits, making your craft not just decorative, but meaningful.
Tips & tricks for perfect Day of the Dead floral crafts
Bringing the vibrant essence of Día de los Muertos to life starts with these insider techniques that elevate your floral designs from simple to stunning.
Material Preparation: When working with fresh marigolds, select blooms with fully unfurled petals but still firm centers—they'll hold their shape better during assembly. For paper flowers, use tissue paper that's slightly textured rather than completely smooth; it creates more interesting visual layers. I've found that lightly dampening the tissue squares before folding helps them hold pleats more securely, preventing them from unfurling during the final shaping.
Structural Stability: The key to durable flowers lies in proper wire usage. For marigolds, wrap the floral wire around the stem in a spiral pattern rather than straight lines—this creates a stronger base that can support more petal layers. For paper flowers, twist the 6-inch stems tightly at the base before inserting through the center; this prevents them from bending or breaking during handling. I've learned this the hard way after seeing several paper flowers collapse mid-project!
Cultural Authenticity: Incorporate traditional elements like the single yellow tissue layer at the center of paper flowers to represent the sun's core—a detail that makes your crafting more meaningful. For marigold arrangements, include at least one white paper flower among your orange and yellow pieces to honor the Mexican tradition of remembrance. These small touches transform your craft into a true cultural representation rather than just decorative elements.
Pro Tips for Make Flowers For Day Of The Dead
- Bringing the vibrant essence of Día de los Muertos to life starts with these insider techniques that elevate your floral designs from simple to stunning.
- Material Preparation: When working with fresh marigolds, select blooms with fully unfurled petals but still firm centers—they'll hold their shape better during assembly.
- Structural Stability: The key to durable flowers lies in proper wire usage.
Frequently asked questions
Got questions about crafting your own Day of the Dead flowers? You’re not alone! Here are some of the most common concerns—and their answers—to help you create stunning, meaningful decorations with confidence.
What’s the best material for beginners?
Start with paper flowers (cempasúchil or marigold-inspired designs) if you’re new to crafting—they’re forgiving, budget-friendly, and easy to customize. For a more traditional (but slightly trickier) touch, try real dried marigolds from a florist or garden center. Pro tip: Pre-cut templates or stencils can save time and frustration!
How far in advance should I make them?
Paper flowers can be crafted weeks ahead and stored flat between cardboard or in an airtight container to keep them crisp. Real marigolds, however, should be dried 2–3 days before the holiday to preserve their vibrant color and shape. For extra longevity, spray them lightly with hairspray or clear acrylic sealer!
Can I use colors other than orange?
While orange and yellow (cempasúchil colors) are traditional, many modern interpretations include purples, whites, or even black for a unique twist. Just keep the spirit of bright, eye-catching hues to honor the festive energy. Mix textures (e.g., tissue paper + wire) for depth!
What if my flowers look uneven or messy?
Don’t stress—imperfections add character! If edges are jagged, trim them with pinking shears or a craft knife for a cleaner look. For lopsided paper blooms, fold petals inward slightly to create a fuller center. Real marigolds? A spritz of water and a gentle flattening with a heavy book can revive wilted stems.
Where’s the best place to display them?
Traditionally, flowers are placed on ofrendas (altars), but get creative! Try:
- Graveyard headstones (if visiting loved ones)
- Windowsills or doorways to “guide spirits home”
- Hanging garlands above tables or mirrors
- Framed as wall art with handwritten messages
Wrapping up and next steps
Creating your own Day of the Dead flowers—whether vibrant marigolds or delicate papercraft—is a beautiful way to honor tradition and add a personal touch to your celebrations. 🌼 With just a few materials and a little creativity, you can craft meaningful tributes that shine with cultural significance.
Now that you’re inspired, why not share your creations with loved ones or even start a new family tradition?
Next step: Gather your supplies and let your hands bring the spirit of Día de los Muertos to life! 💛