
Pruning
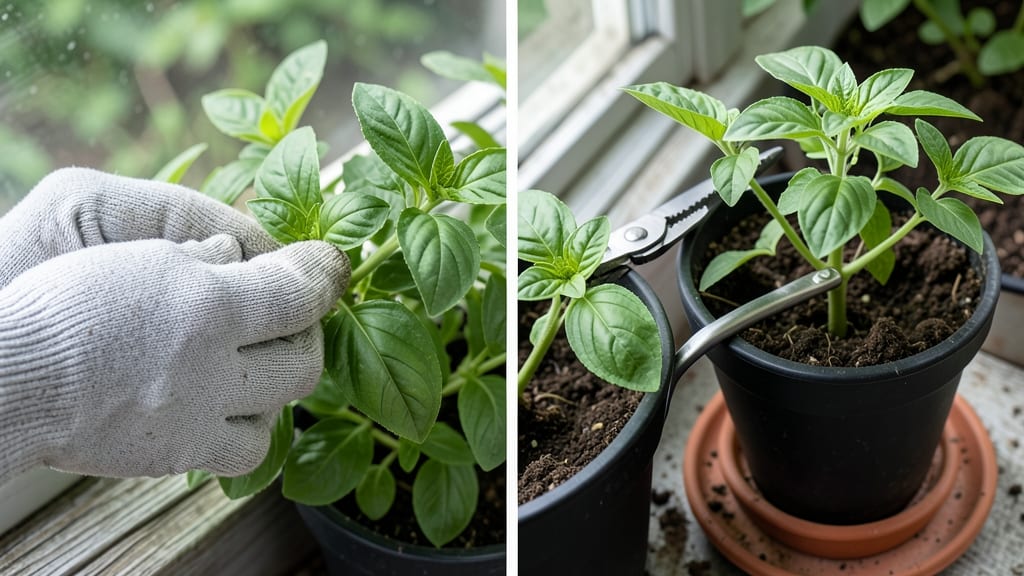
Your plants are hiding their potential—how to pinch back plants unlocks fuller growth and more blooms. 🌿 I spent years growing leggy basil and sparse tomatoes until I learned this simple trick that transforms weak stems into bushy powerhouses.
The secret lies in stopping growth at the right moment to trigger branching, not cutting into the plant's heart.
Timing matters most—do this when plants have 4-6 sets of true leaves but haven't flowered yet. Spring and early summer are ideal for annuals, while perennials get their pinch in late winter before new growth begins.
You don't need fancy tools: clean pruning shears or even your fingers work, but sterilizing them first prevents disease spread between plants.
What you'll end up with is thicker stems, more leaves, and twice as many flowers—tomatoes develop stronger branches, basil grows wider leaves, and impatiens burst with color instead of stretching toward the light.
The process takes just 2 minutes per plant but saves you from buying more transplants next season.
Even experienced gardeners skip this step—don't be one of them. The best candidates include tomatoes, basil, impatiens, and coleus, but many herbs and flowers respond beautifully too. Let's get those plants branching out properly!
📚 In This Guide
- What you need
- Instructions
- Tips and common mistakes
- Wrapping up and next steps
What you need
- ● Clean, sharp pruning shears or scissors – Opt for bypass pruners (for small stems) or anvil pruners (for thicker branches). Sterilize with rubbing alcohol before and after use to prevent disease.
- ● Gloves – A pair of gardening gloves (preferably with a snug fit) to protect your hands from thorns, sap, or dirt.
- ● Rubbing alcohol (70% or higher) – A small bottle (4–8 oz) to disinfect tools between cuts.
- ○ Pruning sealant (optional but helpful) – A small tube of tree wound pruning paste or beeswax-based sealant to coat larger cuts and prevent infection.
- ● Healthy, established plants – Pinching works best on plants that are at least 6–12 inches tall and have 4–6 sets of true leaves (not just seed leaves).
- ● Growth stage awareness – Pinch back plants in early spring or after flowering (varies by plant type—check your variety’s guidelines!).
- ● Sunlight and water access – Ensure your plants are in a location with adequate light and well-draining soil to recover post-pruning.
- ● A small spray bottle with water to mist cuts on succulents or delicate plants.
- ● A notebook or plant journal to track which plants you pinch and their growth progress.
- ● Plant growth hormones (like rooting powder) if propagating cuttings from pinched stems.
Step-by-step instructions for pinching back plants
Here's the simple technique I use to transform leggy, sparse plants into full, bushy powerhouses.
🌿 Step 1: Identify the Right Time and Growth Stage
Pinch back plants when they're young and actively growing—typically in early spring for perennials or when seedlings have 4-6 true leaves. Look for new growth at the tips of stems; these are your pinching targets. Avoid pinching during flowering or when plants are stressed from heat or drought.
I always check the weather forecast first. Pinching during 5-7 days of stable, warm weather (around 60-75°F) gives plants time to recover and branch out. If a cold snap is coming, wait—new growth won't survive freezing temperatures.
✂️ Step 2: Use Clean Tools and Make the Right Cuts
Grab your sharp pruning shears or clean fingers (for small stems) and locate the leaf node—the small bump where leaves attach to the stem. This is where new branches will sprout. Pinch or cut just above the node, leaving ¼ inch of stem below it.
I like to make clean cuts at a 45-degree angle for larger stems—this prevents water from pooling and causing rot. For delicate plants like basil or coleus, a simple pinch with your fingers works perfectly. Never tear stems; this damages the plant and invites disease.
🌱 Step 3: Encourage Branching with Proper Aftercare
After pinching, water the plant deeply to help it recover. You'll notice new side shoots emerging from the leaf nodes within 7-14 days. These shoots will eventually become sturdy branches, creating a fuller, more compact plant.
Here's the thing—don't overdo it. Pinching too aggressively can stress the plant, so I limit myself to 2-3 pinches per season for most plants. For fast growers like basil or mint, you can pinch back every 3-4 weeks to keep them bushy and productive.
☀️ Step 4: Monitor and Repeat for Continuous Growth
Keep an eye on your plants after pinching. If new growth appears leggy (thin and stretched), they need more light. Move them to a sunnier spot or supplement with a grow light for 12-14 hours daily. You'll see stronger, stockier growth within a week.
Repeat the pinching process 2-3 times during the growing season to maintain shape and encourage even more blooms. For flowering plants like petunias or geraniums, pinch back right after the first flush of blooms to promote a second, fuller round of flowers.
⏰ Step 5: Know When to Stop Pinching
Stop pinching 6-8 weeks before your first frost for annuals, or 4-6 weeks before for perennials in colder climates. This gives plants time to harden off and prepare for dormancy. You'll know you've pinched enough when the plant looks full, balanced, and healthy—not sparse or overcrowded.
Real talk: If you pinch too late in the season, new growth won't have time to mature before winter. I always mark my calendar with the last pinching date to avoid this mistake. For container plants, you can pinch back throughout the season since they're not bound by frost dates.
Tips & tricks for encouraging bushier plant growth
These simple tricks will help you transform leggy plants into full, vibrant powerhouses—without fancy tools or expensive equipment.
Timing is Everything: The 4-6 true leaves rule is your golden window—this is when your plant has enough energy to recover from pinching. I learned this the hard way after pinching too early and stunting growth completely. Wait until you see that second set of true leaves forming before you make your first cut. Morning pinching is key too; plants heal faster in daylight, and you’ll avoid the stress of evening cuts.
The Technique That Changed Everything: That 45-degree angle when using pruners isn’t just for looks—it creates a larger surface area for faster healing. If you’re pinching with fingers, focus on making a clean break just above the leaf node. The goal is to remove that top 1-2 inches cleanly, including the terminal bud. I’ve seen beginners leave the bud behind, and the plant just keeps growing tall instead of bushy.
Light and Water Strategy: After pinching, those first few days are critical. Move your plant to bright, indirect light—think of it as plant physical therapy. Too much direct sun right after pinching can stress the plant, while too little light means it won’t have the energy to produce those new side shoots. Keep soil evenly moist (not soggy!)—this is when most people overwater out of excitement, and yellowing leaves are a dead giveaway you’ve gone too far.
Monitoring New Growth: Watch for those new side shoots like a hawk—they’ll appear within 1-2 weeks if everything’s right. Once they reach 3-4 inches, it’s time to pinch them back too. This might seem counterintuitive, but it’s what creates that dense, bushy look. I always make a note in my garden journal when I pinch so I don’t forget to monitor them later. If growth stalls after pinching, check your watering habits first—most problems come back to either too much or too little.
Pro Tips for Pinch Back Plants
- These simple tricks will help you transform leggy plants into full, vibrant powerhouses—without fancy tools or expensive equipment.
- Timing is Everything: The 4-6 true leaves rule is your golden window—this is when your plant has enough energy to recover from pinching.
- The Technique That Changed Everything: That 45-degree angle when using pruners isn’t just for looks—it creates a larger surface area for faster healing.
Frequently asked questions
Got questions about pinching back plants? You’re not alone! Here are some of the most common concerns—plus clear, actionable answers to help you grow like a pro.
When is the best time to pinch back plants?
Pinch back plants in the early morning or late afternoon to avoid stressing them with midday heat. For annuals, do it when they’re young (3–5 inches tall) and actively growing. For perennials, wait until after the first flush of blooms or in early spring. Pro tip: Avoid pinching during extreme weather or drought.
How much should I pinch off each time?
Remove 1/3 to 1/2 of the plant’s growth at a time to encourage bushiness without shocking it. For example, pinch just above a set of leaves or a node (the bump where leaves grow). Overdoing it can stunt growth—think of it like a haircut: small, strategic cuts yield the best results!
What if my plant doesn’t grow bushier after pinching?
If your plant isn’t responding, check these factors:
- Timing: Pinching too late in the season (fall/winter) may limit growth.
- Light: Ensure it gets enough sunlight (6+ hours/day for most plants).
- Water/Nutrients: Underwatering or poor soil can stress the plant.
- Species: Some plants (like tomatoes) respond well, while others (like roses) may need pruning instead.
Can I use scissors or should I pinch with my fingers?
Both work! Use clean fingers or nails for small stems (like herbs or seedlings)—it’s faster and avoids crushing. For thicker stems (e.g., basil or tomatoes), sharp scissors or pruners prevent jagged cuts. Sterilize tools with rubbing alcohol to avoid disease.
What if I pinch too much or in the wrong place?
Don’t panic! If you over-pinch:
- Stunted growth: Wait until new leaves appear before pinching again.
- Wrong spot: If you cut above a node, the plant may grow leggy. Trim just above a leaf pair to redirect energy.
- Leggy stems: Focus on pinching lower leaves next time to encourage compact growth.
Wrapping up and next steps
Pinching back plants is a simple yet powerful way to boost bushier growth, more flowers, and healthier foliage—no green thumb required! 🌱 Whether you’re nurturing herbs, veggies, or flowering shrubs, mastering this technique takes just a few minutes and yields big rewards.
Remember: timing, clean cuts, and patience are your best friends.
Ready to see your garden thrive? Grab your shears and give it a try—your plants will thank you with vibrant blooms and lush foliage in no time! For even more tips, check out our pruning guide or experiment with other growth-hacking techniques.