
Succulent
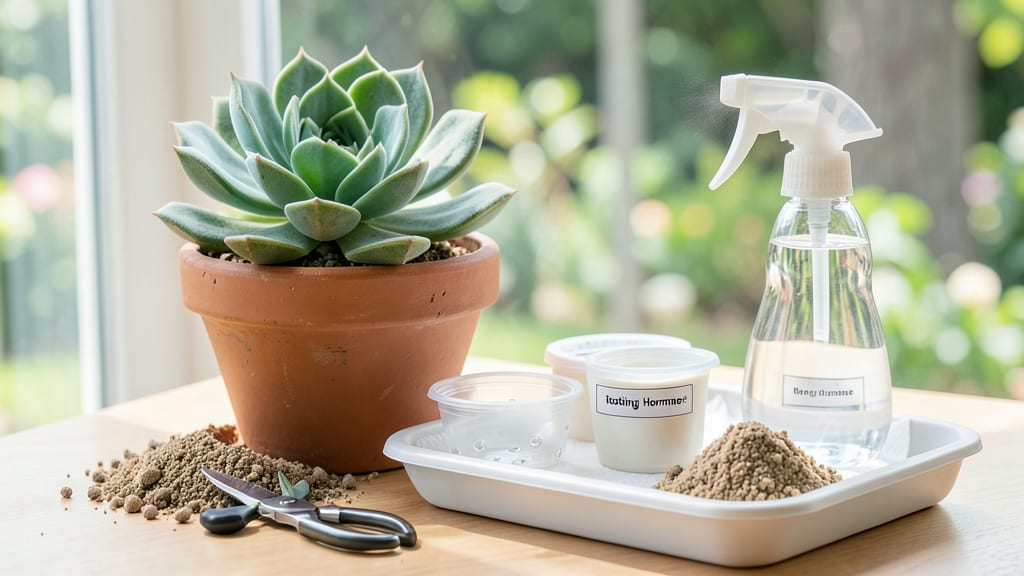
How to clone succulents from a single leaf is easier than you think—just drop that first plump piece into soil, and watch it transform into a whole new plant. ✨ I’ve turned broken leaves into thriving rosettes just by waiting patiently—no fancy tools or green thumbs required. The magic happens when you understand how these hardy plants regrow from tiny fragments.
All you need are a few healthy leaves, a shallow tray, and some well-draining soil mix. The process takes about 4-6 weeks from start to roots, and the best part?
You can clone succulents year-round as long as temperatures stay above 55°F. Even my first attempt (which I almost gave up on) eventually sprouted three new plants.
By the end, you’ll have a collection of identical baby succulents ready to fill gaps in your garden or share with friends. The key is avoiding rot—just let those cut ends dry for a day or two before planting. It’s shockingly simple once you know the tricks.
Works for echeverias, jades, and even snake plants, so you can expand your collection without buying new plants. Let’s get those leaves propagating!
📚 In This Guide
- What you need
- Instructions
- Tips and common mistakes
- Wrapping up and next steps
What you need
- ● Succulent leaves: Healthy, plump leaves from a mature succulent (10–20, depending on the size of your parent plant).
- ● Well-draining soil: A cactus or succulent mix (avoid regular potting soil—it retains too much moisture!). Quantity: Enough to fill small pots (2–4 inches deep).
- ● Small pots or trays: Plastic pots, seed trays, or even repurposed containers with drainage holes. Size: 2–4 inches in diameter.
- ● Perlite or sand: For extra drainage (mix 1–2 parts perlite/sand per 3 parts soil).
- ● Spray bottle: For gentle watering (avoid soaking!).
- ● Tweezers or toothpicks: To handle leaves without crushing them.
- ○ Rooting hormone (optional but helpful): Speeds up root growth—choose a gel or powder formulated for succulents.
- ● Sharp knife or scissors: For cleanly removing leaves (sterilize with rubbing alcohol!).
- ● Heat mat: Accelerates rooting (set to 70–75°F if you’re impatient!).
- ● Clear plastic wrap or dome: Creates a mini greenhouse to retain humidity.
- ● Label markers: To track your clones (trust us, you’ll forget which is which!).
- ● Hair dryer (cool setting): Dries cut ends quickly to prevent rot.
Step-by-step instructions for cloning succulents
Here's the foolproof method I use to multiply my favorite succulents—no fancy tools, just patience and a sunny windowsill.
🌱 Step 1: Select Healthy Leaves for Propagation
Choose plump, firm leaves from a mature, healthy succulent—avoid ones near the base or with brown spots. I like to work in the morning when leaves are fully hydrated. Gently twist a leaf from its stem until it pops off cleanly with a satisfying snap. If it doesn't come free, it's not ready yet.
Let the leaves dry for 3-5 days in a warm, shaded spot. This callusing period prevents rot when you plant them. You'll know they're ready when the cut end forms a slightly rough, chalky texture—this is nature's seal against infection.
💧 Step 2: Prepare the Rooting Medium
Use a well-draining mix: I blend equal parts perlite and coarse sand (or buy pre-made cactus/succulent mix). Fill small pots or a shallow tray with the mix, leaving ½ inch of space at the top. Moisten it lightly until damp but not soggy—you want it to hold moisture without pooling.
This step is where most people mess up. Too much water now will drown your cuttings. Test by squeezing a handful: it should feel like a wrung-out sponge, not a dripping washcloth. If your mix is too dense, add more perlite to improve airflow.
✂️ Step 3: Plant the Callused Leaves
Place the callused end of each leaf ½ inch deep into the prepared mix, spacing them 1-2 inches apart. I use a toothpick to make small holes if the mix is too compact. Don't press down—just tuck them gently so they stay upright. You're aiming for stability, not burial.
Mist the surface lightly with water until the top layer looks evenly moist. Then wait. The first few weeks are about patience. Keep the tray in bright, indirect light (no harsh midday sun yet) and check daily. You'll see tiny roots forming in 4-6 weeks—but don't peek too often, or you'll disturb them.
☀️ Step 4: Transition to Light and Care for New Growth
Once you spot new baby plants (tiny rosettes) at the leaf base, move the tray to morning sun only for a week. This gradual introduction prevents sunburn on delicate new growth. After two weeks, you can increase to 4-6 hours of direct sun daily—just watch for color changes.
Water only when the top ½ inch of soil feels completely dry to the touch. I use a spray bottle to mist the soil surface, never pouring from above. Overwatering is the #1 killer of succulent clones. Healthy new plants will have thick, vibrant leaves and no signs of wrinkling or yellowing.
🪴 Step 5: Transplant Mature Clones
When your clones reach 1-2 inches tall (usually 3-6 months after planting), they're ready for their own pots. Gently remove them from the propagation tray, being careful not to pull on the delicate stems. I use a small spoon to help lift them if needed.
Plant them in 3-4 inch pots with fresh cactus mix, burying them to the same depth they were growing at. Water lightly after transplanting, then reduce watering to every 2-3 weeks. These little survivors will thrive with minimal care—just keep them in bright light and they'll grow into full-sized succulents in no time.
Tips & tricks for perfect succulent cloning
These simple tricks will help you avoid common pitfalls and boost your success rate with succulent propagation.
Leaf Selection: I can't stress enough how important this first step is. Look for leaves that are fully attached and have a healthy, vibrant color—no yellowing or brown edges. The best leaves come from mature plants that have been in bright light for at least a few months. Confession: I skipped this step for years and wondered why so many of my cuttings rotted before they even rooted!
Callusing Check: After those 3-5 days of drying, the cut end should look chalky and slightly rough to the touch. If it still looks wet or shiny, give it another day or two. This callus acts like a natural bandage, protecting against rot when you plant. I test by gently pressing the cut end—if it feels smooth, it's not ready yet.
Rooting Medium: The perlite-to-sand ratio is crucial for airflow and drainage. If you're using pre-made cactus mix, add an extra 20% perlite to improve airflow. I've had the most success with a mix that feels almost powdery dry when squeezed—like a wrung-out sponge. Too much moisture here will drown your cuttings before they even start growing.
Light Transition: That gradual move from indirect to morning sun is key. I start with just 1-2 hours of morning sun for the first week, then slowly increase. Watch for color changes—if leaves start looking pale or translucent, they're getting too much sun. The goal is to harden off those new plants without shocking them.
Pro Tips for Clone Succulents
- These simple tricks will help you avoid common pitfalls and boost your success rate with succulent propagation.
- Leaf Selection: I can't stress enough how important this first step is.
- Callusing Check: After those 3-5 days of drying, the cut end should look chalky and slightly rough to the touch.
Frequently asked questions
Got questions about cloning succulents?
You’re not alone! Here are answers to the most common queries—from timing tricks to troubleshooting tips—so you can propagate like a pro.
When is the best time of year to clone succulents?
The ideal window is spring or early summer (March–June). Warmer temps and longer daylight help roots establish faster. Avoid winter—cooler weather slows growth. If you’re in a mild climate, late summer (August–September) also works, but reduce watering to prevent rot.
How long does it take for a succulent leaf to root?
Most succulent leaves root in 2–6 weeks, depending on the type, humidity, and care. Echeverias and haworthias often root in 3–4 weeks, while sedums may take longer. Patience is key—don’t tug or overwater! Check for tiny roots by gently wiggling the leaf (if it resists, roots are forming).
What should I do if my cuttings rot instead of rooting?
Rot is usually caused by too much moisture. If you spot mushy stems or black spots, act fast:
- Stop watering immediately.
- Remove the rotted part with clean scissors.
- Let the cutting dry for 1–2 days before replanting.
- Use a well-draining mix (like cactus soil + perlite) next time.
Can I clone succulents from store-bought plants?
Many nursery succulents are leaf-propagable, but check for pests first (quarantine new plants). Avoid treated or sprayed plants—chemicals can harm cuttings. Start with healthy leaves from echeverias, jade plants, or string of pearls for the easiest success.
What’s an alternative if I don’t have soil or pots?
No problem! Try these zero-waste methods:
- Water propagation: Place leaves in a jar of water (change weekly) until roots form (4–6 weeks). Transfer to soil afterward.
- Paper towels: Lay leaves on a damp towel, cover loosely with plastic, and wait for roots to appear (2–3 weeks).
- Coffee grounds: A gritty, fungal-free alternative to soil for quick rooting.
Wrapping up and next steps
Cloning succulents through leaf propagation is a simple, rewarding way to expand your plant collection—no green thumb required! 🌱 With just a few leaves, patience, and the right conditions, you’ll soon have thriving new plants.
Whether you’re a beginner or a seasoned plant parent, this method is perfect for busy gardeners who love low-maintenance greenery.
Ready to grow your succulent family? Start with one leaf today—your future plants will thank you! For extra inspiration, explore succulent care tips or share your progress with fellow plant enthusiasts online. Happy propagating! 🌿✨