
Fertilization
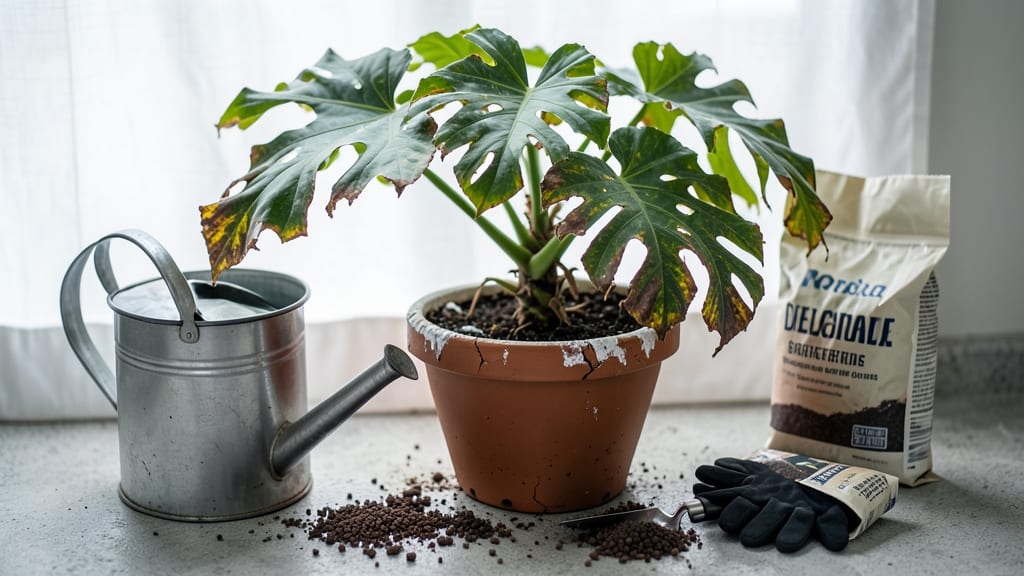
How to fix over-fertilized plants—they can look like they’ve been set on fire, with crispy leaf edges and stunted growth that’s heartbreaking to see. 🌱 I’ve nursed back more than a few plants from this common mistake, and the flush-and-revive method works every time if you act fast. The key is diluting the salt buildup in the soil before it becomes permanent damage.
First, identify the symptoms: brown leaf tips, yellowing between veins, or white crusty deposits on soil. These are your warning signs that the fertilizer salts are burning roots. The fix starts with water—lots of it—to flush out excess nutrients.
Use room-temperature water and let it run through the soil until it drains freely from the bottom of the pot or garden bed.
After flushing, adjust your routine: cut back on fertilizer for at least 4-6 weeks and switch to a diluted, organic option if you resume. Monitor soil moisture—overwatering after flushing can drown stressed roots, while underwatering lets salts linger.
Most plants show new growth within 2-3 weeks if the damage wasn’t severe.
Prevention is simpler than repair: always follow label instructions, test soil before fertilizing, and choose slow-release fertilizers for steady, controlled feeding. A little caution now saves you from scrubbing your hands in frustration later. Let’s get those plants back to thriving!
📚 In This Guide
- What you need
- Instructions
- Tips and common mistakes
- Wrapping up and next steps
What you need
- ● Water – At least 2-3 gallons per plant (or enough to run through the soil quickly). Use room-temperature, chlorine-free water (rainwater or distilled works best).
- ● Large container or bucket – Minimum 5-gallon capacity (for mixing or collecting runoff).
- ● Garden hose with adjustable nozzle – For precise water flow (a gentle spray or "shower" setting is ideal).
- ● Drainage tray or tarp – To catch excess water (prevents mess and soil erosion).
- ○ pH test kit – Optional but helpful (to monitor soil pH after flushing; aim for 6.0–7.0).
- ● Gloves and old towel – For clean hands and quick wipe-ups (fertilizer residue can be gritty!).
- ● Organic matter – Compost, peat moss, or coconut coir (to replenish nutrients post-flush).
- ● Epsom salt (magnesium sulfate) – 1 tbsp per gallon of water (helps counteract fertilizer burn if leaves show magnesium deficiency).
- ● Slow-release fertilizer – Balanced, low-nitrogen blend (like 5-5-5 or 10-10-10) for gradual reintroduction after recovery.
- ● Hair dryer or fan – For speed-drying leaves (prevents fungal issues from excess moisture).
Step-by-step instructions for reviving over-fertilized plants
When fertilizer burn strikes, act fast—these steps get your plants back to healthy growth.
💧 Step 1: Water Deeply to Flush Out Excess Fertilizer
Start by giving your plant a thorough watering from the top. Use room-temperature water and let it run through the soil until it drains freely from the bottom of the pot or garden bed. This helps dilute and wash away the concentrated fertilizer salts that have built up in the root zone. You’ll know it’s working when water emerges from the drainage holes—don’t stop until you see clear runoff.
For container plants, place them in a sink or shallow tray and let the water flow slowly. This ensures you’re not just wetting the surface but pushing excess salts deeper into the soil where roots can access fresh water. Repeat this process every 2-3 days for the next week, even if the soil feels damp. Over-fertilized plants need consistent flushing to recover.
🌱 Step 2: Trim Damaged Roots and Leaves
Gently remove the plant from its pot or carefully dig around the base if it’s in the ground. Inspect the roots—healthy roots are firm and white, while damaged roots will appear brown or mushy. Use clean, sharp scissors or pruning shears to trim away any blackened, slimy, or brittle roots. This step might seem drastic, but it prevents further damage and helps the plant redirect energy to new growth.
Above ground, cut back any yellowed or crispy leaves with the same clean tools. Focus on removing leaves that are more than 50% damaged, as they’re draining energy the plant could use to recover. Don’t worry about losing foliage—new, healthier leaves will grow back once the fertilizer salts are gone. Water the plant lightly after pruning to help it settle back into the soil.
☀️ Step 3: Adjust Light and Watering Routine
Move your plant to a spot with bright, indirect light for the next 7-10 days. Direct sunlight can stress already weakened plants, so avoid placing them in full sun until you see signs of recovery, like new green growth. If you’re growing indoors, a north-facing window or a grow light set 12-18 inches away works best. Keep the light consistent—plants need stability during recovery.
After flushing, switch to a gentler watering schedule. Water only when the top 1-2 inches of soil feel dry to the touch, and use about half the amount of water you normally would. Overwatering after fertilizer burn can drown the roots and worsen the problem. Check the soil moisture daily—it’s better to underwater slightly than risk suffocating the roots with too much water.
⏰ Step 4: Introduce a Mild, Balanced Fertilizer
Wait at least 2 weeks before reintroducing any fertilizer. Once you’re ready, use a diluted, balanced liquid fertilizer (like a 10-10-10 or 20-20-20) at half the recommended strength. This gives your plant essential nutrients without overwhelming it. Mix the fertilizer in a separate container first, then add it to the watering can. Apply it to the soil, not the leaves, to avoid further irritation.
Monitor your plant closely for the next few weeks. If you notice new growth but leaves still yellow at the edges, the plant is recovering but may need another round of flushing. If growth stalls again, switch to an even weaker fertilizer solution or hold off on fertilizing for another week. Patience is key—rushing back into a full feeding can undo all your progress.
🌿 Step 5: Monitor and Maintain Long-Term Health
Keep an eye on your plant’s progress over the next 4-6 weeks. Healthy new leaves should emerge from the center of the plant, and the existing leaves should gradually regain their color. If brown spots or crispy edges persist, trim those leaves immediately and continue flushing the soil. This tells you the fertilizer salts are still present and need more time to leach out.
To prevent future over-fertilizing, stick to a regular feeding schedule—most plants only need fertilizer every 4-6 weeks during the growing season. Always follow the label instructions, and when in doubt, dilute the fertilizer further. Your plants will thank you with lush, vibrant growth instead of stressed, burned foliage. With this method, you’ll have your over-fertilized plants thriving again in no time.
Tips & tricks for reviving over-fertilized plants
Here's what nobody tells you about saving your plants from fertilizer shock—these tricks make all the difference.
Flushing Technique: For container plants, place them in a sink and let water run slowly through the soil for at least 10 minutes during each 2-3 day flush. This ensures you're pushing out those stubborn fertilizer salts from the root zone. I've seen plants recover beautifully when people skip this slow drainage step—don't make that mistake!
Root Inspection: When checking roots in Step 2, look for a clear boundary between healthy white roots and damaged brown ones. Trim only the mushy, blackened sections—healthy roots should spring back slightly when pressed. This precision prevents over-trimming, which can set your plant back further.
Light Transition: During the 7-10 day bright indirect light phase, gradually move your plant closer to its original light source after 5 days if you notice new growth. This helps it adjust without shock. I've had plants struggle when moved back too quickly—go slow!
Fertilizer Reintroduction: After the 2-week wait, test your soil by mixing a spoonful with water—if it looks cloudy or has residue, flush again before fertilizing. This simple check prevents repeating the same mistake. Use a liquid fertilizer you can see dissolving completely in water for best results.
Pro Tips for Fix Over Fertilized Plants
- Here's what nobody tells you about saving your plants from fertilizer shock—these tricks make all the difference.
- Flushing Technique: For container plants, place them in a sink and let water run slowly through the soil for at least 10 minutes during each 2-3 day flush.
- Root Inspection: When checking roots in Step 2, look for a clear boundary between healthy white roots and damaged brown ones.
Frequently asked questions
about fixing over-fertilized plants—here’s what you need to know before diving in!How quickly will my plants recover after flushing excess fertilizer?
Recovery time varies by plant type and severity. Most plants show improvement within 1–3 weeks if flushed properly and given gentle care. Succulents and cacti may bounce back faster (7–14 days), while heavy feeders like tomatoes or peppers could take longer. Monitor soil moisture and avoid fertilizing until new growth appears!
Can I use rainwater to flush out fertilizer?
Yes! Rainwater is a great free and chemical-free option for flushing. However, if your local rainwater is acidic or polluted, opt for distilled or filtered water instead. Avoid tap water with high chlorine/fluoride levels—it can stress plants further. Let the water run through the soil slowly for best results.
What if my plant’s leaves are already crispy or blackened?
Don’t panic! While severe damage may not reverse, flushing can still prevent further harm and help roots recover. Trim dead leaves with clean scissors, reduce light exposure slightly, and keep humidity up (mist lightly or use a humidity tray). Over time, new growth should emerge from healthier roots.
Should I stop fertilizing entirely after this happens?
Wait until you see new, vibrant growth (usually 4–6 weeks) before reintroducing fertilizer. Start with a diluted, organic fertilizer (like fish emulsion or compost tea) to avoid repeat burns. Test soil pH afterward—over-fertilization often throws it off balance.
Can I reuse the flushed fertilizer runoff?
Nope! The runoff contains high levels of salts and nutrients, which can harm plants if reused. Instead, drain it away from your garden or use it to fertilize non-edible plants (like ornamental grasses) only if heavily diluted. For safety, compost the flushed soil separately or amend it with perlite to improve drainage.
Wrapping up and next steps
Over-fertilizing your plants can feel like a setback, but with the right care, they can bounce back stronger than ever! 🌱 The key is acting quickly—flush the soil, adjust your feeding routine, and give your plants time to recover. Remember, even seasoned gardeners face this, so don’t stress.
Now that you’re equipped with the flush-and-revive rescue method, take a deep breath and get back to nurturing your green friends. Next up: Monitor their progress closely and celebrate every new leaf! 🎉