
Size
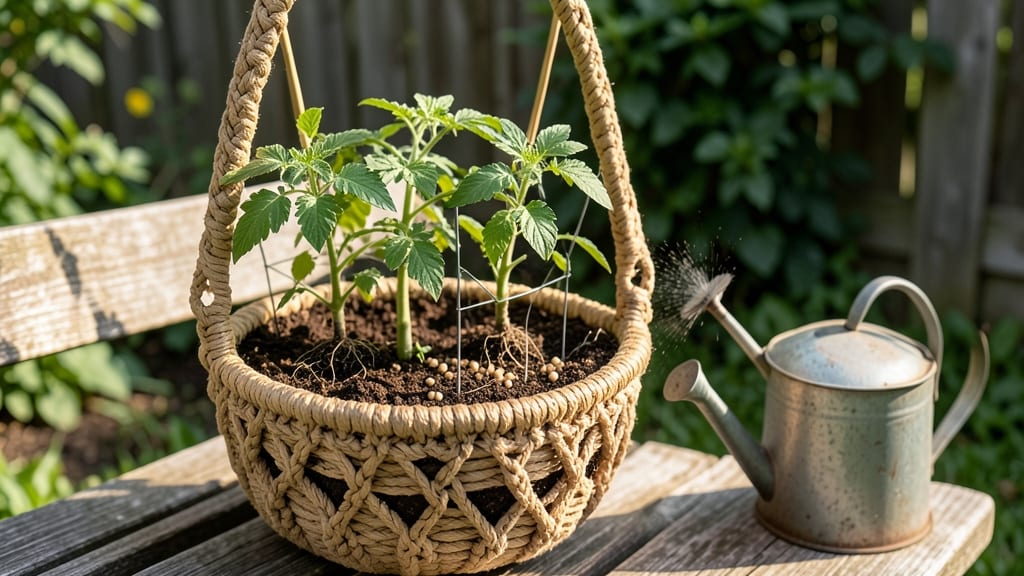
How to grow hanging tomato plants turned my tiny balcony into a sun-drenched harvest zone. 🌱 The secret isn't magic—it's choosing the right varieties, containers, and supports to turn vines into productive powerhouses. My first attempt with beefsteak tomatoes ended in sprawling chaos, but cherry tomatoes? Those thrived, producing pounds of fruit where I expected just a few.
You'll need compact varieties like 'Tiny Tim' or 'Patio Princess', sturdy 5-gallon containers with drainage, and a trellis system that holds 20+ pounds of vines and fruit. The soil mix should be lightweight yet nutrient-rich—think 60% potting soil, 30% perlite, and 10% compost.
Planting too deep or using regular garden soil is a recipe for root rot and poor drainage.
By midsummer, you'll be harvesting pint-sized tomatoes every 3-4 days with minimal space. The key is consistent watering (bottom-watering prevents blossom end rot), weekly feeding with tomato-specific fertilizer, and gentle pruning to focus energy on fruit production. Even my black thumb got results—no more sad, sprawling plants.
This method works for patios, rooftops, or even windowsills with enough light. The only real limitation is your imagination for what you can grow in vertical space. Let's get those vines climbing!
📚 In This Guide
- What you need
- Instructions
- Tips and common mistakes
- Wrapping up and next steps
What you need
- ● Hanging planters or containers: 5–10 gallons per plant (larger = more stability). Choose breathable fabric or durable plastic with drainage holes.
- ● Tomato seedlings or seeds: Dwarf or determinate varieties (e.g., 'Tiny Tim,' 'Patio,' or 'Micro Tom') thrive in hanging setups. Start seeds 6–8 weeks before the last frost.
- ● Potting mix: High-quality, well-draining soil blend (avoid garden soil—it compacts). Add perlite or vermiculite (10–20%) for aeration.
- ● Fertilizer: Balanced, slow-release granular (10-10-10) or liquid tomato fertilizer (diluted to half-strength). Organic options like compost or worm castings work too!
- ● Support system: Sturdy trellis, cage, or stakes (3–5 feet tall) to secure vines. Bamboo stakes or tomato clips are great for hanging setups.
- ● Watering can or drip irrigation: Containers dry out fast! A can with a narrow spout or a self-watering system prevents over/under-watering.
- ● Pruning shears: Sharp, clean scissors to trim suckers and encourage upward growth.
- ● Self-watering planters: Reduces maintenance (e.g., fabric grow bags with reservoirs).
- ● Mulch (straw or shredded leaves): Retains moisture and regulates soil temp—critical for hanging pots.
- ● Grow lights (LED, full-spectrum): Extend the growing season if planting early or in low-light areas.
- ● Plant tags or labels: Track varieties and watering schedules (especially if growing multiple types!).
- ● Eco-friendly pest control: Neem oil, copper tape, or row covers to deter pests like aphids or hornworms.
Step-by-step instructions for growing hanging tomato plants
Mastering the art of growing tomatoes vertically transforms your space and boosts yields—here’s how to do it right.
🪴 Step 1: Select the Right Hanging System and Location
Choose a sturdy hanging basket with a minimum 12-inch depth and multiple drainage holes—shallow pots stunt root growth. I recommend fabric grow bags for their breathability, which reduces root rot risk. Suspend your basket from a secure overhead support (like a patio rail or pergola) where it receives 6-8 hours of direct sunlight daily. South-facing exposure delivers the most consistent results, but west-facing works too if your climate is mild.
Position the basket so the bottom sits 18-24 inches above ground level—this elevation prevents fruit rot from splashing water and makes harvesting easier. Avoid placing it under trees or structures that cast shade, even intermittently. You’ll notice leaves turning pale or stems stretching toward light if the spot isn’t optimal. Adjust immediately if you see these signs.
☀️ Step 2: Prepare Soil and Plant With Proper Spacing
Fill the basket with a lightweight, well-draining potting mix (avoid garden soil—it compacts and suffocates roots). Amend it with compost or worm castings for nutrients, and mix in a slow-release fertilizer to feed the plant over 6-8 weeks. Press the soil down gently to eliminate air pockets, then create a small planting hole—just deep enough to bury the root ball up to the first set of leaves on your tomato seedling.
Plant one sturdy seedling per basket (crowding leads to disease and poor airflow). If using a large hanging planter, you can fit two small determinate varieties (like 'Tiny Tim' or 'Patio Princess'), but space them 12 inches apart. Water deeply right after planting to settle the soil around the roots. You’ll see the first true leaves emerge within 7-10 days—this is your cue that the plant has taken root.
🌿 Step 3: Train Vines and Provide Support Early
Install a tomato cage or trellis system inside the basket before the plant grows too tall. I use flexible wire cages (like those designed for hanging baskets) or spiral twine supports wrapped around a central stake. The moment your plant reaches 12 inches tall, gently weave the main stem through the cage or tie it to the twine with soft plant ties. This prevents stem breakage as the vine thickens.
Remove suckers (the small shoots that form in the leaf axils) weekly—these divert energy from fruit production. Pinch them off with your fingers or snip with clean scissors. You’ll notice the plant’s energy focuses on flowering and fruiting once suckers are gone. Prune yellow or diseased leaves immediately to improve airflow and prevent fungal issues.
💧 Step 4: Water and Feed for Maximum Yield
Water deeply every 2-3 days, ensuring the top 2 inches of soil feel dry before the next watering. Hanging baskets dry out faster than ground-level pots, so morning watering reduces evaporation and fungal risks. Use a self-watering basket or drip irrigation to maintain consistent moisture—fluctuations cause blossom end rot or cracked fruit. Check soil moisture by sticking your finger in—if it’s damp past the first inch, wait before watering again.
Fertilize every 2 weeks with a balanced liquid fertilizer (like 10-10-10) or a tomato-specific feed. Look for dark green leaves and abundant flowers as signs the plant is thriving. If leaves yellow between veins, it’s a magnesium deficiency—switch to an Epsom salt solution (1 tablespoon per gallon of water) applied every 2 weeks until foliage greens up again.
✂️ Step 5: Harvest and Prune for Continuous Production
Pick tomatoes when they’re fully colored but still slightly firm—this encourages more fruit to set. Twist gently to avoid damaging the stem, or use clean pruning shears for larger varieties. You’ll see new flower clusters forming within 5-7 days of harvesting, signaling the plant is ready for another round of growth. Remove overripe or spoiled fruit immediately to prevent pests and disease.
As the season progresses, prune older leaves that shade the lower fruit to improve air circulation. This step is critical in humid climates—poor airflow invites blight and mold. By late summer, you’ll notice the plant slowing down. At this point, reduce watering and stop fertilizing to let the plant focus its energy on ripening existing fruit rather than new growth.
Tips & tricks for thriving hanging tomato plants
Here’s what I’ve learned after years of experimenting with vertical tomato growing—these tricks make all the difference for lush, productive vines.
Sunlight Optimization: While 6-8 hours of direct sunlight is ideal, I’ve found that west-facing baskets actually produce slightly sweeter tomatoes in hot climates. The afternoon sun concentrates sugars in the fruit. If your east side gets shade after 10 AM, supplement with a portable grow light for 2-3 hours during peak sunlight hours. Morning sun alone won’t prevent stretching—watch for stems growing long and spindly as your first warning sign.
Root Health Secret: The 12-inch depth requirement isn’t just about space—it’s about creating a root zone that can support the plant’s weight. I add a handful of perlite to the bottom 3 inches of my baskets to improve aeration and drainage. This prevents root suffocation, which is especially critical in hanging containers where water drains faster. You’ll notice healthier foliage and more consistent flowering when roots get proper airflow.
Support System Hack: Installing your trellis or cage before the plant reaches 12 inches tall prevents stem damage later. I use soft plant ties made from recycled fabric strips—these won’t cut into the stem as it thickens. Pro tip: Weave the main vine through the cage in a zigzag pattern rather than straight up. This distributes weight more evenly and prevents the plant from toppling when heavy with fruit.
Watering Wisdom: The "top 2 inches dry" rule works, but I’ve found that hanging baskets actually need checking more frequently in windy conditions. On breezy days, water every 2 days instead of every 3 to prevent soil from drying out too quickly. For the ultimate consistency, I’ve started using drip irrigation lines with emitters placed at the soil surface—this delivers water directly to the roots without wetting the leaves, which dramatically reduces fungal issues.
Pro Tips for Grow Hanging Tomato Plants
- Here’s what I’ve learned after years of experimenting with vertical tomato growing—these tricks make all the difference for lush, productive vines.
- Sunlight Optimization: While 6-8 hours of direct sunlight is ideal, I’ve found that west-facing baskets actually produce slightly sweeter tomatoes in hot climates.
- Root Health Secret: The 12-inch depth requirement isn’t just about space—it’s about creating a root zone that can support the plant’s weight.
Frequently asked questions
Got questions about growing hanging tomato plants? You’re not alone! Here are some of the most common concerns—and their answers—to help you grow like a pro.
How long does it take for hanging tomato plants to produce fruit?
With proper care, most hanging tomato varieties (like Cherry or Grape types) start producing fruit 60–85 days after transplanting seedlings. Beefsteak or indeterminate varieties may take slightly longer (up to 90 days). Patience pays off—pruning and support speed up fruiting by improving air circulation and sunlight exposure!
Can I grow hanging tomatoes in containers without a trellis?
Technically yes, but not ideal for heavy varieties. If you skip a trellis, opt for determinate (bush) types like Patio or Tumbling Tom, which stay compact. For indeterminate varieties, a small cage or stakes (even a DIY wire frame) prevents sprawling and breakage. Without support, vines may rot or fruits won’t ripen fully.
Why are my hanging tomato leaves turning yellow?
Yellowing leaves (chlorosis) usually signals overwatering, nutrient deficiencies, or disease. Check these fixes:
- Watering: Let soil dry slightly between waterings—hanging pots dry faster!
- Nutrients: Feed with balanced fertilizer (10-10-10) or compost tea every 2–3 weeks.
- Disease: Fungal issues (like early blight) thrive in wet foliage. Prune affected leaves and improve airflow.
If only lower leaves yellow, it’s likely natural aging—remove them to redirect energy upward!
What’s the best hanging tomato variety for small spaces?
Space-saving picks thrive in containers and hanging baskets:
- Tumbling Tom – Compact, prolific, and perfect for 12"+ pots.
- Micro Tom – Dwarf variety (6" tall!) with tiny, sweet fruits.
- Sweet Million – Indeterminate but bushy with hundreds of cherry tomatoes.
- Balcony Red – Disease-resistant and great for urban gardens.
Pro tip: Cherry or grape types outperform larger varieties in hanging setups!
How do I prevent hanging tomato fruits from cracking?
Cracking happens when vines swing wildly (wind/rain) or soil moisture fluctuates. Try this:
- Use a sturdy trellis or sling to stabilize plants.
- Water consistently—aim for 1–1.5 inches per week.
- Mulch pots to retain moisture and reduce stress.
- Harvest early if cracks appear—underripe tomatoes can still be cooked!
Varieties like Sungold or Black Cherry are less prone to cracking.
Wrapping up and next steps
Growing hanging tomato plants is a rewarding adventure that brings bursting vines and juicy rewards to your garden or balcony! By choosing the right variety, providing sturdy support, and mastering a few key care tips, you’ll turn even small spaces into a tomato treasure trove. 🌱✨
Now that you’re armed with the know-how, roll up your sleeves and give it a try—your first harvest could be just weeks away! Start with one plant, experiment with containers, and let your green thumb shine. Happy growing! 🌿