
Size
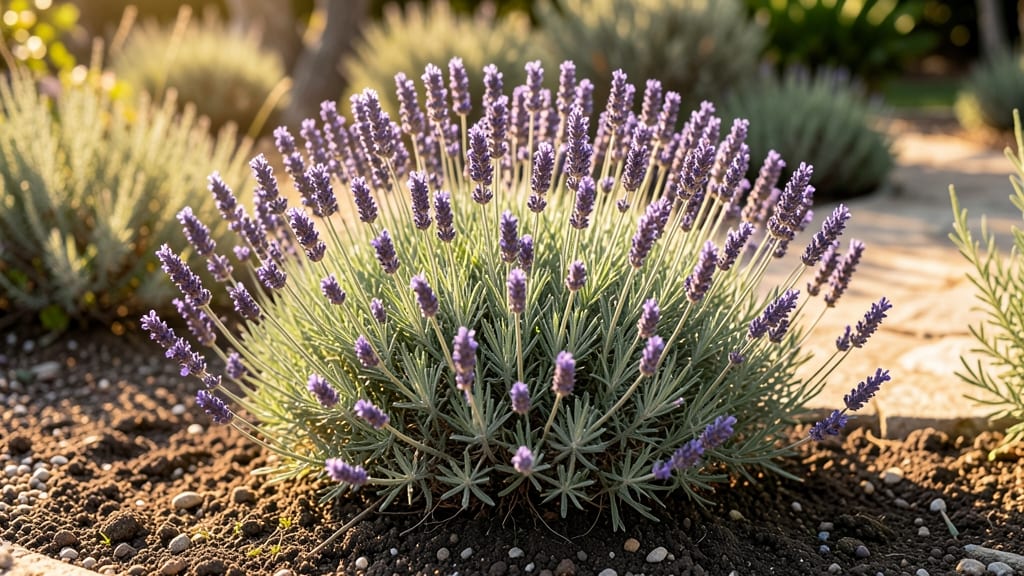
How to grow lavender plants outdoors is shockingly simple once you know the basics. 🌿 I’ve turned my dry, sunny corner into a fragrant haven by following just six steps—no green thumb required. The key? Matching lavender’s natural preferences: full sun, well-draining soil, and minimal fuss. You’ll need healthy nursery plants, a sunny spot with at least 6 hours of direct sunlight, and soil that drains like a sandy beach. Lavender hates soggy roots, so raised beds or slopes work best. Plant them 12-18 inches apart and no deeper than their root ball—too much depth suffocates them. Within a month, you’ll see sturdy stems and those signature silvery-green leaves. The fragrance alone makes it worth it, but the drought tolerance means you’ll spend less time watering and more time enjoying the view. Prune lightly after blooming to keep them bushy and fragrant for years. Works in zones 5-9, though Mediterranean varieties thrive best. Even beginners nail this—just avoid overwatering (the #1 killer) and you’re golden.
📚 In This Guide
- What you need
- Instructions
- Tips and common mistakes
- Wrapping up and next steps
What you need
- ● Lavender plants or seeds: 3–5 English lavender (Lavandula angustifolia) or French lavender (Lavandula dentata) nursery starts (easier for beginners)
- ● OR 1–2 packets of lavender seeds (if starting from scratch—patience required!)
- ● Well-draining soil: 1–2 bags of cactus/succulent mix (or regular potting soil amended with 50% perlite or coarse sand)
- ○ Optional: 1 cup of compost (lavender prefers lean soil—go light on nutrients!)
- ● Growing containers or garden bed: Containers: 3–5 5–7 gallon pots with drainage holes (terracotta or fabric pots work best)
- ● Garden bed: A sunny, elevated spot (6+ hours of direct sunlight daily) with sandy, rocky soil
- ● Drainage solutions: 1–2 inches of gravel or pebbles (for pots) to prevent root rot
- ● Watering can or hose with a gentle spray nozzle (lavender hates soggy roots!)
- ● Pruning shears (sharp, clean pair for trimming)
- ○ Gloves (optional but helpful for handling prickly stems)
- ● Full sun exposure: A location with at least 6–8 hours of direct sunlight daily (lavender is a sun-worshipper!)
- ● Well-draining soil: Avoid clay-heavy or waterlogged areas (amend with sand if needed)
- ● Mild to warm climate: Lavender thrives in USDA Zones 5–9 (hardy to -15°F/-26°C with protection)
- ● Patience: Seeds take 6–12 months to mature; starts bloom in 1–2 years.
- ● 1–2 mulch stones or lava rocks (to retain heat and deter weeds)
- ● Organic neem oil or insecticidal soap (for pest control)
- ● Wooden stakes or trellis (if growing tall varieties like Lavandula stoechas)
- ● Drip irrigation kit (for automated, low-stress watering)
Step-by-Step instructions for growing lavender plants outdoors
Here's my foolproof method for growing fragrant, thriving lavender—no green thumb required.
🪴 Step 1: Choose the Perfect Location and Soil
Lavender demands full sun, so pick a spot that gets at least 6-8 hours of direct sunlight daily. A south-facing area works best, but east or west exposures can work if you have at least 5 hours of morning sun. Avoid low spots where cold air settles—lavender hates soggy roots.
Test your soil first. Lavender thrives in well-draining, slightly alkaline soil with a pH between 6.7-7.3. If your soil is heavy clay, mix in 3-4 inches of coarse sand or gravel to improve drainage. I like to add a handful of crushed limestone to raise the pH slightly if my soil tests acidic.
🌱 Step 2: Plant at the Right Time and Depth
Spring is ideal for planting lavender—after the last frost when soil temperatures reach 60°F or warmer. Dig a hole twice as wide as the root ball but only as deep as the container it came in. Planting too deep suffocates the roots and causes rot.
Gently remove the plant from its container and loosen the roots if they're circling. Place it in the hole so the top of the root ball sits just below soil level. Backfill with native soil mixed with a little sand, then water deeply to settle everything. You'll know it's right when water drains through within 10-15 minutes.
☀️ Step 3: Water Wisely During Establishment
Lavender's first year is critical—water deeply once a week to encourage deep root growth. Water in the morning so foliage dries quickly, preventing fungal issues. You'll see healthy growth when new stems appear 3-4 weeks after planting.
Here's the thing—once established, lavender is drought-tolerant. After the first year, water only when the top 2 inches of soil feel completely dry. Overwatering is the #1 killer of lavender plants. If you see yellowing leaves, you're likely watering too much.
✂️ Step 4: Prune for Bushier Growth and Fragrance
Prune lavender right after flowering in early summer. Cut back one-third of the current year's growth using clean, sharp shears. This encourages bushier growth and more abundant blooms next year. Never prune into old wood—you'll kill the plant.
Shape lightly if needed, but resist the urge to prune lavender for hedges. It grows best when left slightly natural. After pruning, give the plant a light feeding with low-nitrogen fertilizer (like 5-10-10) to support new growth without encouraging leafy overgrowth.
🌿 Step 5: Protect from Winter and Pests
In colder climates (below 10°F), mulch lavender heavily with 3-4 inches of straw or pine needles in late fall. This protects the roots from freezing. Remove mulch in early spring before new growth starts. Never use wood chips—they can rot against the stems.
Watch for spider mites and aphids. If you see webbing or tiny bugs on the undersides of leaves, spray with a strong stream of water to knock them off. For stubborn infestations, use neem oil—it's safe for lavender and effective against soft-bodied pests.
⏰ Step 6: Harvest and Enjoy Year After Year
Harvest lavender when 70-80% of the flowers are open but before they turn brown. Cut stems in the morning after dew has dried. Bundle and hang upside down in a dry, dark place for 1-2 weeks to dry completely.
You'll know it's ready when stems snap easily and flowers crumble at the touch. Store dried lavender in airtight containers away from light. With proper care, your lavender will thrive for 5-10 years, rewarding you with fragrant blooms each season.
Tips & tricks for thriving lavender plants
These simple strategies will help you avoid common mistakes and grow lavender that smells amazing for years.
Sunlight Secret: If your location only gets 5 hours of morning sun (like east-facing spots), pair it with afternoon shade to prevent scorching. I've seen lavender struggle in hot afternoons—even partial shade helps. For true full sun spots, make sure there's no nearby trees or structures casting shadows for those critical 6-8 hours.
Soil Test Tip: Before planting, grab a soil test kit from your local garden center (they're cheap!). Lavender's ideal pH of 6.7-7.3 is tricky to guess—some garden soils are naturally acidic. If your test shows lower than 6.7, mix in 1/4 cup of agricultural lime per square foot before planting. This small adjustment makes all the difference for happy roots.
Planting Depth Check: After placing your lavender in the hole, press gently on the soil around it. If water pools on the surface after your initial watering, you've planted too deep. The top of the root ball should sit just below soil level—no higher, no lower. This ensures proper drainage, which is non-negotiable for lavender.
Watering Wisdom: The 10-15 minute drainage test in Step 2 isn't just for planting—use it as a watering guide too. After your weekly deep watering, check how long it takes for excess water to drain. If it takes longer than 15 minutes, your soil is too compacted. Mix in more sand or gravel to improve drainage permanently.
Pro Tips for Grow Lavender Plants Outdoors
- These simple strategies will help you avoid common mistakes and grow lavender that smells amazing for years.
- Sunlight Secret: If your location only gets 5 hours of morning sun (like east-facing spots), pair it with afternoon s...
- Soil Test Tip: Before planting, grab a soil test kit from your local garden center (they're cheap!). Lavender's ideal...
Frequently asked questions
Got questions about growing lavender outdoors?
You’re not alone! Here are answers to the most common ones—so you can cultivate fragrant, thriving plants with confidence.
How do I know if my lavender is getting enough sun?
Lavender loves sun—at least 6 to 8 hours daily of full sunlight. If your plants look leggy, pale, or stop flowering, they’re likely sun-deprived. Move them to a sunnier spot (like a south-facing window or garden bed) or supplement with a grow light if space is limited.
When is the best time to plant lavender outdoors?
Plant lavender in early spring or late fall for the best results. Avoid extreme heat or frost—spring lets roots establish before summer, while fall gives them time to settle before winter. If you’re in a mild climate, you can plant in winter too!
Why is my lavender turning brown or crispy?
Overwatering or poor drainage are the top culprits! Lavender hates soggy roots—ensure well-draining soil (mix in sand or gravel) and water only when the top inch is dry. Brown edges? It’s thirsty. Yellowing leaves? Too much water. Adjust your care, and your lavender will bounce back!
Can I grow lavender in hot, humid climates?
Lavender thrives in dry, hot conditions but struggles with humidity. If you live in a humid area, choose Spanish lavender (Lavandula stoechas), which tolerates it slightly better. Improve airflow with proper spacing, mulch to reduce moisture, and avoid overhead watering to keep your plants happy.
What can I plant near lavender to complement it?
Pair lavender with drought-tolerant, Mediterranean plants like rosemary, thyme, sage, or salvia. Avoid heavy feeders (like tomatoes) or plants that love shade. For a pop of color, try purple coneflowers or blanket flowers—they share similar care needs and create a stunning, fragrant garden!
Wrapping up and next steps
Growing lavender outdoors is a rewarding journey that brings beauty, fragrance, and even practical uses to your garden! 🌿 With the right sunlight, soil, and care, your lavender plants will thrive and reward you with stunning blooms and soothing scents.
Whether you're a beginner or a seasoned gardener, these steps make it simple to cultivate your own sun-kissed lavender patch.
Now that you’re equipped with the know-how, roll up your sleeves and get planting! Start small—pick a sunny spot, prep the soil, and watch your lavender flourish.
Once established, share your progress with fellow gardeners or experiment with drying flowers for sachets, potpourri, or even homemade lavender oil. Happy gardening! 🌸