
Orchid Care
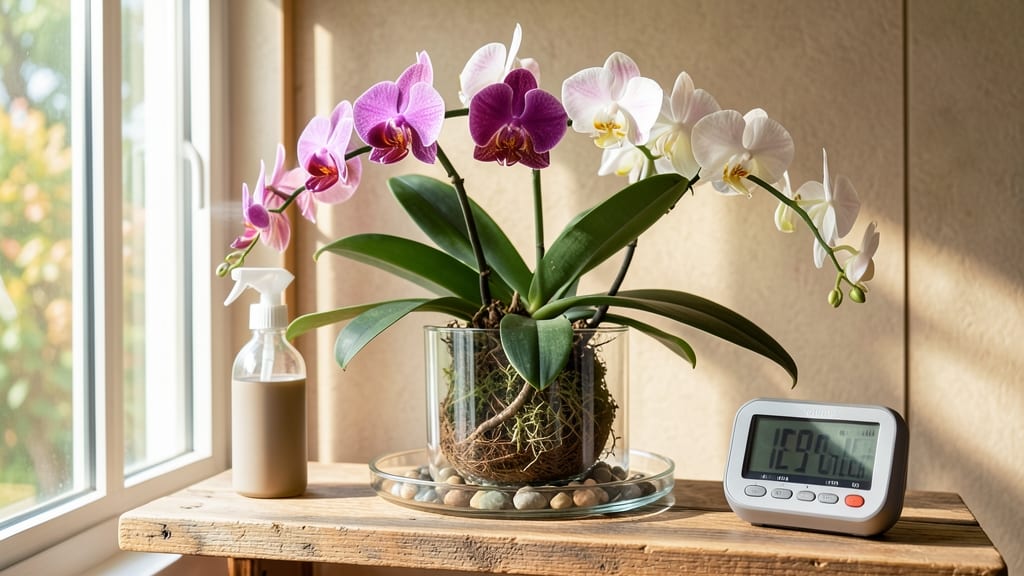
Your sunroom could become the perfect place to learn how to grow orchids, if you get the light, humidity, and airflow just right. 🌱 I’ve grown orchids in sunrooms for years, and the difference between thriving blooms and sad, yellowing leaves comes down to these three factors: bright but indirect light, consistent humidity, and proper airflow.
Most beginners overthink it, but once you dial in these basics, orchids reward you with stunning, long-lasting blooms year after year.
The right setup isn’t complicated—just a few key supplies make all the difference. You’ll need a well-ventilated space with 50-70% humidity, a south- or west-facing window (or a grow light for deeper sunrooms), and a chunky bark mix for drainage.
My favorite varieties for sunrooms? Phalaenopsis, Dendrobium, and Cattleya—they tolerate indoor conditions better than fussy tropical types. With the right balance, you’ll see new growth within 8-12 weeks and blooms lasting 6-8 weeks or longer.
Here’s the game-changer: orchids in sunrooms thrive when you mimic their natural habitat without going overboard. Mist them 2-3 times a week (or use a humidifier), water only when the roots turn silver-gray, and avoid drafts.
I learned the hard way that overwatering is the #1 killer—my first orchid died from soggy roots in just two weeks. But once you get the rhythm, these plants become the showstopper of your home, blooming even in winter when most gardens are dormant.
This method works for any sunroom size, from cozy corners to expansive glass rooms. The key is consistency—orchids are forgiving if you adjust gradually. Start with one or two plants, master the basics, and soon you’ll be expanding your collection with confidence.
Ready to turn that sunroom into a blooming oasis?
📚 In This Guide
- What you need
- Instructions
- Tips and common mistakes
- Wrapping up and next steps
What you need
- ● Orchid pots: 6–8-inch pots with drainage holes (terracotta or plastic with slits). Quantity: 1 per orchid.
- ● Orchid potting mix: Bark-based (e.g., fir or pine bark) or a specialized orchid mix (avoid regular soil!). Quantity: Enough to fill pots (1–2 bags for 5–10 orchids).
- ● Orchid fertilizer: Balanced liquid fertilizer (20-20-20 or 10-10-10) or orchid-specific slow-release granules.
- ● Watering can or spray bottle: With a fine rose attachment for gentle watering.
- ○ Humidity tray or pebble tray: To maintain 50–70% humidity (optional but helpful in dry sunrooms).
- ○ Grow lights (optional): LED or fluorescent (12–15 watts per sq. ft.) if natural light is insufficient.
- ● Orchid stakes or clips: For supporting heavy blooms (e.g., Cattleya or Dendrobium).
- ● Hygrometer: To monitor humidity levels accurately.
- ● Moss (e.g., sphagnum): For wrapping rhizomes of orchids like Phalaenopsis or Paphiopedilum.
- ● Pruning shears: Sterilized for trimming dead foliage or stems.
- ● Sunroom fan: For gentle air circulation (prevents fungal issues).
Step-by-Step instructions for growing orchids in a sunroom
Here's how to transform your sunroom into a thriving orchid haven with the right light and humidity balance.
☀️ Step 1: Position Orchids for Ideal Light Exposure
Orchids need bright, indirect light—think of it as morning sun with afternoon shade. Place your plants near an east-facing window or within 3-6 feet of a south-facing window. Direct midday sun will scorch leaves, so if your sunroom gets intense afternoon rays, use a sheer curtain to diffuse the light.
You'll know the light is perfect when leaves stay medium green—never dark green (too little light) or yellow with brown patches (too much). If your sunroom has limited natural light, supplement with a grow light placed 12-18 inches above the plants for 12-14 hours daily. LED grow lights with a 4000-6500K color temperature work best for orchids.
💧 Step 2: Master the Watering Routine for Sunroom Conditions
Orchids in sunrooms dry out faster than those in cooler spaces, so water only when the bark mix feels completely dry—about once a week in summer and every 10-14 days in winter. Stick your finger 1-2 inches into the mix; if it's dry, it's time to water. Overwatering is the #1 killer, so always use a pot with drainage holes and empty the saucer after watering.
Use room-temperature water—cold water shocks roots—and water in the morning so excess moisture evaporates during the day. I like to run water through the pot for 5-10 seconds until it drains freely from the bottom. Let it sit for 10 minutes, then empty the saucer to prevent root rot.
🌿 Step 3: Maintain Humidity Without Creating a Greenhouse
Sunrooms often have low humidity, which orchids crave at 40-70%. Place a humidifier near the plants or create a pebble tray by filling a shallow tray with pebbles and water, then setting the orchid pot on top (ensure the pot isn’t sitting in water). Mist the leaves 2-3 times a week, but avoid wetting the crown or flowers, as this encourages rot.
Check humidity with a hygrometer—if it drops below 40%, increase misting or move the orchid to a more humid corner of the sunroom. Grouping plants together also raises humidity naturally. You’ll see new growth spurt when humidity is just right—leaves stay plump and vibrant, not crispy or wilting.
✂️ Step 4: Fertilize and Prune for Continuous Blooms
Feed your orchids every 2-4 weeks during active growth (spring and summer) with a balanced orchid fertilizer diluted to half-strength. I use a 20-20-20 or 10-10-10 formula and apply it after watering to prevent root burn. In fall and winter, reduce feeding to once a month or stop entirely if the plant is dormant. Always flush the mix with plain water once a month to remove salt buildup.
After blooming, cut the flower spike 1 inch above the last node (the bump where leaves or roots emerge). If the spike turns green again, it may rebloom—leave it. Remove any yellow or mushy leaves with sterilized scissors to redirect the plant’s energy to new growth. Pruning keeps your orchid healthy and encourages stronger blooms next season.
🪴 Step 5: Repot Every 1-2 Years for Fresh Growth
Orchids need repotting when the bark mix breaks down or roots grow out of the pot. Spring is the best time—choose a pot 1 inch larger in diameter than the current one with fresh bark mix. Gently remove the plant, loosen old roots, and trim any black, mushy roots (healthy roots are silver-green). Soak the roots in room-temperature water for 10 minutes before repotting to check for rot.
Fill the new pot 1/3 full with fresh mix, place the orchid on top, and add more mix around the roots, pressing lightly to secure. Leave the mounting surface (where the plant attaches to the pot) 1/2 inch below the rim—this prevents overwatering. After repotting, water lightly and place the orchid in bright, indirect light for a week to recover. You’ll see new roots and leaves within 4-6 weeks if everything is just right.
Tips & tricks for thriving orchids in sunrooms
Sunrooms can be orchid paradises—but only when you nail these four key details. Here’s how to avoid common pitfalls and get the most from your space.
Light Balance is Everything: That 3-6 feet window distance in Step 2 is your golden range, but here’s the secret: use a reflective surface like white-painted shelves behind plants to bounce light back. I’ve seen orchids with purpling leaves (too much light) and pale stems (too little) both fixed by this simple trick. For south-facing windows, a sheer white curtain diffuses harsh rays better than dark fabrics, which absorb heat.
Root Health Starts with the Right Mix: The orchid-specific bark mix in Step 1 should never feel damp to the touch—it should crumble easily when dry. I’ve repotted orchids with compacted mix that looked like wet sand; within weeks, roots turned black from rot. Always use slotted pots and refresh the mix every 2-3 years, even if it doesn’t look "used up." Pro tip: Add one part perlite to your mix for extra airflow if your sunroom stays consistently humid.
Watering Timing Matters More Than Frequency: Those 10-15 minutes of soaking in Step 3 are non-negotiable, but here’s what nobody tells you: the morning watering isn’t just about evaporation—it’s about giving roots a full day to dry out before night. I learned this after losing three orchids to root rot from evening watering. Use a timer on your humidifier if you’re not home during the day; orchids can handle the 55-80°F range, but soggy roots can’t.
Bloom Triggers Require Precision: That 10-15°F nighttime drop in Step 5 is critical, but timing matters just as much. Start the temperature shift right as buds appear—not before or after. I’ve seen orchids drop buds when the drop came too early (plant wasn’t ready) or too late (buds already stressed). For sunrooms without natural temperature swings, a small portable AC unit on low overnight works wonders. And always cut spent spikes 1 inch above a node—this is where new blooms often emerge!
Pro Tips for Grow Orchids In A Sunroom
- Sunrooms can be orchid paradises—but only when you nail these four key details.
- Light Balance is Everything: That 3-6 feet window distance in Step 2 is your golden range, but here’s the secret: use a reflective surface like white-painted shelves behind plants to bounce light back.
- Root Health Starts with the Right Mix: The orchid-specific bark mix in Step 1 should never feel damp to the touch—it should crumble easily when dry.
Frequently asked questions
Got questions about growing orchids in your sunroom?
You’re not alone! Here are answers to the most common concerns—from lighting tweaks to humidity hacks—so you can keep your orchids thriving all year.
How much sunlight do orchids really need in a sunroom?
Orchids love bright, indirect light—think morning sun or filtered afternoon light. Avoid harsh direct rays (like a south-facing window in summer), which can scorch leaves. A sheer curtain or sheer screen can diffuse light perfectly. Pro tip: Rotate your orchids weekly for even growth!
What’s the ideal humidity level for orchids in a sunroom?
Aim for 40–70% humidity—sunrooms often drop below this in winter. Use a humidifier, pebble tray (with water and gravel), or group plants together to boost moisture. Watch out: Too much humidity (above 70%) risks rot or pests. A hygrometer helps monitor levels easily!
How often should I water orchids in a sunroom?
Water when the top inch of bark dries out—usually every 7–10 days in summer, but stretch to 2–3 weeks in winter (sunrooms stay cooler). Use room-temperature water and avoid soggy pots (empty the cache pot after 10–15 minutes). Overwatering is the #1 killer!
Why are my orchid leaves turning yellow or spotted?
Yellow leaves often mean overwatering or poor drainage, while brown spots or mushy stems signal fungus or bacterial rot (usually from excess moisture). Check for pests (like spider mites) too! Fix it: Trim damaged leaves with sterile scissors, repot if needed, and adjust watering.
Can I grow orchids in a sunroom without a humidifier?
Yes! Try these low-cost fixes:
- Misting: Lightly mist leaves daily (early morning to avoid fungus).
- Pebble trays: Fill a tray with pebbles and water (keep leaves above the waterline).
- Group plants: Cluster orchids together to create a microclimate.
- Houseplant friends: Place orchids near other tropical plants (like ferns or calatheas).
Wrapping up and next steps
Growing orchids in your sunroom is a rewarding journey that combines bright light, humidity balance, and a little patience—and the results are stunning year-round blooms! 🌸 With the right setup, you’ll create a thriving mini-greenhouse where these exotic beauties can flourish.
Whether you’re a beginner or a seasoned plant parent, the key is consistency in care and attention to their unique needs.
Now that you’re armed with the know-how, take the next step: start small! Pick one or two orchid varieties to experiment with, monitor their progress, and adjust your sunroom conditions as needed.
Before you know it, your space will be bursting with color—and you’ll be the proud orchid whisperer of your circle! 💪