
Picking
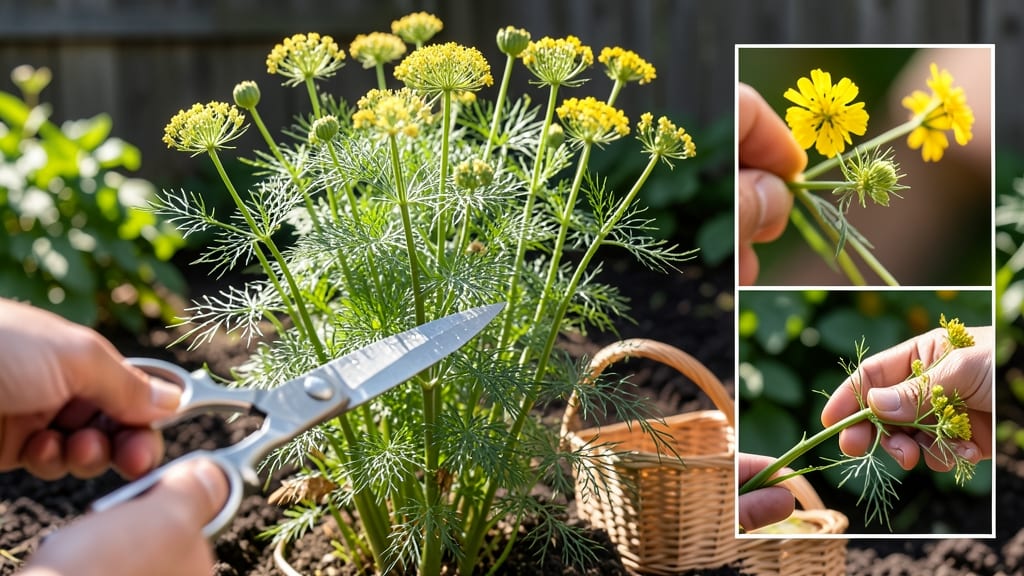
Harvesting dill leaves without killing it starts with the right cut. ✂️ After the plant reaches 12 inches tall, snip just above a leaf pair where the stem meets the main stalk—this triggers bushier growth.
I learned the hard way that cutting too close to the base stunts regrowth, but this method keeps plants productive for months.
The key is timing: harvest leaves in the morning after dew dries but before midday heat stresses the plant. For seeds, wait until flowers turn brown—then snip whole seed heads and hang them upside down.
Most gardeners overlook that dill thrives on regular pruning; I’ve seen plants produce three harvests in a season with proper care.
After harvesting, water at the base to encourage recovery, and avoid fertilizing immediately—dill prefers lean soil. The plant will reward you with fresh, fragrant leaves in 2-3 weeks, and the cut-and-come-again method ensures you never run out of homegrown dill for soups or pickles.
Common mistakes? Cutting too aggressively or harvesting when flowers first appear—both weaken the plant. Stick to one-third of the plant per harvest, and you’ll enjoy dill all season without sacrificing future growth.
📚 In This Guide
- What you need
- Instructions
- Tips and common mistakes
- Wrapping up and next steps
What you need
- ● Sharp pruning shears or garden scissors – Opt for bypass pruners (clean cuts = happy plants!). A 5-inch pair works best for dill’s delicate stems.
- ○ Gloves (optional but recommended) – Lightweight gardening gloves protect your hands from prickly stems and sap. Choose nitrile-coated for grip and durability.
- ● Bucket or harvest basket – A 5-gallon bucket with a lid (to keep pests out) or a breathable mesh basket for airflow. Avoid plastic bags—they trap moisture and speed up spoilage.
- ● Water spray bottle (8 oz.) – For a quick rinse post-harvest to remove dirt and pests.
- ● Kitchen towel or paper towels – To pat leaves dry before storage.
- ● Damp cloth or towel – Wipe down blades after cutting to prevent rust.
- ● Small notebook & pen – Jot down harvest dates to track regrowth patterns.
- ● Food processor or mortar & pestle – If you plan to dry or freeze dill immediately.
- ● Pest spray (neem oil or insecticidal soap) – Keep on hand for post-harvest inspections if aphids or spider mites are lurking.
Step-by-step instructions for harvesting dill without killing it
Here's the method I've used for years to keep my dill thriving while harvesting fresh leaves all season long.
✂️ Step 1: Identify the Right Time to Harvest
Harvest dill in the morning after the dew has dried but before the sun gets too intense. This ensures the leaves are fully hydrated and packed with flavor. Look for stems that have at least 4-6 inches of growth—this gives the plant enough energy to regrow after cutting. You'll see healthy, vibrant green leaves with a strong, fresh aroma at this stage.
Never harvest when the plant is stressed—avoid cutting during extreme heat waves or drought conditions. If you see leaves curling or wilting, wait until the plant recovers. I always check the soil moisture first; if it's dry to the touch, water the plant before harvesting to ensure it has enough reserves to bounce back.
🌿 Step 2: Use the Cut-and-Come-Again Method
The key to harvesting dill without killing it is to cut the stems just above a set of leaves, leaving at least 2-3 inches of growth below the cut. This encourages the plant to branch out and produce more leaves. Use clean, sharp scissors or pruning shears—dull tools crush stems and invite disease.
Focus on harvesting the outer stems first. These are the oldest and have already contributed to the plant's growth. Cutting them back stimulates new growth from the center. I like to harvest about one-third of the plant at a time—this keeps it productive without overwhelming it. After cutting, the plant will send out new shoots within 7-10 days, ready for another harvest.
☀️ Step 3: Maintain Optimal Growing Conditions After Harvesting
After harvesting, give your dill a light drink of water to help it recover, especially if the weather is hot or dry. Water at the base of the plant to avoid wetting the leaves, which can lead to fungal issues. You'll notice new growth emerging from the center within a week if conditions are right.
Ensure your dill gets full sun (6+ hours daily) and well-draining soil. If the plant looks leggy or sparse after harvesting, it might need more sunlight or a dose of balanced fertilizer. I use a low-nitrogen fertilizer after harvesting to encourage leafy growth without overpowering the plant. Avoid over-fertilizing—too much nitrogen can lead to weak, floppy stems.
⏰ Step 4: Monitor Growth and Repeat Harvests
Watch for new growth after each harvest—this is your signal that the plant is recovering well. I harvest my dill every 2-3 weeks during the growing season, adjusting the frequency based on how quickly it regrows. If you're growing dill for seeds, let some stems flower and go to seed while continuing to harvest leaves from other parts of the plant.
By the end of the season, you'll have a bushy, productive dill plant that keeps giving. If you notice the plant slowing down or producing fewer leaves, it might be time to let it go to seed or replace it with a new plant. With the right care, your dill will reward you with fresh, flavorful leaves all season long.
Tips & tricks for perfect dill harvesting
Here's what I've learned from years of keeping my dill plants thriving—these little details make all the difference between a one-time harvest and a season-long bounty.
Timing is Everything: That morning window isn't just about flavor—it's about photosynthesis. Dew-covered leaves are fully hydrated, which means the plant has stored energy reserves to recover from cutting. I've found that harvesting after 9 AM can stress the plant, especially in hot climates where leaves start wilting by midday. If you miss morning, opt for late afternoon when temperatures start dropping.
Tool Selection Matters: I learned this the hard way after using kitchen scissors that crushed stems and left jagged cuts. Invest in sharp bypass pruners or garden shears designed for herb harvesting. The clean cut prevents disease entry points and encourages faster regrowth. For small plants, clean nail clippers work surprisingly well—just sterilize them with rubbing alcohol between cuts.
Visual Growth Cues: When you're ready to harvest, look for these three signs: 1) Leaves should be vibrant green, not yellowing; 2) New buds should be forming at the base; 3) The stems should be firm, not hollow. I've noticed that plants with hollow stems often don't regrow well, as they've already sent energy to seed production. The 4-6 inch rule is perfect, but if your plant is particularly vigorous, you can harvest slightly shorter stems—just leave those 2-3 inches of growth below the cut.
Recovery Protocol: After harvesting, I've developed a simple recovery routine that works every time: water thoroughly at the base (not overhead), then give the plant a light dose of compost tea or diluted fish emulsion. This combination provides immediate hydration and nutrients to support new growth. Within 7-10 days, you'll see fresh shoots emerging from the center—this is your plant's way of saying "thank you" for proper care.
Pro Tips for Harvest Dill Without Killing It
- Here's what I've learned from years of keeping my dill plants thriving—these little details make all the difference b...
- Timing is Everything: That morning window isn't just about flavor—it's about photosynthesis. Dew-covered leaves are f...
- Tool Selection Matters: I learned this the hard way after using kitchen scissors that crushed stems and left jagged c...
Frequently asked questions
How often can I harvest dill without harming the plant?
You can harvest dill every 2–3 weeks once it reaches at least 6–8 inches tall. Regular harvesting encourages bushier growth, so don’t skip it! Just avoid cutting more than ⅓ of the plant at a time to keep it thriving.
When is the best time to harvest dill for the strongest flavor?
Harvest dill just before flowering (when buds form but haven’t opened) for the most potent flavor. If you wait too long, the leaves become bitter. For fresh use, pick in the morning after dew dries—flavor peaks then!
Can I harvest dill seeds without killing the plant?
Yes! Let some dill flowers go to seed—they’ll form tiny green seed clusters. Once the seeds turn brown and dry (usually 6–8 weeks after flowering), snip the seed heads and hang them upside down to dry. The plant may die back but can regrow from the base if conditions are right.
What if my dill looks wilted after harvesting?
Wilting is normal—just water deeply and trim any yellowed leaves. Avoid over-harvesting in extreme heat. If the plant stays limp for days, check for underwatering or pests. A light mulch can help retain moisture and speed recovery.
Can I use the same method for other herbs like cilantro or parsley?
Not quite! Dill’s cut-and-come-again method works best for its hardy stems, but cilantro bolts quickly and parsley prefers staggered harvesting. For cilantro, pick outer leaves; parsley thrives with small, frequent trims to avoid woody stems.
Wrapping up and next steps
Harvesting dill the cut-and-come-again way keeps your plants thriving while giving you a steady supply of fresh, flavorful leaves—no stress required! 🌿 By snipping just the outer stems and avoiding the flower buds, you encourage bushier growth and more harvests.
Whether you’re prepping for summer salads, pickling, or cooking, this method ensures your dill stays happy and productive.
Now that you’re ready to harvest like a pro, put your new skills to use! Try swapping dried dill for fresh in your favorite recipes or experiment with dill-infused vinegar for a tangy twist. Happy gardening—and enjoy that homegrown flavor! 🍽️✨