
Vegetables
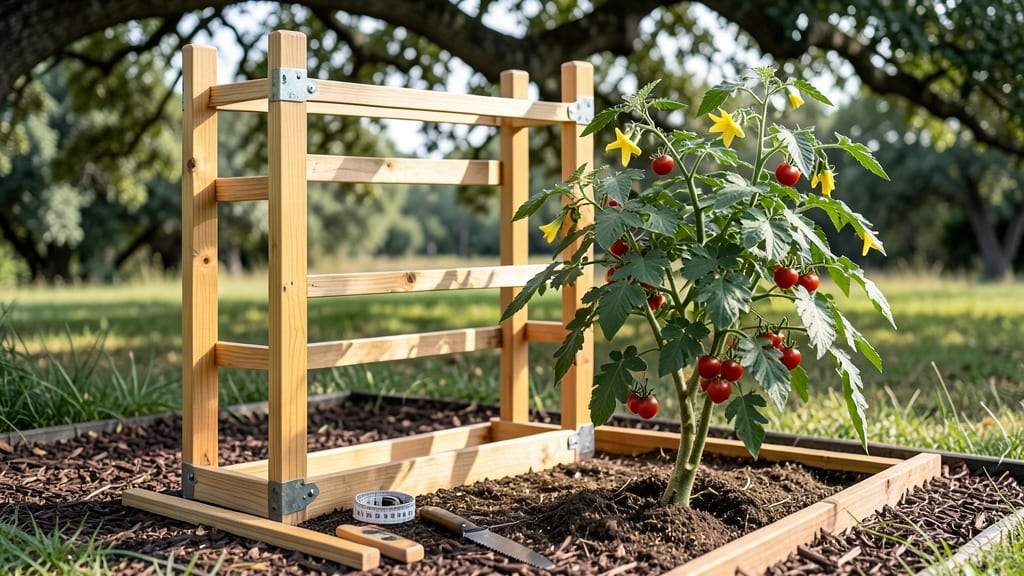
My first tomato cage collapsed under a 10-pound harvest—so I built my own. 🌱 These sturdy wood cages hold up to heavy fruit, resist wind, and last for years, unlike flimsy wire cages that bend or rust.
The secret is simple lumber, basic tools, and a design that lets plants grow strong without sagging. You’ll need 2x4s, screws, a saw, and an hour of your time. No fancy joinery or treated wood—just untreated pine or cedar for safety.
I cut pieces to match my plants’ growth habits, with 6-foot heights for indeterminate varieties and 4-foot for determinate ones. The result? Tomatoes stay upright, leaves stay dry, and you avoid the heartbreak of broken cages mid-season.
By the time your plants hit 4 feet tall, they’ll be leaning against a support that won’t wobble. No more tangled vines or fruit rot from damp foliage touching the ground. Plus, the cages look better than store-bought versions—customizable to fit your garden’s style.
Works for raised beds, containers, or in-ground gardens. Here’s how to build one that outlasts your plants—and your harvests.
📚 In This Guide
- What you need
- Instructions
- Tips and common mistakes
- Wrapping up and next steps
What you need
- ● 2x4 lumber – 2 pieces, 8 feet long (for vertical supports)
- ● 1x2 lumber – 4 pieces, 6 feet long (for horizontal crossbars)
- ● Wood screws – 1.5-inch deck screws (20-30 pieces) (or galvanized for extra durability)
- ○ Wood glue (optional, for extra reinforcement)
- ○ Wood stain or paint (optional, for weather resistance)
- ● Measuring tape
- ● Pencil (for marking cuts)
- ● Miter saw or handsaw
- ● Drill & drill bits
- ● Screwdriver or impact driver
- ○ Clamps (optional, for holding pieces steady)
- ● Sandpaper (120-grit, for smoothing edges)
- ● Basic woodworking skills (or a patient attitude for learning!)
- ● Outdoor workspace (or a garage with ventilation if staining/painting)
- ● Gloves & safety glasses (for handling tools and wood)
Step-by-step instructions for building wood tomato cages
Here's the straightforward method I use every year—strong enough to handle 10-pound tomatoes without bending.
🪴 Step 1: Gather Materials and Tools
For four sturdy cages, you'll need 12 pieces of 2×2 lumber (each 3 feet long) and 4 pieces of 1×2 lumber (each 3 feet long for cross supports). I use untreated cedar because it resists rot naturally, but pine works too if you stain it afterward. Grab a drill with 3/16-inch bit, 2-inch deck screws, and wood glue for extra strength at joints.
Measure and cut the 2×2 pieces into 12 equal 1-foot sections—these become your vertical supports. The 1×2 pieces stay whole for horizontal crossbars. Lay everything out on a flat surface so you can visualize the cube shape before assembly. I always test-fit the pieces first to catch any rough edges that need sanding.
✂️ Step 2: Assemble the Cage Frame
Start by building one square base. Use 4 of the 1-foot 2×2 pieces to form a 2-foot square (connecting the ends). Pre-drill holes at each corner to prevent wood splitting, then attach with 2-inch deck screws and a dab of wood glue. Repeat this process to make 4 identical square bases—you'll need two for the bottom and two for the top.
Now connect the bases vertically. Stand two bottom squares upright, 2 feet apart, and attach the top squares directly above them using the remaining 4 vertical 2×2 pieces. This creates a 2×2×2-foot cube with open sides. Double-check alignment—your cage should stand perfectly square, not leaning. If it wobbles, reinforce the corners with extra screws.
🌿 Step 3: Add Cross Supports for Stability
Cut the 1×2 lumber into 12 equal 1-foot pieces—these become the diagonal supports that keep the cage rigid. Starting at the bottom, attach one crossbar diagonally from the front-left corner to the back-right corner of the cage. Repeat on the opposite side, then add a second layer of crossbars 8 inches above the first to create an "X" pattern in each vertical plane.
Use 1.5-inch screws for these crossbars to ensure they bite into the vertical supports. Space them evenly—about 4 inches apart—so the cage can flex slightly with wind without collapsing. The goal is to create a lattice that distributes weight evenly. You'll see the difference immediately when you pick up a finished cage—it feels solid, not flimsy.
☀️ Step 4: Reinforce and Finish
For extra durability, add a final horizontal ring around the middle of each cage using the remaining 4 crossbar pieces. This creates a 1-foot diameter circle that prevents the cage from bowing outward under heavy fruit. I like to sand all edges lightly at this stage—it makes the cages safer to handle and prevents splinters when tomatoes brush against them.
If using untreated wood, apply a waterproof sealant (like spar urethane) to extend the cage's life. Let it dry completely before planting. I've had these cages last 5+ years—the key is keeping them dry and storing them vertically in winter. You'll know they're ready when they stand up straight without wobbling and the wood feels smooth under your hands.
⏰ Step 5: Install and Maintain
Place your cages in the garden after transplanting seedlings, leaving 6 inches of space around each plant for airflow. Gently weave tomato vines through the openings as they grow—don't force them. I like to add a stake through the cage center for extra support if my tomatoes get particularly heavy.
Check cages mid-season for any loose screws or wobbly joints. Tighten anything that feels unstable before it becomes a problem. At the end of the season, clean off debris and store them in a dry place. You'll use these same cages year after year—they're built to last through multiple harvests without sagging.
Tips & tricks for sturdy wood tomato cages
Building these cages right means your tomatoes will thrive—here's how to avoid the rookie mistakes that lead to flimsy supports.
Material Selection: Cedar is my go-to because it resists rot naturally, but if you choose pine, apply a waterproof sealant like spar urethane before planting. I've seen untreated pine cages last only two seasons, while cedar cages stay strong for five years. The extra cost upfront saves you money long-term.
Precision Cutting: When cutting your 12 equal 1-foot sections from the 3-foot 2×2 lumber, use a straightedge and mark measurements carefully. I mark every 12 inches with a pencil before cutting—this prevents uneven pieces that won't fit properly in your cube frames. A miter saw gives cleaner cuts than a circular saw for this project.
Joint Reinforcement: In Step 2, don't skimp on wood glue at the joints. I apply a generous bead along each connection point before screwing, then wipe away excess immediately. This hidden glue creates an invisible bond that prevents wobbling. For extra stability, I add a second screw diagonally at each corner—it adds minimal time but eliminates all wobble.
Seasonal Storage: After harvest, clean cages thoroughly and store them vertically against a wall or fence. I stack them with the open sides facing out to prevent moisture buildup. The vertical position also makes them easier to move next season. If storing for multiple years, apply a fresh coat of sealant every few seasons to maintain durability.
Pro Tips for Make Wood Tomato Cages
- Building these cages right means your tomatoes will thrive—here's how to avoid the rookie mistakes that lead to flimsy supports.
- Material Selection: Cedar is my go-to because it resists rot naturally, but if you choose pine, apply a waterproof sealant like spar urethane before planting.
- Precision Cutting: When cutting your 12 equal 1-foot sections from the 3-foot 2×2 lumber, use a straightedge and mark measurements carefully.
Frequently asked questions
Got questions about building your own wood tomato cages? Here are some of the most common ones—and their answers—to help you get started with confidence!
What’s the best wood to use for tomato cages?
Opt for cedar, pine, or pressure-treated lumber—they’re durable, resist rot, and won’t splinter. Avoid untreated wood (like oak) to prevent warping or mold. If using cedar, it’s naturally pest-resistant, making it a top pick for long-term use!
When is the best time to build and install tomato cages?
Build your cages before planting season (early spring) so they’re ready when seedlings go in. Install them right after transplanting to support young plants as they grow. If starting from seeds, assemble cages 2–3 weeks before germination to avoid disturbing roots later.
Can I reuse wood tomato cages from year to year?
With proper care, wood cages can last 5+ years. Clean them thoroughly after harvest (scrub with soapy water, dry in the sun), store them in a dry place, and reapply a non-toxic sealant if needed. Just watch for signs of rot or splintering—replace damaged sections promptly.
What if my tomatoes outgrow the cage? Can I extend it?
Yes! If your plants tower over the cage, add vertical supports like bamboo stakes or wire mesh tied to the top. For indetermined varieties (like cherry tomatoes), consider building a taller, multi-tiered design from the start. Just ensure the base stays sturdy—top-heavy cages can topple!
Do I need screws or can I use nails for assembly?
Use galvanized screws (not nails) for a stronger, longer-lasting hold. Screws prevent wood from splitting and make disassembly easier for storage. If you prefer nails, opt for stainless steel or coated nails to avoid rust, but screws are the pro choice for durability.
How do I keep cages from blowing over in windy conditions?
Anchor your cages with stakes or weights—drive a wooden stake into the ground next to each cage and tie it securely with twine, or place a brick or cinder block at the base. For extra stability, angle the cage slightly (like a tepee) to reduce wind resistance.
Wrapping up and next steps
Building your own wood tomato cages is a rewarding way to support your garden while adding a rustic charm to your space! With just a few materials and a little elbow grease, you’ve got a sturdy, custom solution for your heavy harvests.
Now that you’re armed with tips and tricks, it’s time to roll up those sleeves and get building—your tomatoes will thank you!
🌱 Next step: Gather your tools, follow your plan, and watch those vines climb! Share your creations or ask questions in the comments—we’d love to see (and help with) your garden projects. Happy growing! 🍅✨